Last month, a client called me in panic.
Her online store I helped build was loading so slowly that customers were abandoning their carts before checkout. We ran a quick test – 12 seconds on mobile. That’s business suicide in 2026.
Within two hours of following a simple optimization checklist, we got her site down to 2.1 seconds. As a result, her sales increased significantly after 2 weeks.
See, WordPress performance isn’t rocket science.
Most sites are slow because of a few fixable issues. These issues include poor hosting, bloated themes, unoptimized images, and missing caching.
Now, when you fix these issues systematically? And your site transforms.
This WordPress speed and performance checklist walks you through every optimization that actually moves the needle.
We’ll start with the quick wins that take minutes to implement. Then move to advanced techniques for those extra speed gains.
What you’ll achieve:
- Load times under 3 seconds globally
- Core Web Vitals in the green zone
- Better search rankings and user experience
- Higher conversions and lower bounce rates
Understanding WordPress Performance vs Speed
Most people think that WordPress optimization is just about how fast pages load. But performance is bigger than that.
Let me explain. WordPress Speed is how quickly your pages load for visitors while WordPress Performance is complete user experience, including speed, responsiveness, and stability
2026 Performance Benchmarks
Your WordPress site should hit these targets:
- Largest Contentful Paint (LCP): Under 2.5 seconds – How long your main content takes to load
- Interaction to Next Paint (INP): Under 200ms – How quickly your site responds when users click buttons
- Cumulative Layout Shift (CLS): Under 0.1 – Prevents annoying page jumps while loading
- Overall PageSpeed Score: 85+ mobile, 90+ desktop – Google’s rating of your site speed
- Loading Time: Under 3 seconds globally – Total time for your page to fully load anywhere
Understanding the Basics (5 minutes)
Before we start optimizing your WordPress site with this checklist, let’s understand what we’re actually fixing. This takes just 5 minutes but prevents you from feeling lost during the process.
Remember, speed optimization can feel overwhelming when you don’t know why you’re doing each step. But once you understand the basics, everything clicks into place.
To make it easier to follow, I also included the reason for the fixes in the checklist. This way, you can follow everything in a more streamlined way.
You can also use the table of contents below to quickly go through the checklist and skip to the section you want to read.
- Why Site Speed Matters for Your Business
- How to Check Your Current Speed
- What Causes WordPress Sites to Be Slow
- Foundation Fixes (10 minutes)
- Instant Speed Boosters (10 minutes)
- Image Optimization (5 minutes)
- Database & Plugin Cleanup (3 minutes)
- Advanced Quick Wins (7 minutes)
- Celebrate Your Speed Improvements
- Common Mistakes to Avoid During Performance Optimization (Quick Checklist)
- FAQs: WordPress Speed & Performance Optimization Checklist
- Final Verdict: Should I Optimize My WordPress Site?
Let us begin!
Why Site Speed Matters for Your Business
Here’s the truth about slow websites that most beginners don’t realize:
☐ Understand that 1 second delay = 7% fewer sales
This isn’t just a random statistic. Amazon discovered it loses $1.6 billion annually for every second of delay. For your business, this means real money lost.
It happens because when people click on your site, they expect instant results. If your page takes 4-5 seconds to load, they assume something’s broken.
And just like that, they hit the back button and buy from your competitor instead.
Even if you don’t sell products directly, slow sites hurt you. Fewer people read your content, sign up for your newsletter, or contact you for services.
☐ Know that Google ranks faster sites higher
As you know, Google’s job is to show people the best results. Since 2010, they’ve included site speed as a ranking factor. Then, in 2021, they made it even more important with Core Web Vitals.
Think about it from Google’s perspective.
If two sites have similar content, but one loads in 2 seconds and another takes 8 seconds, which one provides a better user experience? Google rewards the faster site with higher rankings.
This means faster sites get more organic traffic. More traffic means more customers. More customers mean more revenue. It’s a simple chain reaction that starts with speed.
☐ Realize 53% of mobile users leave slow sites if it takes more than 3 seconds to load.
Mobile users are even less patient than desktop users. They’re often on-the-go, using slower cellular connections, and trying to find information quickly.
When your site takes forever to load on mobile, you’re losing more than half your potential mobile visitors. Since mobile traffic makes up over 50% of all web traffic, this is a huge problem.
Plus, mobile users are often ready to buy with their search often having local intent. They’re searching for “pizza near me” or “emergency plumber” while they need something right now.
If your site doesn’t load fast, they’ll call your competitor instead.
How to Check Your Current Speed
Before we fix anything, let’s see exactly how fast your site is right now. This gives us a baseline to measure improvements against.
☐ Test your site with IsItWP Free Performance Tool
IsItWP.com is one of the oldest WordPress resources. As a result, we have gathered years of feedback and experience to build the best WordPress site speed checker.
Plus, this tool is specifically designed for WordPress beginners like you.
So visit our free website speed tester and enter your website URL.
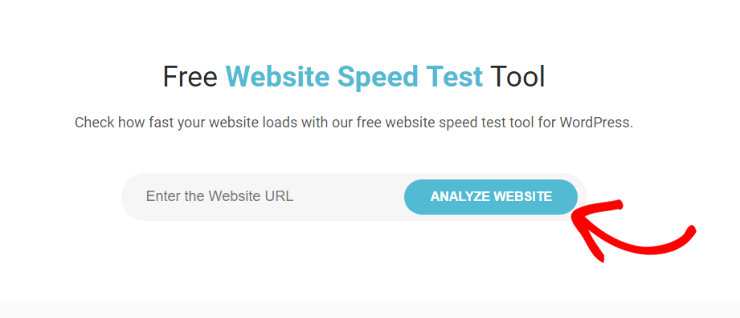
Why use this WordPress performance tool?
Unlike other speed testing tools that show confusing technical data, IsItWP explains results in plain English.
You’ll see your loading time, what’s slowing you down, and specific suggestions for your WordPress site.
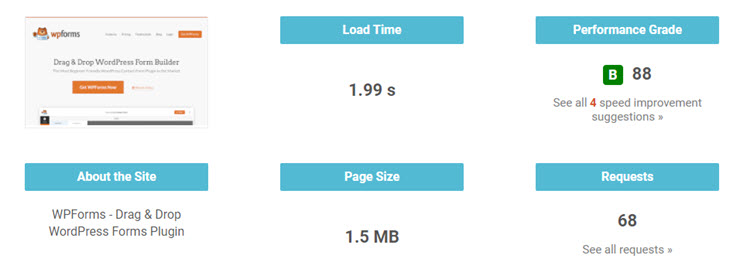
The tool tests from multiple locations around the world. This matters because your site might load fast for you, if you’re geographically close to your server, but slowly for visitors in other countries.
☐ Alternative: Use Google PageSpeed Insights (free)
You can also check both desktop and mobile performance with PageSpeed.Web.Dev, the official speed tool from Google. Again, all you have to do is enter your website URL.
PageSpeed Insights shows you exactly what Google sees when ranking your site. It gives you a score from 0-100 and tells you specific issues to fix.
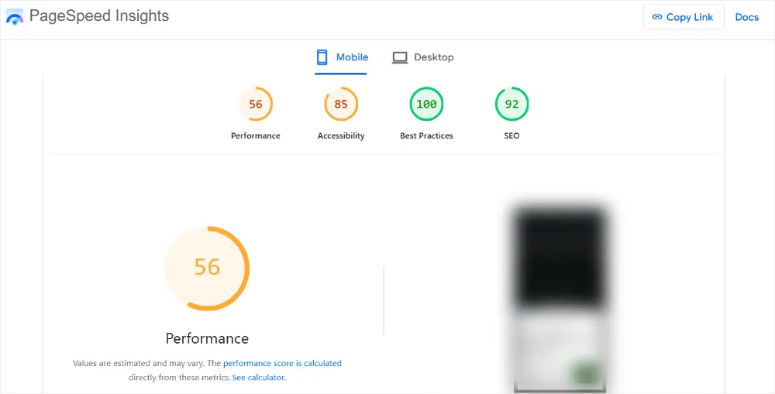
Don’t panic if your score is low. Most WordPress sites start between 30-60 points before optimization. After following this checklist, you should see scores above 85.
☐ Write down your current score
Take a screenshot or write down these numbers:
- Loading time (in seconds)
- PageSpeed score (mobile and desktop)
- Core Web Vitals status (if shown)
It is important to document this because in 35 minutes, you’ll want to celebrate your improvements.
What Causes WordPress Sites to Be Slow
Understanding why WordPress sites get slow helps you prevent problems in the future. Here are the main culprits:
☐ Cheap shared hosting with overloaded servers
Your web host is like the foundation of a house. So, if the foundation is weak, nothing else matters.
Cheap hosting companies ($1-3/month) can be great for small sites, but they often overcrowd their servers, leading to slower performance.
Imagine 500 websites trying to use the same computer at once. Everything slows down.
Good hosting providers invest in fast SSD drives, plenty of RAM, and fewer sites per server. This costs more, but the speed difference is dramatic.
☐ Bloated themes packed with unnecessary features
Many WordPress themes try to be everything to everyone. They include page builders, sliders, contact forms, social media widgets, and dozens of other features you’ll never use.
It’s like buying a Swiss Army knife when you only need a screwdriver.
☐ Huge, unoptimized images slowing down every page
This is the most common beginner mistake. You take a photo with your phone, which can be about 8MB, and upload it directly to WordPress. But most website images only need to be 100-300KB.
☐ Too many plugins or poorly coded ones
Each plugin adds extra code that your site has to load. It’s like carrying 20 backpacks instead of one – you’ll move much slower.
Many beginners install plugins for every little feature they want. Before you know it, you have 50+ plugins running simultaneously.
The worst part? Like bloated themes, some plugins load their code on every page, even where they’re not needed.
A contact form plugin might load its CSS and JavaScript on your blog posts where there’s no contact form.
☐ Outdated PHP versions (anything before 8.0)
PHP is the programming language that powers WordPress. It’s like the engine in your car – newer engines run much more efficiently.
Now, PHP 8.3 runs about 50% faster than PHP 7.4. If you’re still on PHP 5.6 or older, you’re missing out on massive speed improvements.
But, many hosting companies default to older PHP versions because they’re more “stable.” But stable doesn’t mean fast. It’s like choosing a horse over a car because horses are more “reliable.”
The good news? Upgrading PHP usually takes one click in your hosting control panel. Plus, most modern WordPress themes and plugins work perfectly with PHP 8.0+.
☐ No caching setup whatsoever
Without caching, your site rebuilds every page from scratch for every visitor.
Imagine a restaurant where the chef throws away all ingredients after each order and has to restock the entire kitchen before cooking the next meal.
WordPress dynamically generates pages by pulling data from your database, processing PHP code, and assembling everything together. This process takes time.
Here’s what happens without caching:
- Visitor requests your homepage
- WordPress queries the database for posts
- PHP processes all the code
- WordPress assembles the final HTML
- Page loads (2-8 seconds later)
With caching, this same process happens once. Then WordPress saves the finished page and serves it instantly to future visitors.
☐ Database bloat from years of accumulated junk
Your WordPress database is like a filing cabinet. Over time, it fills up with junk you don’t need anymore.
This junk includes:
- Spam comments (sometimes thousands of them)
- Old post revisions (WordPress saves every draft)
- Expired temporary data
- Settings from deleted plugins
- Orphaned metadata with no purpose
A clean database can be 10-50% smaller and respond much faster to queries. The difference becomes dramatic on busy sites with lots of content.
As you may have seen, I have only gone through the basics. Here are additional resources to help you understand WordPress better.
Now that you understand what makes WordPress sites slow, let’s start fixing these issues one by one. The next section covers the foundation fixes that give you the biggest speed improvements.
Foundation Fixes (10 minutes)
These are the big-impact changes that set you up for success. Think of this as fixing your foundation before decorating the house.
The foundation fixes might seem basic, but they’re where you’ll see the most dramatic improvements. They also help you fix the primary issues, which we discussed above, of what slows down your site.
☐ Choose Better Hosting (If Needed)
Now, hosting is a sensitive area that you really need to pay close attention to.
While many cheap hosting services can lead to slower performance, you would be surprised at some bargain services that outperform premium ones.
So before you make a switch, consider going through my hosting comparison article for more details.
Now, if you notice any issues with your hosting or if it takes more than 5 seconds to load your WordPress admin dashboard, then, in this case, I recommend you upgrade.
Here are some excellent host platforms I suggest.
Budget Option: Hostinger ($2.99/month)
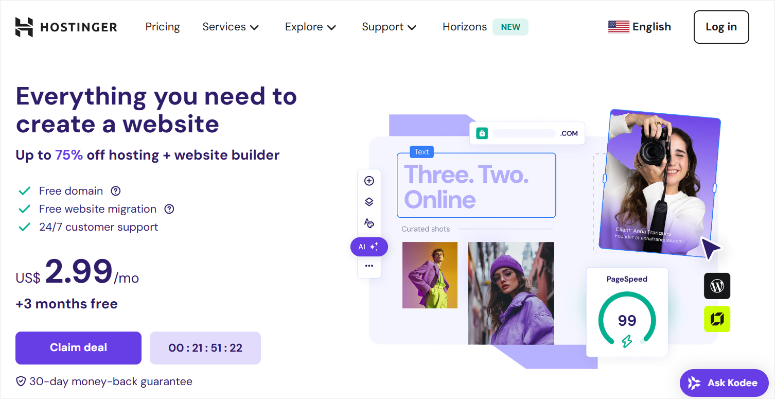
Hostinger offers excellent value for beginners who want performance without breaking the bank.
They use modern LiteSpeed servers instead of older Apache technology, which handles traffic spikes much better and includes built-in caching.
Plus, Hostinger comes with WordPress-specific tools that automatically optimize your site during installation, so you get speed benefits right from the start.
- Includes free SSL certificate and LiteSpeed caching
- Built-in WordPress optimization tools
- Good for personal blogs and small business sites
- Excellent average loading time
Check out my Hostinger review for more details.
Recommended: Bluehost ($1.99/month with the IsItWP coupon)

Bluehost is perfect for WordPress beginners because its dashboard is designed for people who’ve never managed a website before.
When you call support, they understand WordPress-specific problems and can help with speed optimization.
On top of that, their servers are optimized specifically for WordPress, which means better performance out of the box compared to generic hosting.
- WordPress.org officially recommends them
- One-click WordPress installation with optimization
- 24/7 support specifically trained for WordPress beginners
- Great average loading time
Check out my latest Bluehost review here. On top of that, here is a comparison article on Bluehost and Hostinger, two of my picks in this post, to see how they stack up against each other.
You can also check out our Bluehost coupon page for all the best deals to get you started.
Best Performance: SiteGround ($3.99/month)
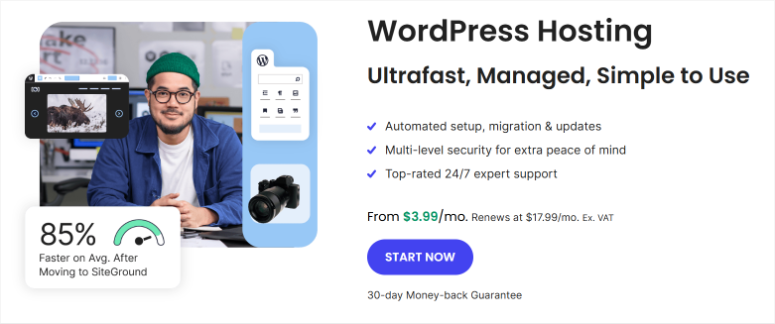
SiteGround delivers the fastest performance because it uses Google Cloud servers – the same infrastructure powering Google Search.
Their SuperCacher technology works better than most caching plugins, and they automatically optimize your WordPress installation for maximum speed.
If performance is your top priority, this is your best choice.
- Fastest loading times in my tests
- SuperCacher technology built-in
- Google Cloud infrastructure
- Best for growing businesses or anyone prioritizing speed
Check out my updated SiteGround review here.
You can also check out our SiteGround coupon page for all the best deals to get you started.
Now, if you are looking for more great hosting options, I have a few articles you can look at.
- Best Dedicated Hosting Companies
- Best eCommerce Hosting Companies
- Top 10 Best Blog Hosting Companies
- 7 Best PCI Compliant Web Hosting Companies
☐ Pick a Fast Theme
Your theme is like your site’s outfit. Some outfits are heavy winter coats with lots of pockets and zippers. Others are lightweight t-shirts.
Most WordPress users pick themes based on how they look in demos. But those beautiful demos often hide serious speed problems.
To help you with this problem, here are my top theme picks based on their performance. Plus, I also picked themes that offer a free version so that you can test their performance first before making a decision.
aThemes Sydney – Fast and Beginner Friendly
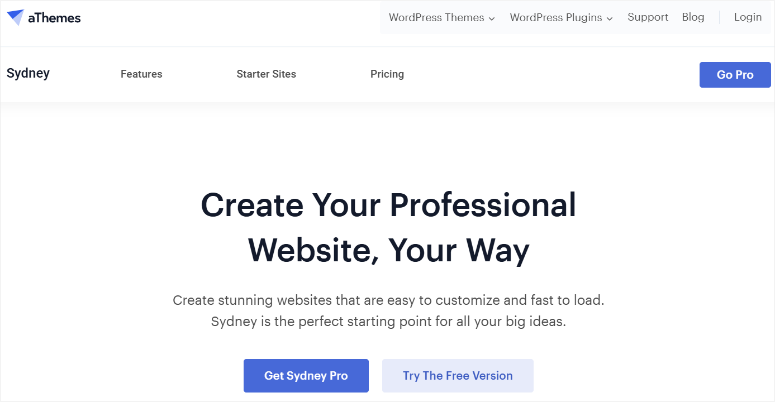
Sydney combines professional design with impressive speed optimization, making it perfect for business websites that need to look good and load fast.
The built-in optimization features mean you don’t need additional plugins to achieve great performance.
- Beautiful business theme with high PageSpeed score
- Uses vanilla JavaScript only, no jQuery
- Built-in lazy loading and minified code
- 100,000+ active installations
Free Theme? Yes
Pricing: Starts at $63 per year.
Check out my Sydney review here.
SeedProd – Drag and drop Theme Builder

SeedProd offers the visual control of page builders without the typical speed penalties.
If you need to create custom layouts but don’t want to sacrifice performance, this is your best option for drag-and-drop functionality.
- Drag-and-drop page builder with theme functionality
- Great for landing pages and custom layouts
- Minimal performance impact compared to other builders
- Perfect if you want visual design control
Free Theme? Yes
Pricing: Starts at $39.50 per year.
Check out my detailed SeedProd review here.
Astra – fast, and Easily Customizable

Astra is perfect for beginners because it’s modular, meaning you only load the features you actually use.
Want a slider? Enable the slider module. Don’t need it? It won’t slow down your site. This smart approach means your site stays fast even as you add features over time.
- Small page size with few HTTP requests
- Works with any page builder
- Over 1 million active installations
Free Theme? Yes
Pricing: Starts at $69 per year.
Check out my Astra theme review here.
Are these theme recommendations not for you? Here are other themes you can look at.
- Fastest WordPress Themes to Speed Up Your Website
- Best Responsive WordPress Themes to Create a Mobile-Ready Site
- My Top 17 Free eCommerce Themes Picks
- I Rank The Best and Most Popular WordPress Themes
- 20+ Affiliate Themes I’ve Profited From
Theme switching is straightforward but requires caution.
I always recommend you create a full backup of your site first. You can use Duplicator or any other top backup plugin you have.
Apart from that, many hosts also provide backup options if you do not want to use a plugin.
Once done, go to Appearance » Themes, click “Add New.” If you are installing a free theme, search for your chosen theme. For pro themes, you need to upload them from your PC using the Upload button.
Then, install it, and activate it.
If anything looks wrong after activation, simply return to Appearance » Themes and reactivate your previous theme, or restore from your backup if needed.
Pro tip: Most theme switches go smoothly, but if you have custom CSS or specific styling, you might need to recreate it with your new theme.
If you face any issues, refer to my post on how to install a WordPress theme.
☐ Update Everything
Every WordPress update includes performance improvements.
Old WordPress software is like driving with the parking brake on. Updates remove bugs that slow things down and fix security vulnerabilities that can get your site hacked.
Let me explain in detail.
- Update All Plugins for Performance Gains: Old plugins slow down your website because they have bugs and problems that pile up over time.
- When you update plugins, you fix these speed problems and often make your site 20-30% faster.
- Don’t skip updates because you’re worried about breaking something – old plugins actually cause more problems than new ones.
- Update Your Theme for Compatibility: Theme updates fix problems and make your website work better with the newest WordPress features.
- Updated themes run faster and help your site rank better on Google. Many theme updates are specifically made to improve your website’s speed scores.
- Enable Automatic Updates: Automatic updates keep your website fast and secure without you having to remember to do it.
- WordPress will email you when updates happen, so you always know what changed. These automatic updates are safe and only install changes that have been tested thoroughly.
If you face any issues, you can also use one of these auto-update plugins to help you.
What if something breaks after updating?
Most good hosting providers keep automatic backups. If something goes wrong, contact your host’s support team. They can restore your site from a backup within minutes.
This foundation work takes 10 minutes but gives you the biggest speed improvements without heavy technical lifting.
Let’s now move to more technical optimization options. The next section covers caching setup, which is often the single biggest speed boost you can get.
Instant Speed Boosters (10 minutes)
As mentioned, without caching, every time someone visits your site, WordPress has to build the page anew.
It does this by querying your database, processing PHP code, and assembling everything together. With caching, WordPress saves a ready-made copy of your page and serves it instantly.
The result? Your site can go from 8 seconds to 3 seconds just by setting up caching properly.
☐ Select a Reliable Caching Plugin
Caching plugins reduce the strain on your server by storing ready-made copies of your pages, so your hosting doesn’t have to work as hard every time someone visits.
This means your site can handle more visitors without slowing down and uses less of your hosting resources. These plugins create fast-loading copies of your pages that are served instantly to visitors.
Here are my top cache plugin options to help improve WordPress performance.
WP Super Cache – Best Free Option
WP Super Cache is completely free with simple page caching that works immediately. It creates static HTML copies of your pages and includes GZIP compression to make files smaller.
Perfect for beginners because it’s straightforward – install it, turn it on, and your site gets faster with just two clicks.
Check out my WP Super Cache review for more details.
WP Rocket (Recommended) – Best Premium Cache Option ($59/year)

WP Rocket offers one-click optimization that combines caching, file compression, lazy loading, and database cleanup into one plugin.
Instead of installing multiple plugins, WP Rocket handles everything automatically with smart default settings that work for 95% of websites.
This caching plugin is worth every penny because it eliminates the need for technical knowledge while delivering professional-level optimization.
Check out my full WP Rocket review here.
W3 Total Cache – Alternative Free Option
W3 Total Cache has advanced caching with object caching, database optimization, and CDN integration built in.
It offers maximum customization and control but requires more technical knowledge to configure properly.
W3 Total Cache is best for users who are comfortable with settings and want granular control over their caching setup.
Quick test: Visit your website and notice how much faster pages load. Then try visiting different pages – they should all load quickly now.
Note: Only install one caching plugin at a time. Remember, using multiple caching plugins will conflict with each other and actually make your site slower or break it completely.
But you can safely combine any caching plugin with Cloudflare since this free CDN works at a different level.
It works before requests even reach your server, while your WordPress caching plugin works on your actual website files.
That brings us to the next item in our checklist, setting up Cloudflare.
☐ Set Up Free CDN with Cloudflare
A CDN (Content Delivery Network) allows you to have copies of your website stored around the world.
Let me explain how Cloudflare works.

This free CDN acts as a middleman between your website and visitors, storing copies of your site on servers around the world.
When someone visits your site, they get the content from the closest server instead of your hosting server, which makes everything load much faster.
So, when someone in Australia visits your site, they receive it from a server in Australia or one that is closest to them, rather than your main server in the US.
The free plan is often enough for most WordPress sites.
It includes automatic file compression, image optimization, and code minification that happens without you doing anything.
Cloudflare also blocks malicious traffic before it reaches your server, reducing the load on your hosting. Their global network spans over 200 cities, so visitors from anywhere get fast loading times.
What results should you expect after setting up Cloudflare?
Your site should load 20-40% faster for visitors around the world, with international visitors seeing the biggest improvements.
You’ll also get basic security protection and detailed analytics about your site’s performance.
Check out this post to see a full breakdown on how to set up Cloudflare.
Cloudflare is not the only CDN out there. If you are looking for more options, check out my list of the best WordPress CDNs.
Apart from that, you can also compare Sucuri vs. SiteLock vs. CloudFlare to see which is best for you.
☐ Enable GZIP Compression
GZIP compression is like vacuum-sealing your website files, making everything smaller without losing any quality.
It compresses your HTML, CSS, and JavaScript files before sending them to visitors’ browsers, then decompresses them instantly.
The good thing is that most caching plugins and modern hosting providers enable GZIP automatically. So, you can use one of the caching plugins we have discussed above.
After setting up caching and CDN, your website should feel dramatically faster. Most sites see a major improvement in loading times just from these three optimizations.
The next section covers image optimization, which is often the second-biggest speed killer after poor caching.
Image Optimization (5 minutes)
As a WordPress expert with 10 years of experience, I can tell you that most WordPress sites are slow because of images, not code or hosting issues.
When you upload a photo straight from your phone to WordPress, you’re often adding 5-8MB files to your pages. That’s like forcing every visitor to download a small movie just to see one picture.
But here’s the good news: You can reduce image file sizes by 70-90% without any visible quality loss. Your photos will look exactly the same but load infinitely faster.
☐ Use an Image Optimization Plugin
Image optimization plugins automatically make your photos smaller without reducing quality.
They work by removing extra data from image files and using smart compression that keeps pictures looking good while making them load much faster on your website.
Here are some image compression tools I use.
Smush (Free):
Smush makes images 40-60% smaller automatically and includes lazy loading, so they only load when people scroll to them.
It works on all the images you already have uploaded, with a 1MB limit per image on the free version. Great for beginners because it works by itself once you install it.
ShortPixel (Recommended):
Starting at $9.99 per month, ShortPixel makes images 70-90% smaller while keeping them looking great. It automatically changes your images to WebP format, which makes files 25% smaller than regular JPEG photos.
No size limits, and it can optimize all your existing images at once.
TinyPNG (Budget):
This is a professional-quality compression plugin that big websites use around the world. TinyPNG is perfect if you don’t upload many new images each month, since you get 100 free compressions.
This is still enough for most websites.
Why Modern Image Formats Matter
WebP and AVIF are newer image types that are much smaller than old JPEG and PNG files. In fact, they are sometimes 50% smaller with the same quality.
Most modern browsers can display these formats, and the plugins automatically show the right format to each visitor’s browser.
This means faster loading for most people while keeping compatibility with older browsers.
So before you decide, remember that ShortPixel includes WebP conversion automatically, while Smush and TinyPNG focus on traditional compression.
☐ Set Up Lazy Loading
Lazy loading means images only download when visitors scroll down to see them, instead of loading all images when the page first opens.
This saves bandwidth and makes your site load much faster, especially on mobile devices.
If someone only reads the first paragraph of your blog post, they don’t waste time downloading images at the bottom of the page.
WordPress has built-in lazy loading since version 5.5, so your images already load this way if you’re using a recent version.
While WordPress’s built-in lazy loading works well for basic images, specialized plugins offer more advanced features and better performance optimization.
With that in mind, you can use WP Rocket, which includes advanced lazy loading for videos and iframes with smart exclusions for above-the-fold images.
On top of that, Smush offers integrated lazy loading with its image optimization. While a3 Lazy Load provides lightweight lazy loading with YouTube video support and custom loading effects.
Test your lazy loading:
Open a long page on your site and scroll slowly. You should see images loading just before they come into view. If images load too late, causing layout shifts, adjust the offset settings in your plugin.
For even more options, check out my post on the best lazy loading plugins for WordPress.
☐ Optimize Images During Upload
Preventing image bloat is better than fixing it later.
WordPress can automatically resize large images when you upload them by creating smaller versions for different uses on your site.
As a result, this stops massive 5MB photos from slowing down your pages when you only need a 300px thumbnail.
But to ensure you do not strain your WordPress site, you should choose the right image format for each use.
- JPEG for photos
- PNG for graphics with transparency
- SVG for simple icons that need to scale perfectly
Apart from that, remember to set up automatic optimization. This saves you from having to manually fix images later.
You can configure automatic resizing in Settings » Media with maximum sizes like 1920×1920 for large images.
Plus, there are several tools that can help make this process even more efficient.
For example, TinyJPG lets you compress images before uploading. Photoshop‘s “Save for Web” feature dramatically reduces file sizes.
All the same, most image optimization plugins also handle compression automatically during upload.
Now, the next section covers database cleanup and plugin management – the final pieces of the speed puzzle.
Database & Plugin Cleanup (3 minutes)
Your WordPress database often includes old comments, post revisions, and leftover plugin data that pile up and slow down every database query.
So how do you fix this?
☐ Remove Unused Plugins and Themes
Every plugin you install adds code to your site, even when it’s deactivated. It’s like keeping old apps on your phone – they take up space and sometimes run in the background.
Find unused plugins:
Go to Plugins » Installed Plugins in your WordPress dashboard. Look through the list and honestly ask yourself: “Do I actually use this?”
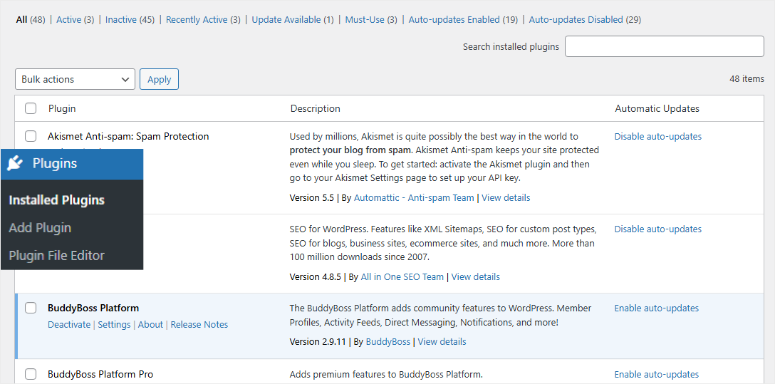
Common plugins beginners install but rarely use:
- Multiple contact form plugins (you only need one)
- SEO plugins you installed but never configured
- Backup plugins you replaced with hosting backups
- Social media plugins you set up once and forgot
Don’t just deactivate, delete unused plugins:
When you find a plugin you don’t use, click “Delete” instead of just “Deactivate.” Deactivated plugins still take up space and can create security vulnerabilities.
WordPress asks you to confirm deletion because it permanently removes the plugin files. Click “Yes, Delete these files” if you’re sure you don’t need it.
Important: Don’t delete plugins you’re actively using, even if you’re not sure what they do. When in doubt, ask yourself: “Did my site work fine before I installed this?” If yes, you probably don’t need it.
What about inactive themes?
Go to Appearance » Themes and delete any themes you’re not using. WordPress requires at least one theme, so keep your active theme plus maybe one backup.
Expected results: Your site loads faster, uses less server resources, and has fewer potential security vulnerabilities.
☐ Clean Your Database
Your WordPress database stores everything, and over time, it gets cluttered with unnecessary information that slows down every page load.
This cleanup makes database queries run 20-30% faster and reduces your hosting backup sizes significantly.
You can manually clean the database through phpMyAdmin in your hosting control panel by optimizing tables and removing specific entries.
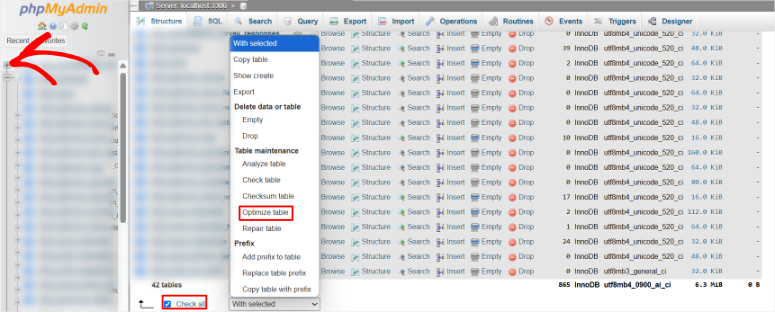
But this can be difficult for beginners. Instead, you can use data cleaning plugins to safely handle this cleanup process for you, removing the guesswork and risk of deleting important data.
For starters, you can use the free version of WP-Optimize to safely remove spam comments, post revisions, and expired temporary data. I like this plugin because it shows you exactly what it will delete first.
Apart from that, Advanced Database Cleaner handles orphaned metadata from deleted plugins. WP-Sweep provides lightweight database maintenance with preview functionality before cleanup.
To help you with this process, here are the best WordPress database tools to clean and optimize your site.
You can also follow this step by step guide on how to remove unused files from your WordPress media library. After that, follow this tutorial on how to clean your WordPress database.
☐ Limit Post Revisions
WordPress saves every draft as you write, creating multiple versions that clog your database and slow down queries.
Each revision makes WordPress work harder to find your current content. Limit revisions to 3-5 by adding define('WP_POST_REVISIONS', 3); to your wp-config.php file.
You can also use the WPCode plugin to safely add this code without editing files directly.
All you have to do is install WPCode, create a new snippet, paste the revision limit code, and activate it through your WordPress dashboard.
Check out this post to find the snippet to use to limit the number of revisions and use it with WPCode. You can also follow this WPCode review to see how to use it.
Clean up existing revisions:
Now the steps above only help you limit post revisions for future content. But what about posts that are already live?
For this, use WP-Optimize to remove excessive existing revisions. Again, setting this up is very simple. Just choose “Keep latest 3 revisions” to maintain some backup versions while removing the excess.
Expected results: Your database becomes significantly smaller, and post-loading times improve, especially for content-heavy sites.
☐ Optimize Comment Settings
Comments can create database bloat, especially if you get spam or don’t moderate them actively.
For sites with few comments:
Go to Settings » Discussion and configure these settings:
- Uncheck “Allow people to submit comments on new posts”
- This stops all new comment spam immediately
- Existing comments stay visible
For sites that want comments:
Keep comments enabled but add these protections:
- Check “Comment author must fill out name and email”
- Check “Users must be registered and logged in to comment”
- Enable “Comment must be manually approved”
Clean existing comment spam:
In WP-Optimize, enable “Clean all spam comments” and “Clean all trashed comments.” This removes the obvious junk immediately.
You can also use an anti-spam plugin like Akismet, which is free for personal sites, to automatically filter future spam comments.
Comment pagination for popular posts:
If you have posts with 50+ comments, enable comment pagination:
- Go to Settings » Discussion
- Check “Break comments into pages”
- Set to 10-15 comments per page
This prevents long comment threads from slowing down page loading.
This cleanup section takes just 3 minutes but often provides dramatic speed improvements. Sites with years of accumulated junk sometimes see 40-50% faster loading times after thorough cleanup.
Side Note: Many WordPress experts recommend you switch off comments completely. But this is often not the best move. Comments help users engage and stay longer on your site, making them important for SEO.
So instead, I suggest using one of these WordPress comments plugins for better engagement and take full advantage of your visitors.
The next section covers advanced optimizations that squeeze out even more performance with minimal effort.
Advanced Quick Wins (7 minutes)
These optimizations might sound technical, but they’re actually simple to implement. Think of them as the finishing touches that transform a good website into a great one.
Each of these tweaks takes just 1-2 minutes, but can shave precious milliseconds off your loading time. When combined, they often push sites from “good” performance into “excellent” territory.
☐ Optimize Fonts
Google Fonts are beautiful, but they slow down your site because each custom font requires an extra trip to Google’s servers, adding 200-500ms to your loading time.
Remember, every external font request creates a delay that affects your Core Web Vitals scores and user experience.
This becomes a problem, especially on mobile devices and slower internet connections, where every millisecond counts for keeping visitors engaged.
You can manually optimize by limiting to 1-2 font families in your theme customizer.
You can do this by using only the necessary font weights in your Google Fonts selection and adding font-display:swap to your theme’s CSS file to prevent invisible text.
Alternatively, you can use OMGF (Optimize My Google Fonts), which solves this by downloading Google Fonts to your own server, eliminating external requests and improving GDPR compliance.
☐ Enable Lazy Loading for Videos
Uploading videos from YouTube, Vimeo, or even embedding them can add massive loading delays. A single YouTube embed adds about 500KB of JavaScript even if visitors never click play.
As a result, multiple videos easily add 2-3 seconds to loading time, hurting your Core Web Vitals scores.
You can manually reduce video impact by limiting embeds per page and using video thumbnails with custom play buttons.
Apart from that, Lazy Load by WP Rocket, a free plugin, can replace video embeds with clickable thumbnails that only load the actual video when clicked.
Now, if you want a better visual appeal and your videos to update automatically, use feeds.
You can use Smash Balloon to create video feeds that do not bloat up your code, are faster, and don’t consume your hosting storage or bandwidth.
Plus, you can add video feeds from multiple platforms to create a social wall that keeps your users engaged and your site performing.
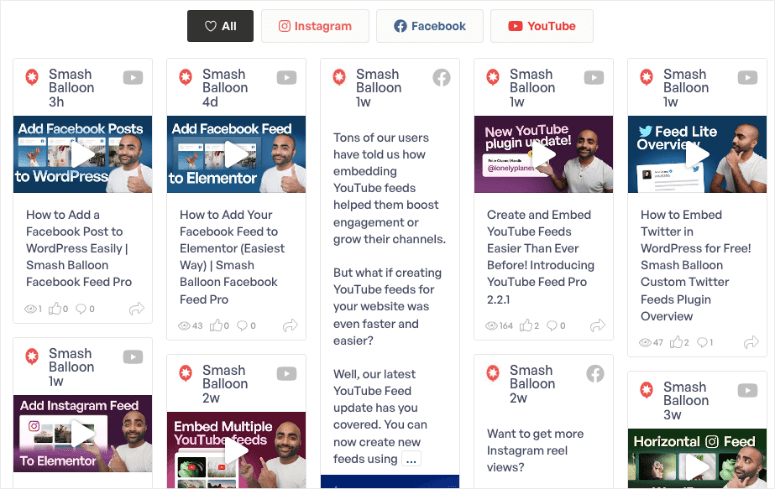
Check out this article to see how to add YouTube feeds to WordPress. Follow that up by checking out my Smash Balloon review to see all the types of bloat-free feeds you can create.
☐ Reduce External HTTP Requests
Every external resource, like Google Analytics, social media widgets, and chat tools, creates additional requests that slow loading by 100-500ms each.
Removing 5-10 external requests can save 1-2 seconds of loading time.
Open your website and press F12 to open developer tools. Then go to the “Network” tab and reload your page. Look for requests to external domains, not your own site.
Common external requests that slow sites:
- Google Analytics
- Google Fonts (fixed with OMGF above)
- Social media embed scripts
- Chat widgets
- Ad networks
- External CDNs for unused resources
Minimize external requests:
- Google Analytics: Use Google Analytics 4 (GA4) instead of older versions. It’s faster and more efficient.
- Social media: Replace social media widgets with simple links. Social sharing buttons often load 500KB+ of JavaScript you don’t need.
- Chat widgets: Only load chat widgets on pages where they’re actually useful (contact page, support pages). Remove them from blog posts and other content pages.
- Remove unused tracking codes: Check your theme’s header for old tracking codes from tools you no longer use.
- Expected results: Each external request you eliminate saves 100-500ms in loading time. Removing 5-10 external requests can shave 1-2 seconds off your loading time.
☐ Set Up Comment Pagination
Posts with lots of comments can add 2-3 seconds to loading time because WordPress loads all comments at once.
Comment pagination splits long comment threads into manageable chunks of 10-15 comments per page, making posts with hundreds of comments load 30-60% faster.
To add comment pagination, go to Settings » Discussion, and enable “Break comments into pages.”
☐ Use Excerpts Instead of Full Posts
Displaying full blog posts on your homepage forces visitors to download massive amounts of content – sometimes 2-3MB just to see your blog overview.
Excerpts show short summaries instead, making homepages load 3-5 times faster while visitors can still click to read full posts.
Switch to excerpts in Settings » Reading by selecting “Excerpt” instead of “Full text.”
☐ Enable Browser Caching
Browser caching tells visitors’ browsers to remember your files so they load instantly on return visits instead of downloading again.
This dramatically speeds up repeat visits and reduces server load. Set cache expiration to 1 month for images and CSS files through your .htaccess file or hosting settings.
On top of that, WP Rocket and Cloudflare automatically configure optimal browser caching settings.
Test browser caching:
Visit your site, then immediately reload the page. On the second load, most images and files should load from cache (you’ll see this in the Network tab of developer tools).
Expected results: Return visitors experience 50-80% faster loading times because their browsers don’t need to re-download static files.
After implementing these advanced optimizations, your site should load consistently under 3 seconds. These seemingly small tweaks often provide the final push from “good” to “excellent” performance.
The next section shows you how to test your improvements and celebrate your success.
Celebrate Your Speed Improvements
☐ Testing Your Result
After implementing these optimizations, test your site’s new speed using the same tools from the beginning.
Most sites see dramatic improvements. Loading times drop from 8+ seconds to under 3 seconds, and PageSpeed scores jump from 40-50 to 85-90+.
- Use Google PageSpeed Insights to check Core Web Vitals improvements
- GTmetrix to test from multiple global locations and get detailed performance breakdowns
- IsItWP’s free performance tool to compare the results of the other tools.
Also, do not forget to test on mobile using cellular data to experience real-world performance gains. Then, document your before/after results for future reference.
☐ Verify Business Impact
Speed improvements should translate into better business results within a few weeks.
Track these key metrics in Google Analytics and Google Search Console to see how your faster site impacts your actual business goals.
- Bounce Rate (Google Analytics): Should decrease as more visitors stick around on your faster-loading pages. Faster sites typically see 10-30% lower bounce rates within the first month.
- Session Duration: Visitors should spend more time exploring your site since pages load quickly. Faster loading encourages people to view more pages and engage deeper with your content.
- Conversion Rates: Newsletter signups, contact form submissions, or sales should increase measurably. Even small speed improvements often boost conversions by 10-20% as friction decreases.
- Search Rankings: Monitor your keyword rankings over the next month for gradual improvements. Faster sites often see ranking boosts as Google rewards better Core Web Vitals scores.
- Mobile Traffic: Mobile visitors should engage more with your optimized mobile experience. Check mobile-specific metrics in Google Analytics for increased page views and lower bounce rates.
To simplify monitoring these metrics, I suggest you use MonsterInsights, the best Google Analytics plugin. It simplifies these metrics so that you can easily understand them.
Plus, you can use it directly in your WordPress dashboard, so you do not have to change browser tabs.
You can also use traffic tracking tools to help you carry out even deeper site analysis.
Common Mistakes to Avoid During Performance Optimization (Quick Checklist)
Avoid these common mistakes that can actually make your WordPress site slower or break functionality during optimization.
This quick checklist helps you steer clear of pitfalls that beginners often encounter when trying to speed up their websites.
- ☐ Don’t install multiple caching plugins: This is the #1 mistake beginners make. Use WP Rocket OR WP Super Cache, never both. Multiple caching plugins conflict and actually slow down your site.
- ☐ Don’t ignore plugin update warnings: Outdated plugins often have memory leaks and compatibility issues that worsen over time. That “harmless” old plugin might be secretly consuming server resources.
- ☐ Don’t upload images directly from your camera: Always resize photos before uploading. Your phone’s 24-megapixel camera creates files way larger than necessary for web use.
- ☐ Don’t install plugins “just to try them”: Every plugin you install leaves traces in your database, even after deletion. Only install plugins you plan to actually use.
- ☐ Don’t change themes frequently: Theme switching can leave orphaned data and break optimization settings. Pick a fast theme and stick with it.
Well done! At this point, you should see significant improvements in your site speed and performance. And just like that, you have completed the whole optimization process in less than 35 minutes.
If anything is unclear, check out the commonly asked questions below.
FAQs: WordPress Speed & Performance Optimization Checklist
Do I need to know coding to follow this site performance checklist?
No coding knowledge required! Everything in this checklist uses point-and-click interfaces or simple copy-and-paste instructions.
The most “technical” thing you might do is adding a line to wp-config.php to limit post revisions, and we provide the exact code to use. Most hosting providers will even do this for you if you ask support.
All the plugins mentioned have user-friendly dashboards designed for beginners. WP Rocket, for example, works perfectly with default settings – just install and activate.
What if I break my site while optimizing?
This is the #1 fear for beginners, but it’s easily preventable. Before making any changes, create a full backup through your hosting control panel or a reliable backup plugin. Most good hosting providers and plugins offer one-click backup restoration.
If something does break, clear all caches first (fixes 80% of issues), then deactivate the last plugin you installed. Contact your hosting support – they can restore from backup in minutes.
How often should I run this optimization checklist?
Full checklist once when you first set up your site. Monthly maintenance takes 5 minutes for updates and database cleanup. Quarterly review takes 15 minutes for deeper maintenance. Annual assessment to consider hosting upgrades or tool changes.
The initial optimization is the biggest time investment. After that, maintaining speed is much easier than achieving it.
Can I do this optimization on a live website?
Yes, but follow safety guidelines. Safe to do on live sites: installing caching plugins, image optimization, database cleanup, WordPress and plugin updates, and setting up Cloudflare CDN.
Best done during low-traffic times: major theme changes, PHP version upgrades, extensive plugin testing. Always back up first.
Will speed optimization affect my SEO rankings?
Yes, positively! Google has used site speed as a ranking factor since 2010, and it became even more important with Core Web Vitals in 2021.
Typical SEO improvements include higher Core Web Vitals scores, better mobile search rankings, improved user experience signals, and lower bounce rates. Technical improvements are immediate, ranking improvements take 2-8 weeks, and traffic increases happen over 1-3 months.
What’s the difference between free and premium optimization tools?
Free tools provide basic caching and optimization, 40-60% speed improvements, manual configuration required, and community support only.
Premium tools offer advanced automation features, 60-90% speed improvements, one-click optimization, and priority support. Start with free tools, upgrade to premium when your site generates revenue.
How do I know if my hosting is the problem?
The most obvious sign is that your site loads slowly, even after optimization, frequent downtime or error messages, the WordPress admin dashboard takes 5+ seconds to load, and hosting costs under $3/month.
If your site loads fast from your location but slowly from other countries, that’s usually a hosting infrastructure issue, not an optimization problem.
What should I do if my PageSpeed score is still low after optimization?
Scores above 85 are excellent – focus on maintaining performance. Then, scores between 70-84 are good – minor tweaks might help, but don’t obsess. Scores below 70 mean you should review the checklist for missed optimizations.
Remember, real-world loading speed matters more than perfect scores. A site that loads in 2-3 seconds with a score of 75 is better than a site that scores 95 but loads in 4 seconds.
What if my site is still slow after following everything?
Try systematic troubleshooting. Test with a different theme temporarily, deactivate all plugins except caching, contact your hosting provider about server performance, and consider professional optimization consultation.
Can I optimize an existing site with lots of content?
Absolutely! Content-heavy sites often see the biggest improvements because they have more optimization opportunities.
Special considerations: image optimization may take longer (run overnight), database cleanup might find significant bloat, consider premium tools for bulk optimization, and backup everything before starting. Typical results: 50-80% speed improvements are common for large sites.
Final Verdict: Should I Optimize My WordPress Site?
Absolutely yes! WordPress optimization is one of the most valuable investments you can make for your website.
The benefits far outweigh the minimal time and cost involved, delivering immediate and long-term returns that compound over time.
What’s more, your site speed directly impacts everything that matters, from search rankings to user experience, conversions, and mobile performance.
The best part is, you can optimize your site by just investing time, or less than $100/year if you go with premium options.
Unlike paid advertising that stops when you stop paying, speed improvements work 24/7 to grow your business.
The bottom line is that every WordPress site should be optimized for speed.
The question isn’t whether you should optimize, but how quickly you can get started. Your visitors, search rankings, and bottom line will thank you.
Check out this article for a full overview on how to boost WordPress site performance if you need to clarify anything from this checklist.
Apart from that, here are more resources you may be interested in reading.
- 8 Best 24/7 WordPress Support Services to Manage Your Site
- 10 Top WordPress Plugins to Make Your Site Mobile Friendly
- 8 Best WordPress Maintenance Services and Plans (Compared)
With your WordPress site now optimized for lightning-fast performance, these additional resources will help you maintain and enhance your site’s overall functionality and user experience.
With this detailed checklist on WordPress speed and performance, you’re ready to focus on growing your business instead of worrying about slow loading times.
These speed improvements will continue delivering better user experience, higher search rankings, and increased conversions for years to come.

Comments Leave a Reply