
Do you want to accept payments with Stripe on your WordPress website?
Although there are several payment gateways, Stripe stands out for its simplicity and developer-friendly features.
In this article, we’ll show you how to accept payments with Stripe on your WordPress site.
Accepting Stripe Payments With WordPress
To be able to install Stripe, your website needs to have an SSL/HTTPS encryption. This ensures that the payment details that your customers will be sharing on your site are safe.
If you don’t have an SSL/ HTTPS already, here’s how you can get it for free within a matter of minutes.
Here’s how to prepare your website to accept payments with Stripe using two different methods:
- WPForms – Best Form Builder with Stripe Integration
- WP Simple Pay – Top Stripe Payments Plugin
Let’s get started.
Method 1: Accepting Stripe Payments with WPForms

WPForms is known as the best form builder plugin on the market. But, it’s also one of the best payment plugins for WordPress.
It comes with an easy-to-use drag and drop form builder that lets you build any kind of online form, including payment forms to accept credit card payments from your customers using Stripe, PayPal, Square, or Authorize.net.
WPForms also offers pre-built form templates, smart conditional logic, file uploads, multi-page forms, instant form notifications, and much more.
Here’s how to create a Stripe payment form with WPForms.
Step 1: Installing WPForms
The first step is to install and activate the WPForms plugin on your website.
For reference, check out how to install a plugin on your WordPress site.
Step 2: Installing the WPForms Stripe Addon
Next, activate the WPForms Stripe addon by going to your website dashboard and clicking on WPForms » Addons.
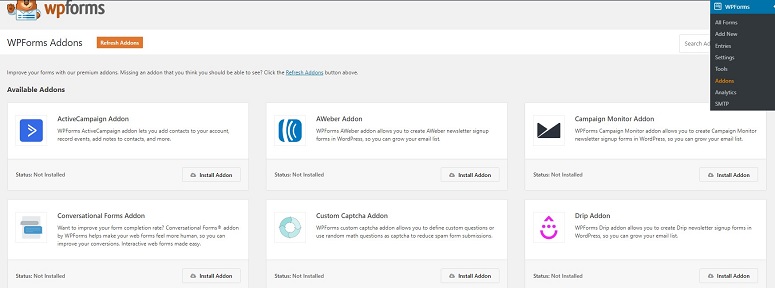
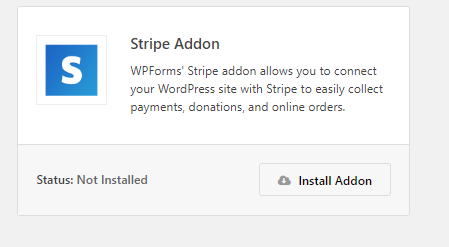
Now using the search field look for the Stripe addon. Once found, click on the Install Addon button.
Step 3: Preparing WPForms to Accept Stripe Payments
Once the addon is installed, you can now move on to the Settings page by navigating to WPForms » Settings » Payments.
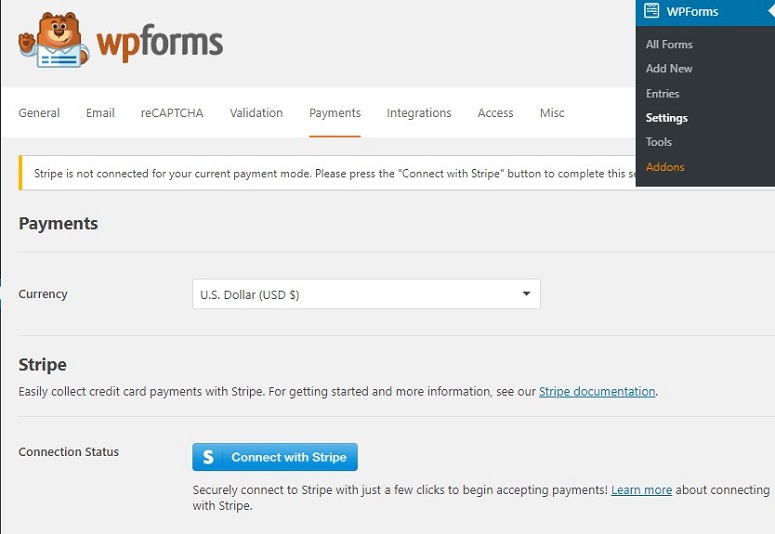
Now click on the Connect with Stripe button. In the next step, you need to authorize the connection between your forms and Stripe.
If you have a Stripe account already, you can use the button on the top right corner to sign in.
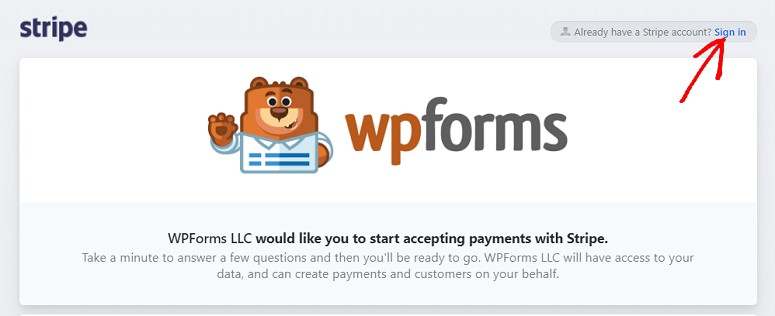
If you don’t have a Stripe account, you can simply create it by using the options below.

Once you’ve agreed to the requirements, you’ll be redirected back to your WordPress admin area.
Step 4: Create a Payment Form With Stripe
Now that you’ve set up Stripe addon with WPForms, let’s go ahead and start creating your Stripe payment form. For that, you first need to create a form. Here’s how you can create your form.
You can also edit an existing one and integrate it with the Stripe option.
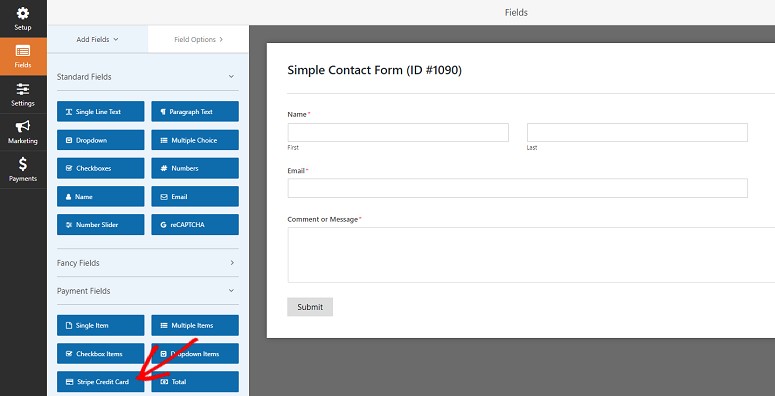
While creating your form, make sure you add the Stripe Credit Card field to your form from the Payment Fields section.
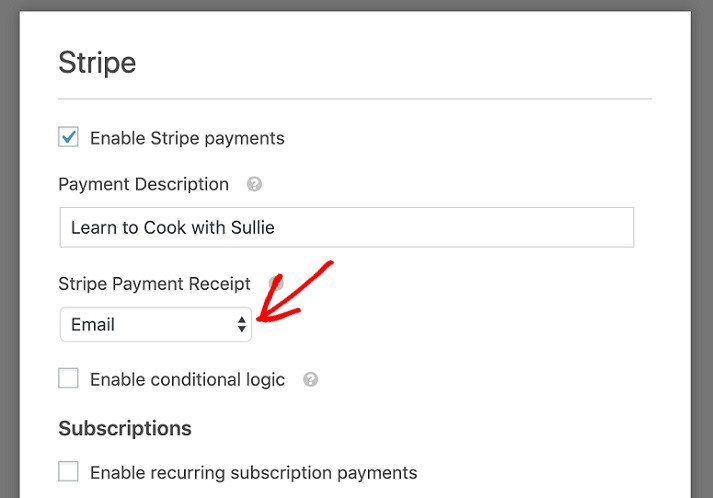
Once you’ve added all the fields you want to your form, go to Payments » Stripe. Now from the Stripe panel, select the Enable Stripe Payments option.
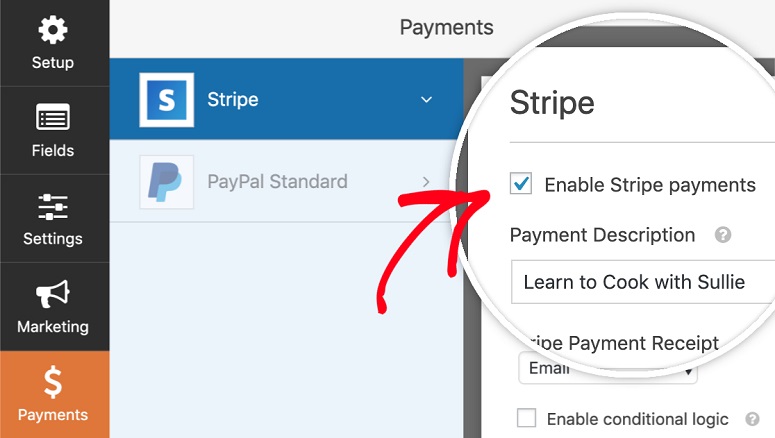
Now under the Stripe Payment Reciept option, click on the dropdown and select Email. That’s where your customer’s payment reciept will be sent to.
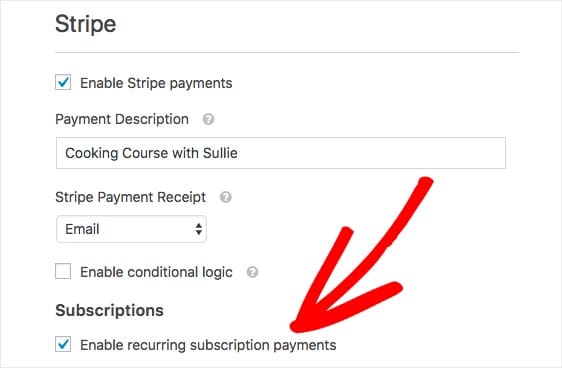
If you want to set up a recurring or subscription payment, then you’ll also need to select the Enable recurring subscription payments option under Subscriptions.
Configure your recurring payment options and save your form.
Step 5: Publishing Your Form
WPForms is a Gutenberg-friendly form plugin, so you can quickly add a payment form to your post or page by using a block.
In your post editor, add a new WPForms block by clicking the + (plus) icon in the upper left corner.
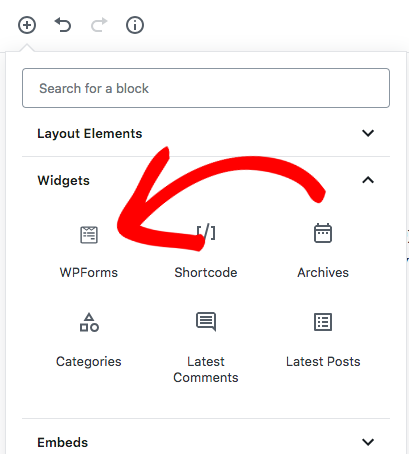
Now, you’ll be given a few different menu options. Search WPForms to locate the block and click on it.
You’ll now see the WPForms block in the editor screen. Next, go ahead and select the form you want from the Select a Form dropdown.

Now, you can see the complete form in your editor. Once done, publish or update your article.
If you’re still using the legacy classic editor, you can publish the form by clicking on the Add Form button above your toolbar.

Clicking on it will trigger a popup. Select the payment form you created from the dropdown menu. Then, click Add Form.
You’ll now see that a shortcode is added to your post editor. You can now go ahead and publish your article.
Your live payment form will look something like this:
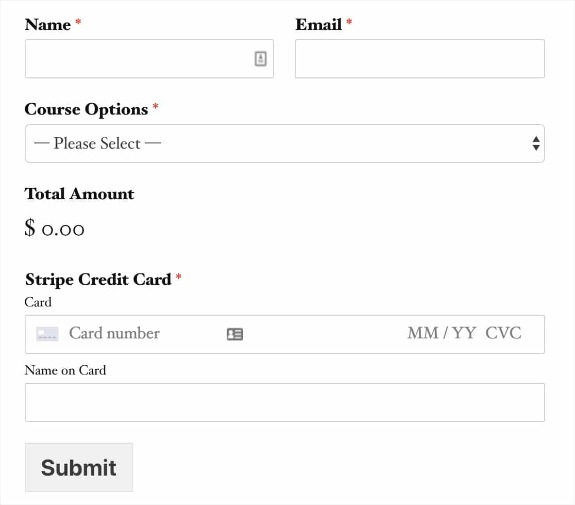
Now your site is ready to collect Stripe payments with WPForms.
Method 2: Accepting Stripe Payments with WP Simple Pay
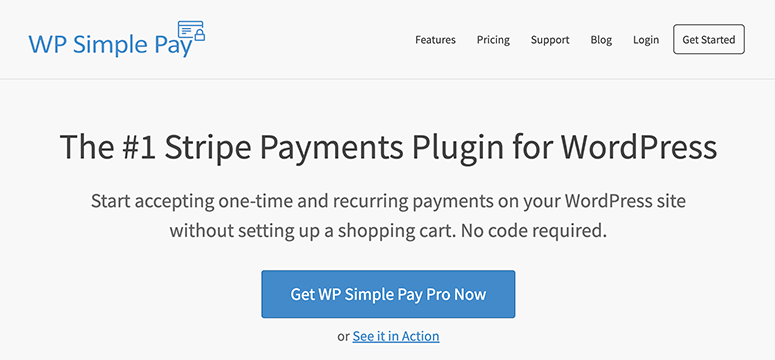
WP Simple Pay is the most popular Stripe payments plugin for WordPress. You can easily accept one-time or recurring payments on your WordPress site without setting up a shopping cart.
The drag and drop payment form builder is easy to use and there’s no coding required. You can add custom fields to collect as much or as little information as you need.
WP Simple Pay also comes with features like coupon codes, custom amounts, multi-language and currency support, and more.
If you want to learn more, then you can check our full WP Simple Pay review!
Here’s how to create a Stripe payment form with WP Simple Pay.
Step 1: Installing WP Simple Pay
First, visit the WP Simple Pay website to purchase and download the plugin.
Then, install and activate the plugin on your WordPress site. If you need help, see our step-by-step guide on how to install a WordPress plugin.
Once the plugin is activated, you’ll need to go to WP Simple Pay » Settings in your WordPress dashboard and enter your license key.

You can find your license key in the email receipt or in your WP Simple Pay account area.
After typing or pasting in your license key, hit the Activate button.
Step 2: Connecting WP Simple Pay to Stripe
Next, you’ll be prompted to connect the WP Simple Pay plugin with your Stripe account.
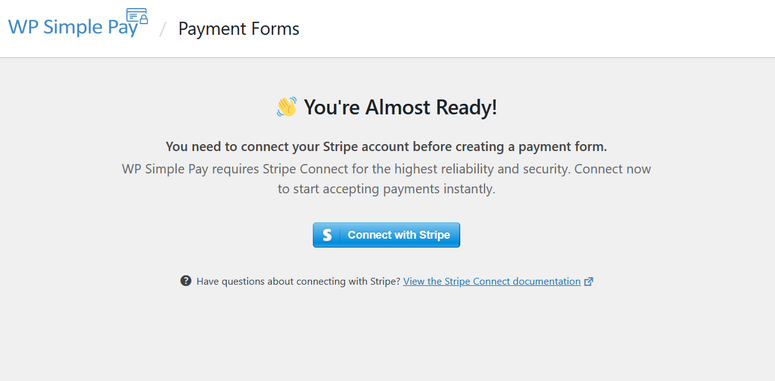
Click the Connect with Stripe button and you’ll be taken to Stripe.com where you can log into your existing account or create a new one.
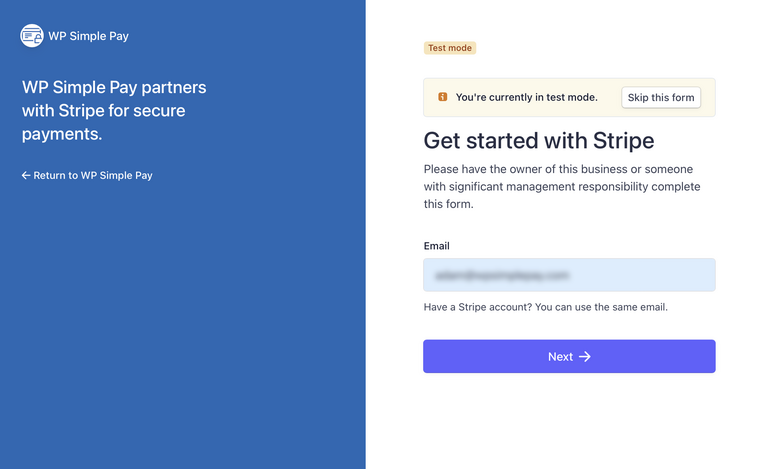
After typing in your login details, click the Connect button.
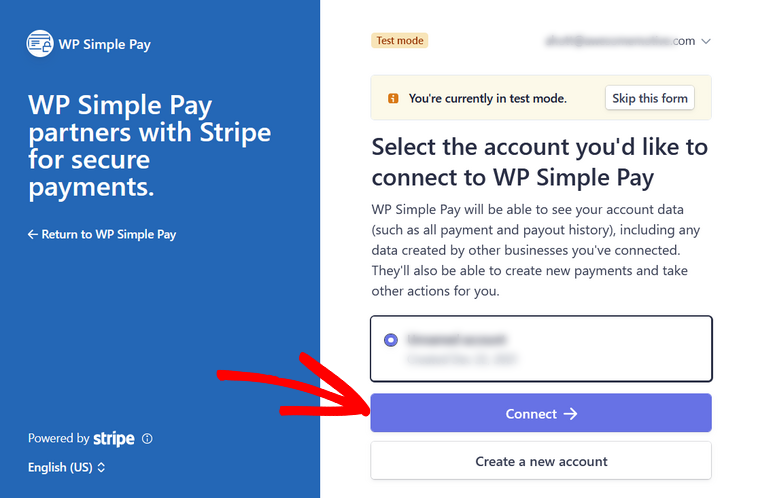
You’ll then be taken back to the WP Simple Pay plugin. Notice that your Stripe account is connected in Test Mode. We highly recommend staying in Test Mode until you’ve finished setting up your payment form.
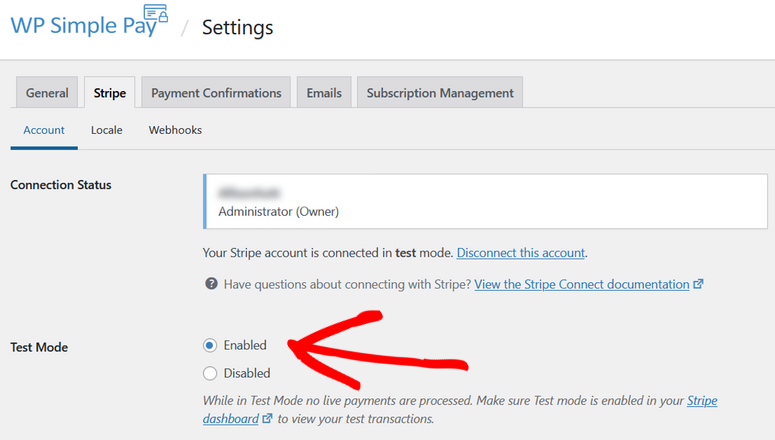
Now it’s time to start creating your first payment form…
Step 3: Create a Stripe Payment Form
To create a Stripe payment form, click on the Create Your Payment Form button. Alternatively, you can click go to WP Simple Pay » Add New from your WordPress Dashboard.
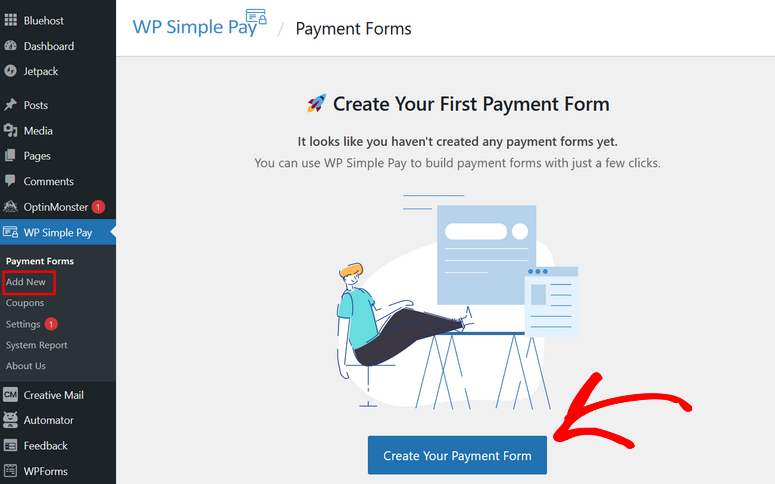
After clicking the button, you’ll be taken to the form builder where you can start building your payment form.
First, on the General tab, you can give your payment form a title and description.
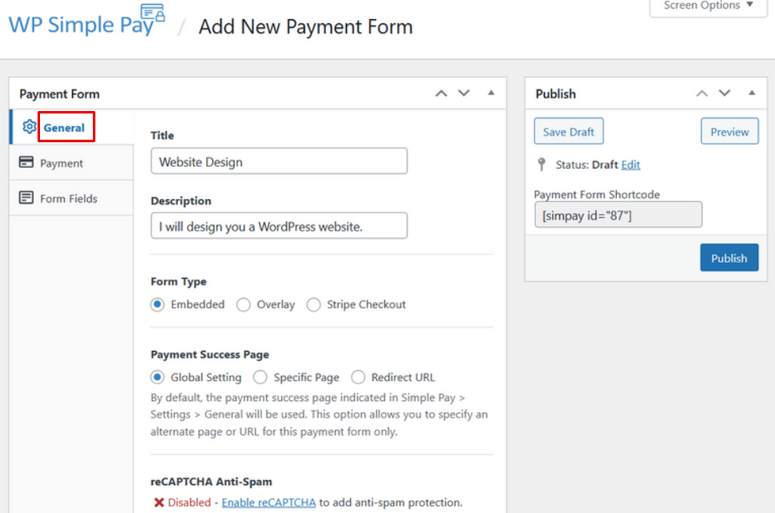
Directly underneath the title and description, select the Form Type you want. You have three options to choose from:
- Embedded – Embed a payment form directly on your WordPress site.
- Overlay – Create an overlay form, similar to a popup.
- Stripe Checkout – Use an off-site payment flow that’s optimized for conversions.
For this tutorial, we’ll create an embedded form to keep users on-site for the entire payment process.
On the same page, you can also set your Payment Success Page and enable reCAPTCHA Anti-Spam.
Next, click on the Payment tab and scroll down to the Price Options section.
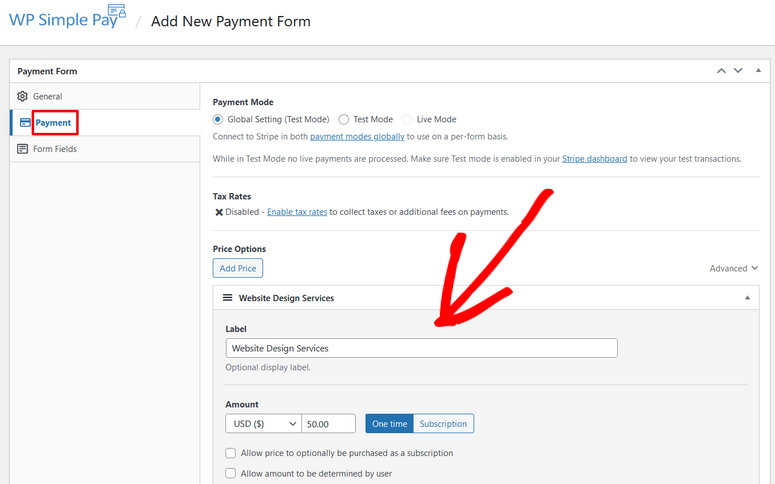
Here, you can add an optional display Label to be used as the item description by Stripe. Under Amount, you can set the price and currency.
You can also choose between One Time payment and Subscription payment. Subscription payments are only available with the Plus license or higher, so for this tutorial, we’ll choose the One Time payment option.
Next, click on the Form Fields tab to customize your form. As you can see, four form fields are added automatically, these include email address, price options (if you have more than one price), payment method, and checkout button.
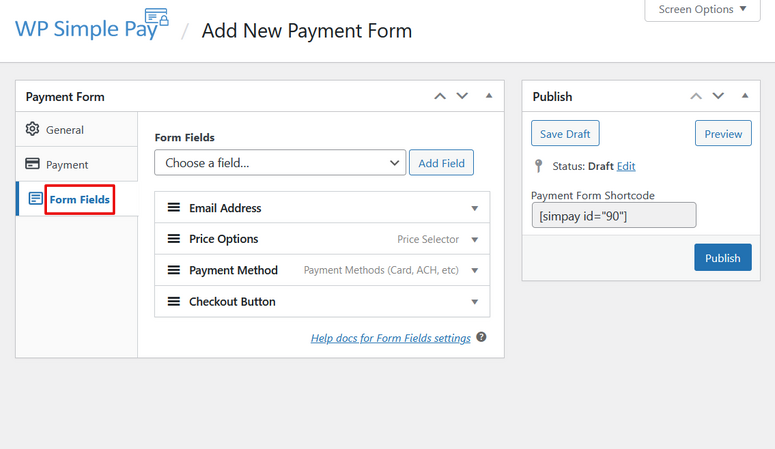
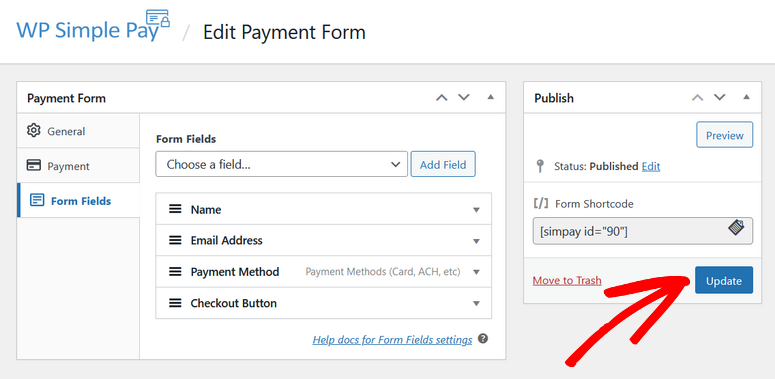
You can add additional fields to your form by clicking the Choose a field dropdown. There are fields like customer name, phone number, coupon, and more. Select any fields you want and click the Add Field button to add them to your form.
You can also rearrange the order of your fields by dragging and dropping them into place, as well as configure individual field settings by clicking on them.
Make sure to hit the Update button to save your changes.
You can also click the Preview button to see how your form looks, it should look something like this:
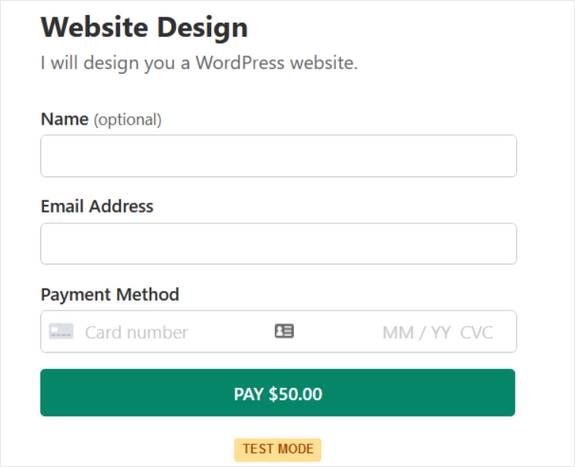
If you’re happy with your form, it’s time to add it to your website.
Step 4: Publishing Your Form
To add your payment form to your site, make sure it’s published, and copy the Form Shortcode, which looks like this: [[simpay id=”90″]]
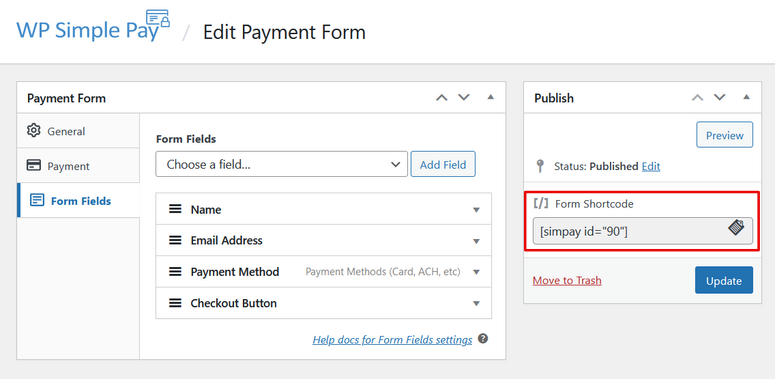
Next, create a new WordPress page or post, or edit an existing one. Then, paste the shortcode into the WordPress editor. This will automatically add the Shortcode widget to your page.

Now you can click the Preview button or Publish/Update the page to see how your payment form looks on your site.
Step 5: Making a Test Payment
As we mentioned earlier, it’s best to keep your payment form in Test Mode until you know it’s working properly.
So, let’s view your form now and make a test payment. Fill out the form fields including a test card number, which Stripe provides on its website.
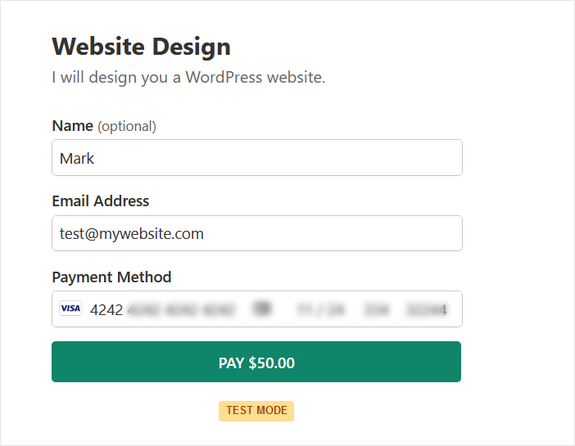
After you’ve submitted the form, Stripe will process the payment and you should see a confirmation page like the one below:
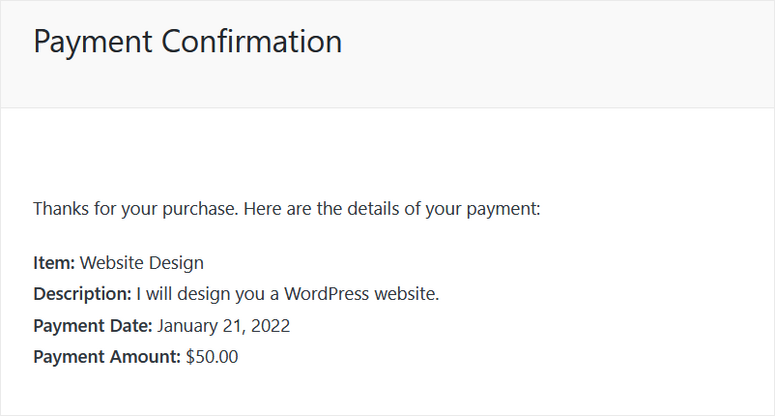
Now that you know your payment form is working, you can turn off test mode by going to WP Simple Pay » Settings from the WordPress dashboard. In the Stripe tab, choose the Disabled option under Test Mode.
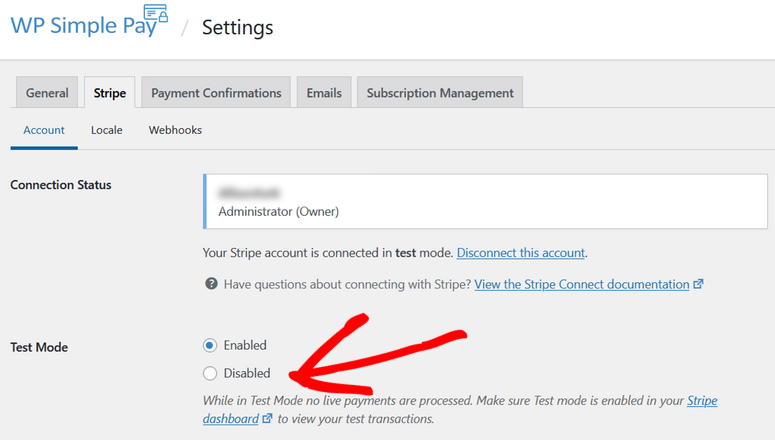
Then, click Save Changes.
Now you’re ready to start accepting Stripe payments on your WordPress site!
That’s it. We hope you liked this guide on accepting payments with Stripe. You might also want to check out the best Stripe payment plugins for your WordPress site.
FAQs on Stripe Payments for WordPress
Is Stripe free or paid?
Stripe is free to signup. Once you start getting payments, you’ll incur transaction fees on a pay-as-you-go pricing model. There are no setup fees, monthly fees, or hidden fees.
Can I use Stripe in WooCommerce?
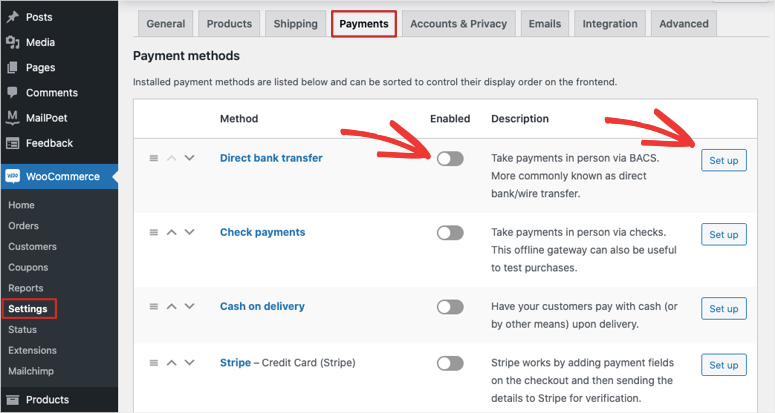
Yes, you can enable Stripe payments inside the WooCommerce plugin settings. Inside the Settings » Payments tab, you can enable any payment method and then use the Set Up button to configure it.
Which is better Stripe or PayPal for WordPress?
PayPal is more suitable for individuals and small businesses that are just getting started. Stripe is a more advanced payment gateway that lets your customers pay using their preferred method. It also comes with payment management features making it more suitable for businesses of all sizes.
Next, you can check our guide on how to add Square payments in WordPress.


Comments Leave a Reply