
Are you seeing themes being listed as ‘widget-ready‘, but not sure what that means?
Widgets make designing your pages and posts a lot easier. They help you edit and display visually stunning headers, footers, sidebars, and other areas of your site.
In this tutorial, you will learn:
- What exactly is a widget-ready WordPress theme
- Why you would even want to use widgets anyway
- How to use widgets to customize a WordPress site
As usual, this tutorial includes screenshots so it’s easy for you to follow along even if you’re completely new to WordPress
What Exactly is a Widget-Ready WordPress Theme?
Most WordPress themes come with widgetized areas which let you dynamically manipulate these areas in an easy to use drag-and-drop fashion.
For instance, a widget could be the search bar in the image below:
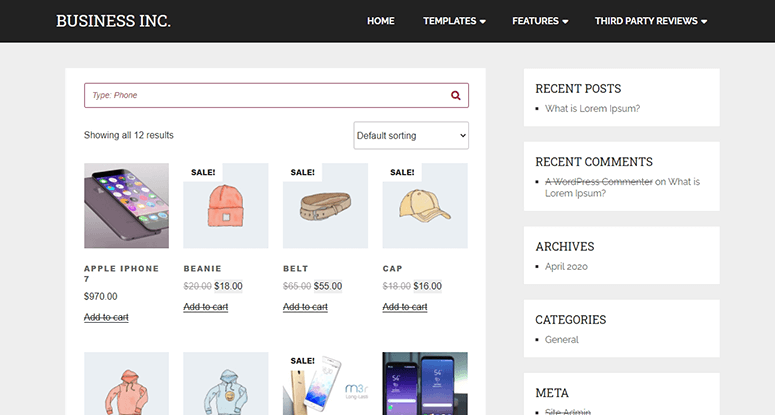
It could also be the elements in the sidebar such as Recent Posts, Recent Comments, and Categories.
Most of the time widgets are used in the sidebars and footers of themes. Since WordPress 2.2, widgets are a part of the “core” and bundled with all new WordPress installations.
To make it easier to choose a widget-ready theme that works for your brand, we did a round-up of the best WordPress themes for you.
Why would you want to use widgets?
You might want to use widgets because they make changing up the sidebar (or other widgetized areas) of your WordPress site much easier. Moving around sidebar items such as category/archive listings and blogroll links can be done with ease through a widget-ready theme.
Now you know what widgets are and why you would want to use them. Next up is how to use widgets to customize your WordPress site.
Step 1: Check if The Theme is Widget-Ready
You can’t use widgets if the theme you’re using isn’t widget-ready in the first place.
If you’re using the WordPress block/Gutenberg editor, you can easily access widget areas of your site from your WordPress admin panel.
Navigate to the Appearance » Widgets tab and depending on the theme you’re using, you’ll see options here such as a header, footer, sidebar, and other widget-ready areas.

For instance, the theme we are using only allows us to edit the footer. There is no option to edit the sidebar as the theme does not have a sidebar included.
Keep in mind that most themes are widget-ready these days. Unless you’re using a really old theme or a basic one, you may find that there are either limited widgets available or none at all.
That said, over time, developers have made sure to include the option of widgets.
Step 2: Default WordPress Widgets
In the Appearance » Widgets tab, you’ll see the same block editor interface to edit your header, footer, and sidebars.
We’ll edit the sidebar for this tutorial. On the right menu, there’s a settings button that opens up two sub-menus to edit the settings of widget areas and blocks.
When you click on the + sign at the top, this will open a new menu with blocks that you can drag and drop into your sidebar.

You can add headings, paragraphs, lists, quotes, images, galleries, and more. You can also reorder the list by simply dragging and dropping them where you want.
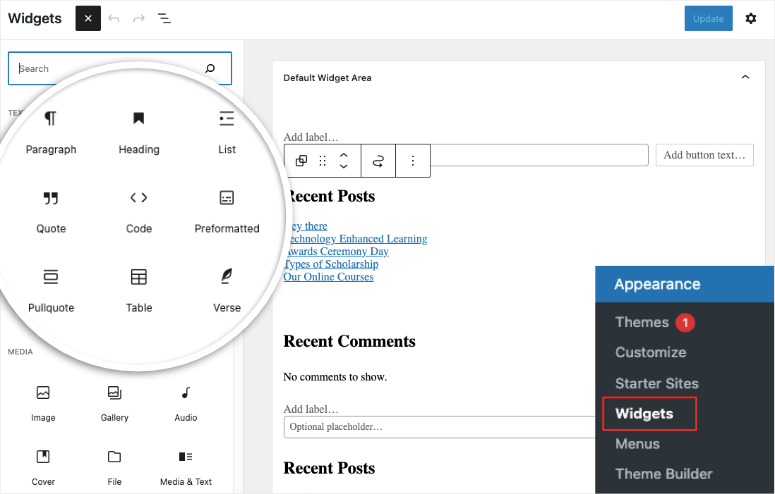
This is really easy to use but the customization options are limited.
Step 3: More Widgets with Other Builders
With many theme builders in the market, you can get a lot more widget options for your site. Let’s explore what the top 2 builders have to offer – SeedProd and Thrive Themes.
Customized Widgets with SeedProd
With SeedProd, when you choose a theme kit and enable it, the plugin will automatically import all the pages and widgets included in that theme.
You can use the toggle button to publish or unpublish them with just a click. For now, let’s edit the sidebar to show you what options you get.
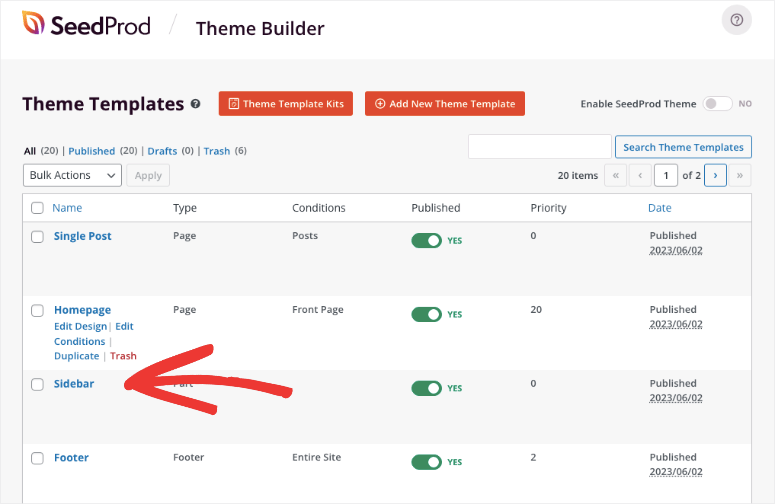
Once you click on the ‘Edit Design’ button, the drag and drop builder will launch. What we love about this builder is that you won’t have to edit and preview your design every time you make a change. You’ll see a preview of your design and can edit your widgetized areas visually.
If you want to add a new element to your sidebar, you’ll find a long list of options in the left menu. You’ll see standard and advanced blocks as well as readymade widgets. Simply select the block and drag and drop it into your sidebar design
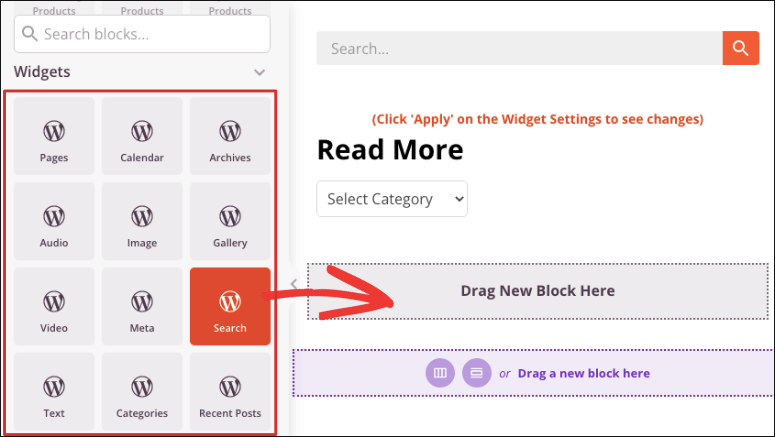
If you want to edit any of the content, select the block in the preview and you’ll see a new editing options open on the left.
Here, you can change the title and other options. So for instance, we’ve added a Categories widget to our sidebar. When we select it, we can change the title, display the posts as a dropdown, show a post count, and show hierarchy.
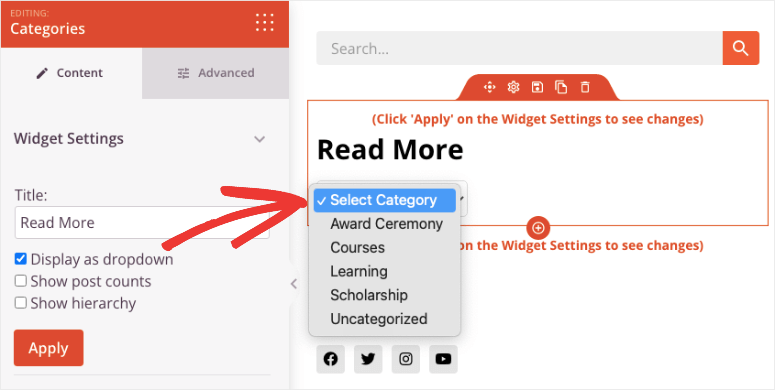
Once you click on the Apply button, the changes will appear in your design. You’ll see it exactly as it would look when it’s live.
When you’re ready, save and publish your design. It really is that simple.
We’ve only covered what SeedProd can do for widgetized areas of your site. You’ll want to see our complete SeedProd Review to learn what you can really do with this builder.
Next, let’s look at what Thrive Themes has to offer.
Customized Widgets with Thrive Themes
With the Thrive Theme Builder, you can choose a theme that matches your style. There’s an easy setup wizard that walks you through setting up your logo, brand color, header, footer, homepage, and blog.
You also get options to change your grid layout. The theme and layout we’re using already have a sidebar enabled. This is displayed boldly at the top of the builder.
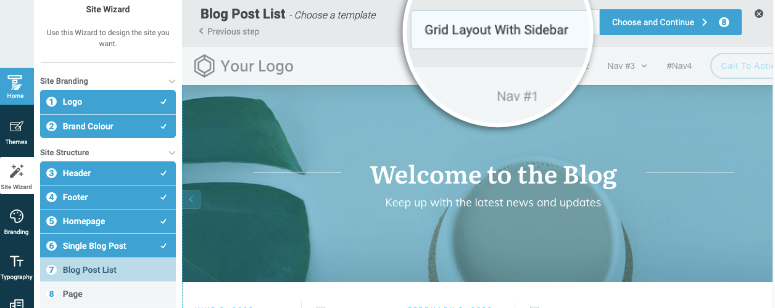
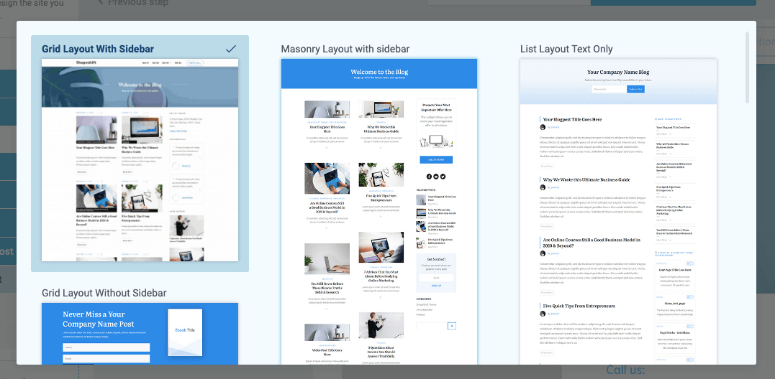
If you click on this option, you’ll get a library of grid layouts to choose from. You can find layouts with text only, without a sidebar, and more.
Once you choose your layout, you’ll see the layout of your page appear on the left. In case there’s a section you want to hide, you can use the little eye icon next to each section to show/hide it.
Then, you can click on any of these sections to edit it. So for instance, we’ll click on Sidebar and we can edit the sidebar on the right.
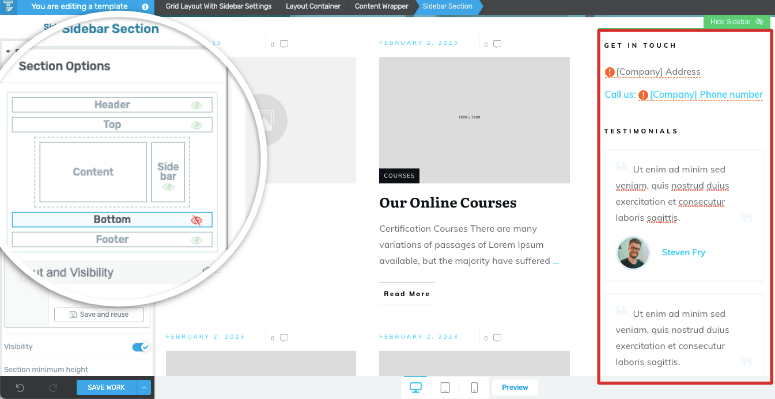
If you select an individual element in the sidebar, you’ll get options to customize the block in the left menu.
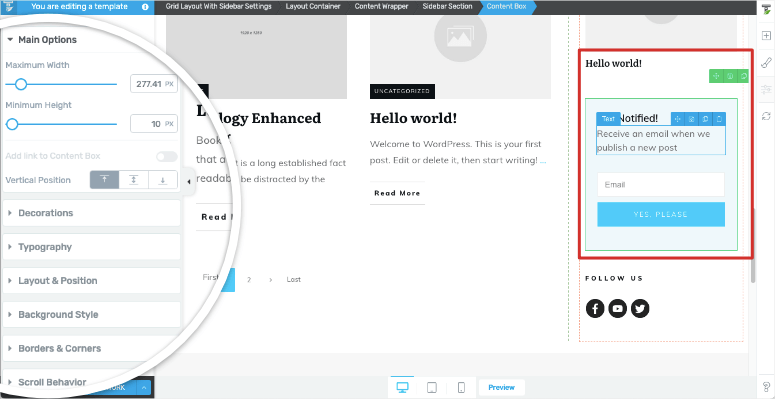
You can change the width and height, typography, layout and position, background, and borders. You can even customize advanced options such as how it appears on scroll, mobile, and desktop.
To edit the contents of your pages and posts, the Thrive Theme Builder works hand in hand with Thrive Architect – a powerful page builder. You can add and edit powerful elements to your pages and posts like countdown timers, social icons, pricing tables, lists, optin forms, image galleries, and so much more.
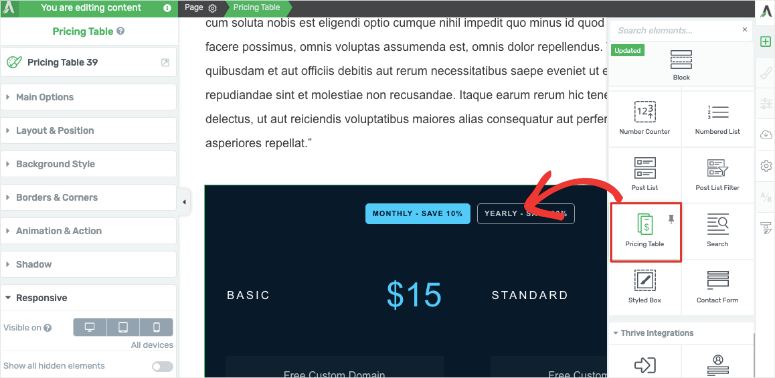
Everything is based on drag and drop functionality so it’s easy to customize your design by adding, deleting, and reordering blocks.
We did a complete review of this page builder that you can read here: Thrive Architect Review.
With that, you’ve learned all about widget-ready areas in WordPress. We hope you found this guide helpful.
Up next, you may also want to see more of our guides:
- How to Add and Style a Button in WordPress
- How to Add a Contact Form to Your WordPress Website
- How to Create a Custom WordPress Layout
These tutorials will help you make your site more conversion-focused. The last guide will make it a lot easier to create new pages and posts with a custom layout.

Comments Leave a Reply