
A few months back, I started noticing something odd. My contact form was getting slammed with dozens of entries a day from the same three countries.
None of them were potential clients. All of them were junk.
I quickly set up CAPTCHA to help with this. This only slowed things down but didn’t stop them completely. What I needed was a way to block the entries at the source, by country.
Turns out, WPForms makes this surprisingly simple.
In this guide, I’ll show you two ways to do it: one that blocks by country IP through WPForms Pro, and one that filters by email domain, which works on any plan, including the free version.
If you’re still deciding which best contact form plugins for WordPress best fit your site, check that guide first.
By the end of this tutorial, your forms will stop accepting entries from whatever countries you choose.
Key Takeaways
- I show you how to block form entries using WPForms’s built-in Country Filter without extra plugins
- I cover the email domain Denylist for sites on the free WPForms Lite plan
- Explain the Allow vs. Deny strategy so you can choose the right approach for your site
- I reveal a simple VPN test that confirms your blocking is actually working before it matters
- I walk you through the most common failure points, including why entries still slip through after you’ve set everything up
What We’ll Accomplish in This Tutorial
By the end of this guide, your WPForms contact form will reject submissions from countries you’ve flagged silently, automatically, and without any extra code or plugins.
Here’s what that looks like in practice:
- Visitors from blocked countries submit the form and see an error message
- Entries from those regions never reach your inbox
- Legitimate users from your target markets aren’t affected at all

What You’ll Need Before We Start
Skill level: Intermediate
Time to complete: ~10 minutes
Before we begin, make sure you have:
- WPForms installed and activated – head to the WPForms website and purchase a Pro plan to access the Country Filter.
- A form already created – you need at least one form in WPForms to apply these settings to. If you haven’t built one yet, create a simple contact form before continuing.
- WordPress admin access – you’ll be working inside the WPForms form editor.
If you’re on WPForms Lite (free), skip to Method 2. The Country Filter is a Pro feature, but the Email Denylist works on any plan.

You can also use the table of contents below to skip to any method or step you want to read.
- Method 1: Block Form Submissions by Country (WPForms Pro)
- Method 2: Filter Submissions by Email Domain (Any WPForms Plan)
- Country Filter vs. Email Denylist: Which Should You Use?
- How to Test if You Have Blocked Form Submissions from Certain Countries
- Common Issues and Quick Fixes
- FAQs: How to Block Form Submissions from Certain Countries
- Final Thoughts
- Resource Hub: WordPress Form Security and Management
Now that you have everything ready, let’s begin.
Method 1: Block Form Submissions by Country (WPForms Pro)

WPForms is a drag-and-drop WordPress form builder used by over 6 million websites.
It’s the form plugin I use across every site I manage. Not just because it’s easy to set up, but because of how much it handles behind the scenes.
The feature we care about here is the Country Filter. It’s part of WPForms’s Spam Protection and Security settings.
When you enable it, WPForms checks the IP address of every person who submits your form and compares it against the country list you’ve configured.
If they’re on the blocked list, the submission is rejected before it ever reaches your inbox.
It takes about 5 minutes to configure once your license is active.
That said, for this tutorial, I’m using WPForms Pro. Not because you can’t manage this with the free version of WPForms, but because the Country Filter is a Pro-only feature.
The good news: Method 2, later in this guide, covers a free alternative that works differently but can be just as effective.
🤓☝️A couple of extras worth knowing:
WPForms also supports CAPTCHA and Akismet integration, which you can stack on top of country filtering for stronger protection.
If you want a broader look at anti-spam plugins for WordPress, that comparison covers every major option.
WPForms also handles conditional logic, so you can build forms that behave differently depending on where a user is from.
This is useful if you want to show different content to different regions rather than blocking them entirely.
Step 1: Set Up WPForms Pro
Head to the WPForms website and grab a Pro plan. Once you’ve purchased, log in to your WPForms account and download the plugin file.
Copy your license key from the account dashboard; you’ll need it in a moment.

Then, in your WordPress dashboard, go to Plugins » Add New » Upload Plugin.
After this, upload the file you downloaded, click Install Now, then Activate Plugin.
From there, navigate to WPForms » Settings and click the General tab. Paste your license key into the License Key field and click Verify Key. You’ll see a green confirmation when it’s active.

If you face any issues, here’s how to install a WordPress plugin.
That’s the setup done. If you want the full walkthrough with screenshots, there’s a complete guide in the WPForms review.
Now open the form you want to protect. To do this, go to WPForms » All Forms, hover over the form name, and click Edit.
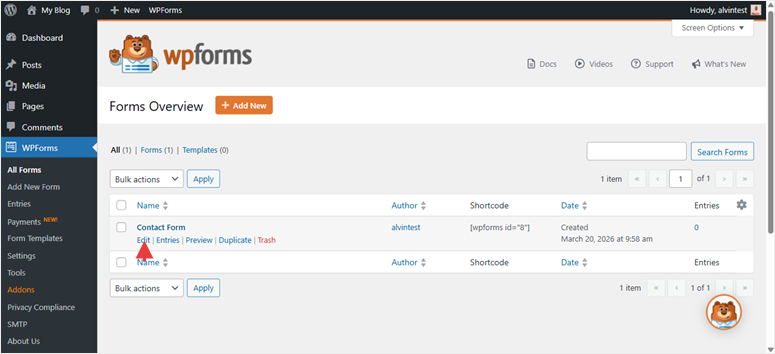
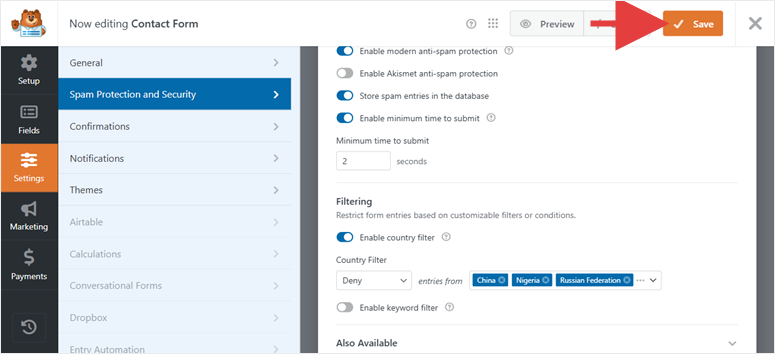
Step 2: Navigate to Spam Protection and Security
Once you’re inside the form editor, look for the Settings tab in the left-hand navigation panel. It’s near the bottom of the panel icons. Click it, and you’ll see a list of settings categories appear.
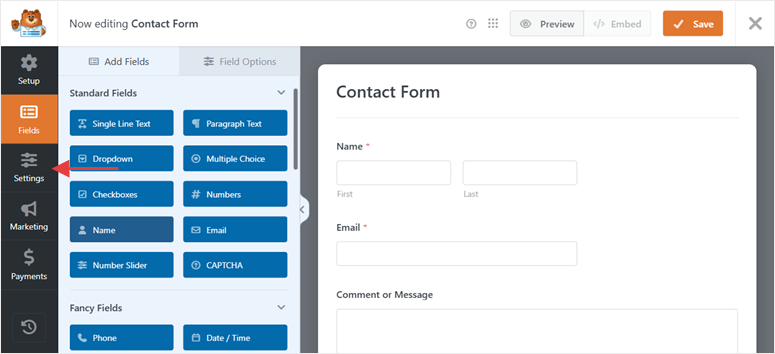
From there, click Spam Protection and Security.
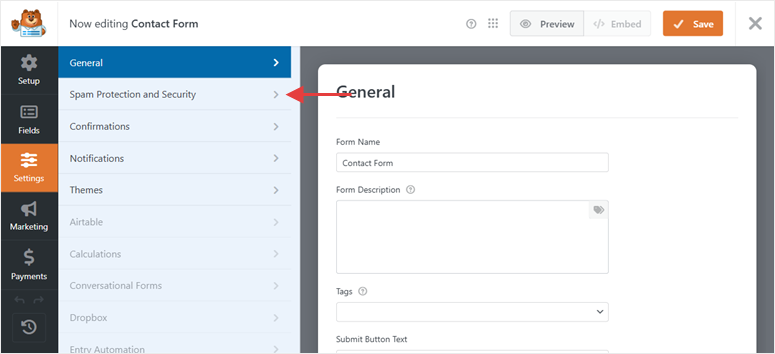
This opens the section where all of WPForms’s filtering options live, including CAPTCHA settings, keyword filters, and the Country Filter.
Step 3: Enable the Country Filter and Choose Your Mode
Here, scroll down inside the Spam Protection and Security section until you see the Filtering heading.
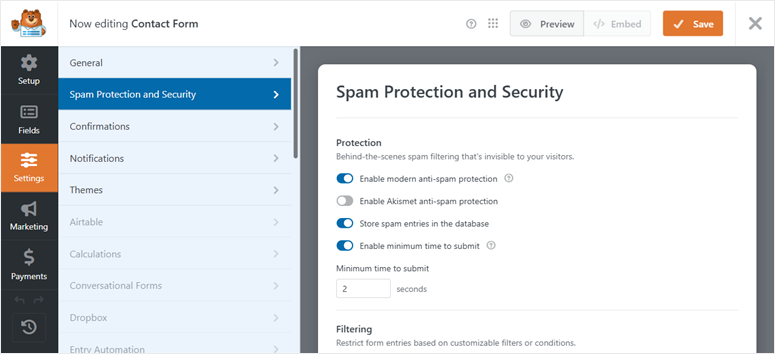
Underneath it, you’ll find the Enable Country Filter toggle. Click it to turn it on.
Once it’s enabled, two new options appear: a dropdown and a country selector.
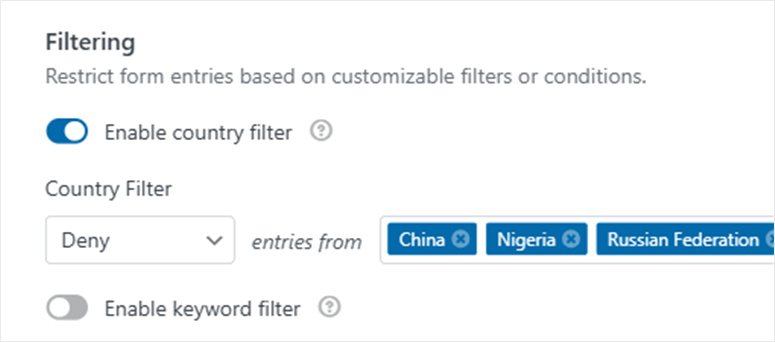
The dropdown is the most important one to get right. It lets you choose between Deny mode and Allow mode. Remember, they work in opposite ways.
- Deny is what most people need. It means “block entries from these specific countries, allow everyone else.” Use this if you’re dealing with spam from a handful of known problem regions.
- Allow is the reverse. It means “only accept entries from these countries, block everyone else.” Use this if your business only serves a specific market and you want to restrict your form to that audience entirely.

After doing this across dozens of sites, I always start with Deny unless I have a clear reason to go the other direction. It’s safer; a misconfigured Allow list can accidentally block your own customers.
Step 4: Select Your Countries and Save
With your mode selected, click into the country selector below the dropdown. It opens a searchable multi-select list. Type a country name to find it quickly, or scroll through the list.

Select every country you want to apply your rule to. For a Deny setup, these are the countries to block. For an Allow setup, these are the only countries that can submit.
But for this tutorial, I will focus on the Deny list.

Once you’ve made your selections, click Save in the top right corner of the form editor. WPForms saves the settings immediately.
Step 5: Make Sure Your Form Is Published on a Page
The Country Filter only works on forms that are live on your site. If your form isn’t embedded on a page yet, here’s the quick version.
Go to Pages » Add New (or edit an existing page).
Then, click the + icon to add a new block, search for WPForms, and select the WPForms block.
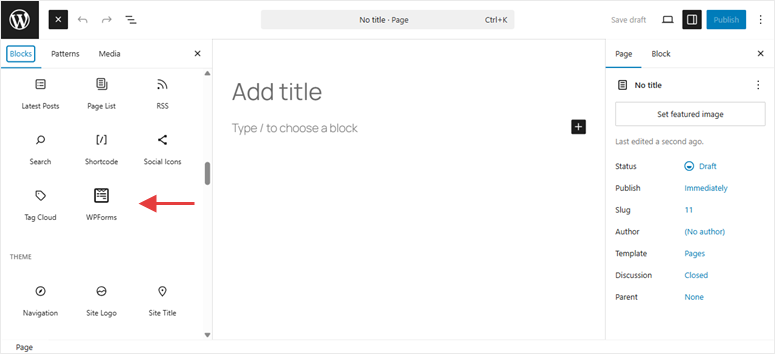
A dropdown will appear where you choose your form from the list. Then update or publish the page.

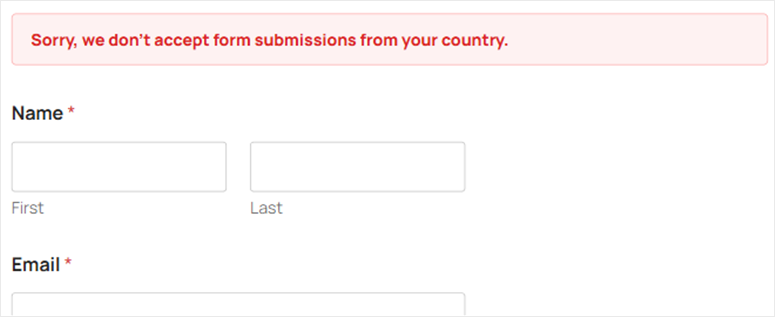
Method 1: Final Result
Once the form is live, any submission from a blocked country will be rejected. The visitor sees an error message, and the entry never reaches your WPForms inbox.
Method 2: Filter Submissions by Email Domain (Any WPForms Plan)
If you’re on WPForms Lite, the setup takes about two minutes. Go to Plugins » Add New, search for WPForms, and install the free WPForms Lite plugin.

Click Activate, and you’re in; no license key needed. For the full setup walkthrough, head to the WPForms review.
If you’re on WPForms Lite or an entry-level paid plan, the Country Filter isn’t available. But there’s a different approach that works for any plan.
Instead of blocking by IP address, this method blocks by email domain.
You set rules that reject submissions from specific email domains like *.cn (all Chinese domain emails) or *.ru (Russian domains). Anyone who submits using an address from those domains gets rejected.
It’s not as airtight as IP-based blocking since someone could use a Gmail account and slip through, but it handles a meaningful chunk of spam, especially the kind that comes from regional free email services.
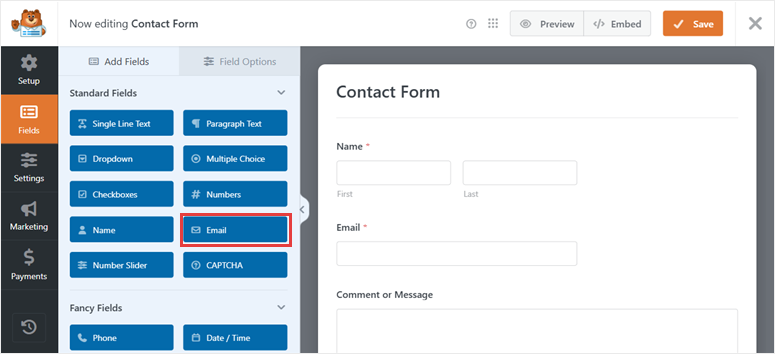
Step 1: Open Your Form and Check for an Email Field
Go to WPForms » All Forms, hover over your form, and click Edit. Once you’re in the form editor, check whether you have an Email field in your form.
If you do not have a form ready, you can quickly create one using the 2100+ form templates available.

Once in the form builder, look for the email field.
If you don’t see one, drag the Email field from the left panel into your form. You’ll find it under the Standard Fields section. Drop it wherever makes sense in your form layout.
The Denylist feature is attached to the Email field specifically; it won’t appear anywhere else in the settings.
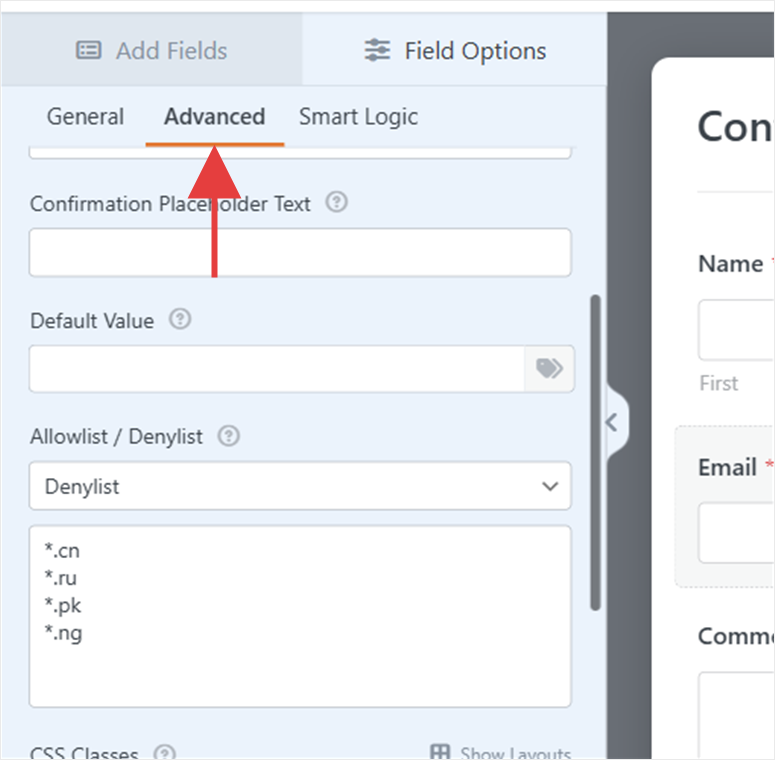
Step 2: Open the Email Field’s Advanced Settings
Click on the Email field in the form builder to open its settings in the left panel. By default, you’ll land on the General tab. So, switch to the Advanced tab, it’s right next to General at the top of the panel.
The “Advanced” tab is where per-field settings like validation rules, CSS classes, and the Allowlist/Denylist options live.
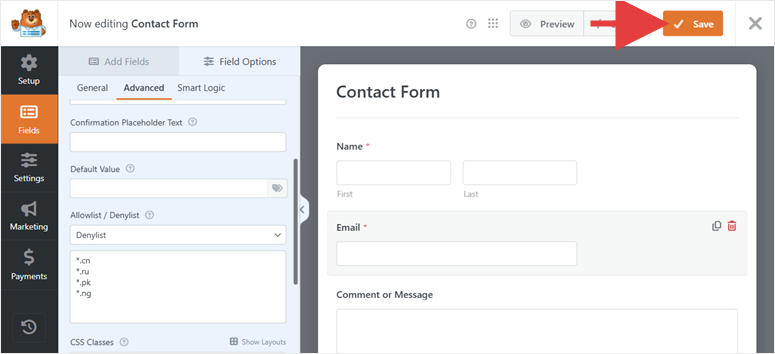
Step 3: Set Up the Denylist
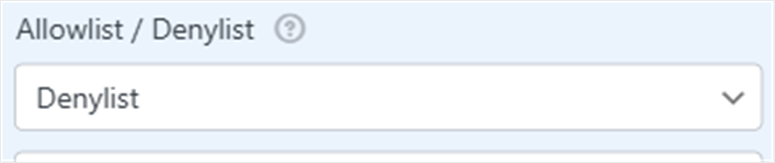
Scroll down inside the “Advanced” tab until you find the Allowlist / Denylist section. It has a dropdown set to None by default.
Click that dropdown and select Denylist. (Or Allowlist if you want to restrict submissions to specific trusted email domains only.)
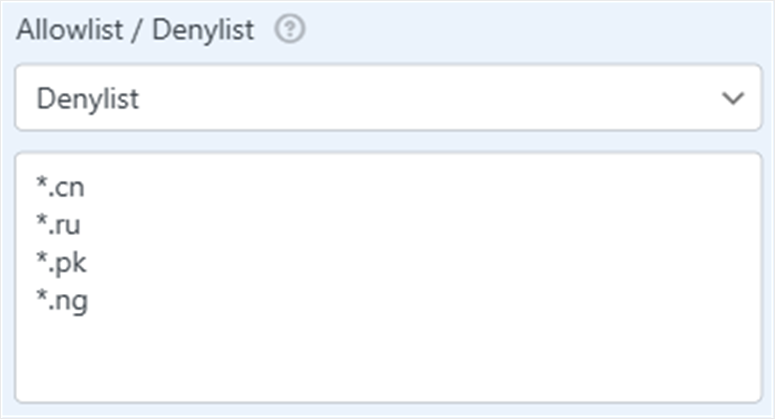
Once you select Denylist, a text area appears. This is where you enter the email addresses or domains to block; one entry per line.
For blocking entire country domains, use the wildcard format: *.cn, *.ru, *.pk. For blocking a specific domain, enter it directly: spamdomain.com.
The trick I’ve learned: start with just the domains generating the most spam, not every country you can think of. An overzealous Denylist can accidentally block legitimate users from email providers you didn’t expect.
Step 4: Enter Your Domain Rules and Save
With your rules entered in the text area, click Save in the top right corner of the form editor. The rules apply immediately to any new submissions.
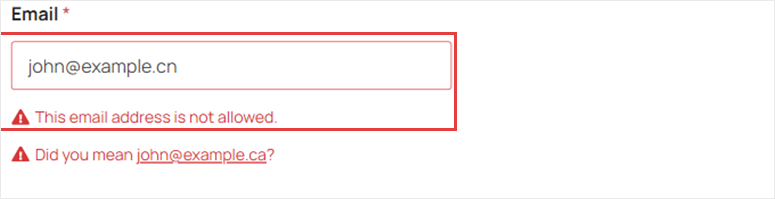
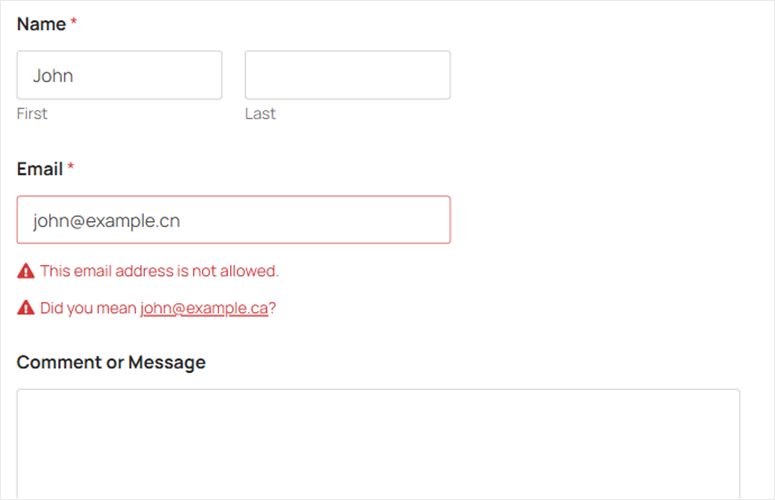
Method 2: Final Result
When someone submits using an email from a blocked domain, WPForms rejects the submission with an inline validation error on the Email field. They can’t get through without using a different email address.
That’s it. You can now block form submissions from specific countries through either the free or pro version of WPForms.
Country Filter vs. Email Denylist: Which Should You Use?
Both methods are built into WPForms — but they work differently and suit different situations.
| Feature | Country Filter | Email Denylist |
|---|---|---|
| Plan Required | WPForms Pro ($199.50/yr) | Any plan including Lite (free) |
| How It Blocks | IP address geolocation | Email domain matching |
| Block Accuracy | High – works regardless of email used | Medium – bypassable with Gmail or similar |
| Best For | Blocking spam from known spam-heavy countries | Blocking regional email providers or free plan users |
| VPN Bypass Risk | Yes, VPN users can spoof their country | No, email domain is checked, not IP |
| Setup Time | ~5 minutes | ~3 minutes |
The best setup uses both together.
The Country Filter blocks IP-based spam from problem regions. The Email Denylist catches anyone who gets through with a regional email address. Together, they cover the gaps the other leaves open.
👉 Get started with WPForms here
How to Test if You Have Blocked Form Submissions from Certain Countries
Don’t just save and assume it’s working. Here’s exactly how I verify these settings before I call a project done.
Testing the Country Filter (Method 1):
The most reliable way is a VPN. Set your VPN to a country you’ve blocked, then visit your form and submit a test entry.
If the Country Filter is active, you’ll see an error message and no entry will appear in WPForms » Entries.

If the submission goes through, double-check that you saved the settings and that the form on the page is the same one you configured.
Testing the Email Denylist (Method 2):
This one is easier since you don’t need a VPN. Just submit your form using a test email address with a blocked domain.
For example, if you blocked *.cn, try submitting with [email protected]. You should see an inline error on the Email field immediately.
In both cases, success looks the same: the submission is rejected, no entry appears in your WPForms inbox, and the visitor sees an error message.
Common Issues and Quick Fixes
Problem: “The Country Filter option doesn’t appear in my settings”
What’s happening: The Country Filter is a WPForms Pro feature. If you’re on Lite or a lower paid plan, the setting simply isn’t there.
Quick fix: Go to WPForms » Settings and check the License tab. If your license shows as inactive or expired, re-enter your key and click Verify Key. If you’re on a plan that doesn’t include the Country Filter, upgrade to Pro or use Method 2 instead.
My experience: I’ve seen this catch people out after a plan renewal. The license key sometimes needs to be manually refreshed even if the subscription is current.

Problem: “Entries are still getting through after I enabled Country Filter”
What’s happening: VPN users can mask their real country. Someone submitting from a blocked country via a VPN will appear to be from a different location.
Quick fix: Layer the Country Filter with Method 2’s Email Denylist. VPN users can hide their IP, but they can’t change their email domain. Combine both methods for maximum coverage.
Problem: “My country filter is blocking legitimate users”
What’s happening: You’re using Deny mode, but one of the blocked countries includes legitimate customers, or you’ve accidentally used Allow mode with an incomplete country list.
Quick fix: Go back to the form’s Spam Protection and Security settings. If you’re in Deny mode, remove the affected country from your block list.
If you’re in Allow mode, add the missing country to your approved list. Always double-check your Allow list is complete before publishing.
Well done. You can now set up your forms to deny submissions from specific countries and troubleshoot any errors. If anything is unclear, check out the commonly asked questions below.
FAQs: How to Block Form Submissions from Certain Countries
Does blocking form entries from certain countries affect my SEO?
No. The Country Filter only affects form submissions. It doesn’t block anyone from viewing your site. Visitors from blocked countries can still browse your pages, read your content, and be indexed by search engines. Their form submissions just won’t go through.
What does a blocked user actually see when they try to submit?
WPForms shows an inline error message, the same kind of validation error you’d see for a missing required field. The message doesn’t say “your country is blocked” by default. It’s a generic error message. They can try submitting again, but the result will be the same.
Can someone bypass the Country Filter using a VPN?
Yes. The Country Filter works by checking the submitter’s IP address against a geolocation database. A VPN lets someone appear to be in a different country. This is why combining Method 1 with Method 2’s Email Denylist is worth doing. Someone using a VPN still has to submit with an email address, and you can block regional email domains regardless of IP.
Is the Country Filter available on WPForms free (Lite)?
No. The Country Filter is a WPForms Pro feature. If you’re on WPForms Lite, Method 2, the Email Denylist is your alternative. It’s built into the Email field settings and available on every plan, including free.
Can I block multiple countries at once?
Yes. The country selector in WPForms is a multi-select dropdown. You can add as many countries as you need in a single session. There’s no limit on how many countries you can include in your block or allow list.
Should I use Allow mode or Deny mode?
Use Deny if you want to keep most countries accessible, but block a specific handful of known spam sources. Use Allow if your business only operates in specific markets and you want to restrict submissions to those regions exclusively. Most sites do better with Deny. Allow mode requires you to maintain a complete whitelist, and a missing country means those users can’t reach you at all.
Final Thoughts
If form spam has been piling up from the same regions, you now have two solid ways to deal with it. WPForms makes the Country Filter straightforward to set up.
Once it’s on, it runs automatically with no ongoing maintenance.
The Email Denylist takes a few extra minutes to configure but adds a useful second layer, especially for catching anyone who slips past IP-based blocking.
Start with one method, test it, then layer in the second if you’re still seeing unwanted entries. Between the two, most sites get to near-zero spam from the targeted regions within a day of turning them on.
Resource Hub: WordPress Form Security and Management
Looking to go further with WordPress forms and spam protection? These guides cover everything from choosing the right form plugin to locking down your site against bots.
- Contact Form 7 vs. WPForms Lite: What I Discovered – Head-to-head comparison of both free form plugins across features and ease of use
- How to Create a Lead Capture Page in WordPress – Turn your forms into a dedicated lead capture machine with this step-by-step guide
- WPForms vs. Google Forms: Which One is Best? – When it makes sense to stay with Google Forms vs. upgrading to WPForms
- Best WordPress Security Plugins Compared – Broader site protection options that complement form-level spam control
- Best WordPress Lead Generation Plugins – Tools to maximize the quality of leads your forms actually bring in
- WPForms vs. Gravity Forms – Detailed side-by-side breakdown for sites considering either plugin

Comments Leave a Reply