Wondering how to secure your WordPress forms with password protection? If so, you came to the right place. With the right forms plugin and the proper know-how, you can quickly and easily add password protection to your WordPress forms.
In this article, we’ll share how to secure your WordPress forms with password protection the EASY way.
Password Protect Your Form with WPForms

If you’re going to have forms on your WordPress website, then we recommend using the absolute best forms plugin on the market: WPForms.
If you’re asking about how to secure your WordPress forms with password protection, you’re probably looking to avoid getting unwanted form submissions. If that’s the case, then WPForms is the perfect choice for you.
Not only does WPForms have a Post Submissions addon, which will allow you to get submissions in the first place; it’s also incredibly easy to add password protection to.
Adding password protection to your WPForms submission forms will save you from wasting time reviewing content you don’t intend to use. Only those with access will be able to send you content.
WPForms features an intuitive drag and drop builder, making it easy to use and beginner-friendly, even when creating advanced forms. It comes with GDPR enhancements so that you can be compliant, even when asking for others’ valuable information.
IsItWP readers can save 10 percent off the cost of WPForms Pro by using the coupon code SAVE10.
Once you’ve purchased the WPForms plugin, follow our 4-step guide below on how to secure your WordPress forms with password protection.
You’d also like to check out this guide on how to choose a secure password or try using our strong password generator, to cut the hassle.
Step 1: Install WPForms on Your Website
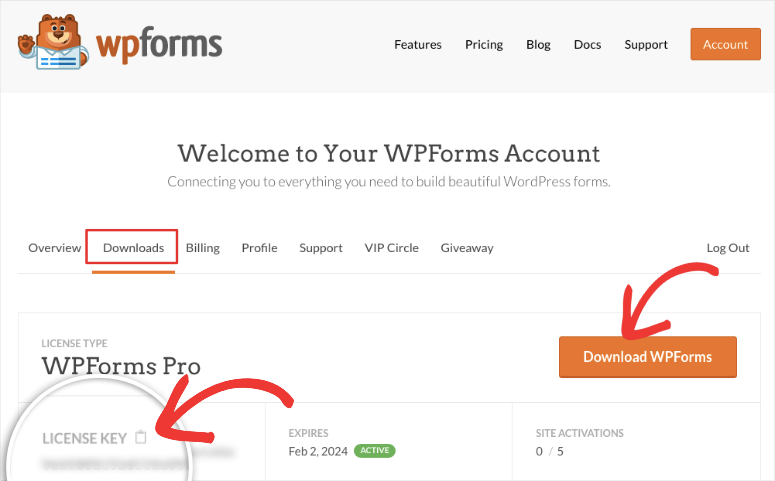
When you sign up for WPForms, you’ll get a plugin file and license key inside your account. Download the file to your computer and copy the license key.
In your WordPress dashboard, scroll down to Plugins » Add New page on the left-hand side.
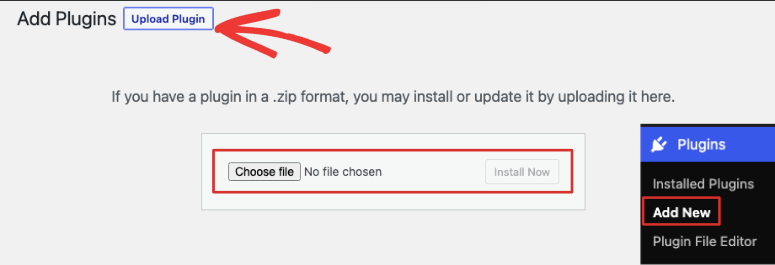
From there, click the Upload Plugin button.
Now you can choose the .zip file you downloaded from the WPForms website. Note: If you haven’t downloaded your plugin and addons from WPForms, you can find them in your Account section on their website.
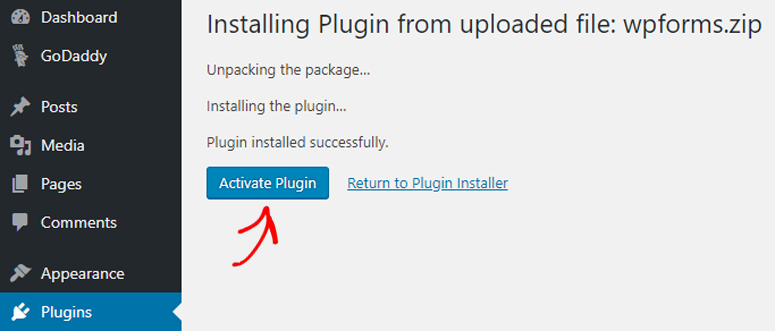
Once the plugin has been uploaded, click the Activate button.
Now, go to the newly-added WPForms tab on your dashboard’s navigation bar. Head to WPForms » Settings.
Enter your license key in the appropriate field to gain access to all of WPForms Pro’s features. You can find your license key in your Account section on the WPForms website. Simply copy and paste it into the field.
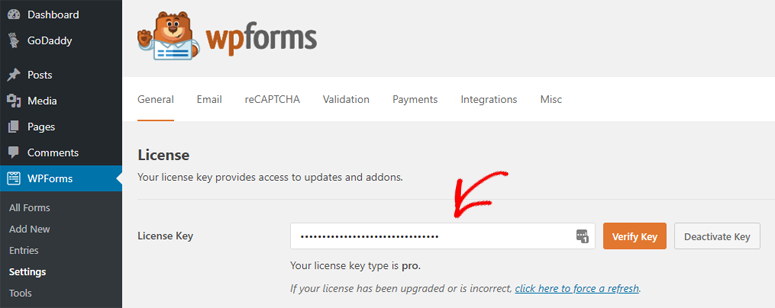
Your plugin is now ready to rock and roll. You have basic form-building capabilities.
Now, it’s time to kick it up a notch.
Step 2: Activate Your Addons
There are 2 addons you’ll need to activate: Post Submissions and Form Locker. The first will allow you to accept content submissions from your visitors, while the second is needed to secure your form.
First, head to WPForms » Addons.
Locate the Post Submissions and Form Locker addons and install them by clicking the Install button.
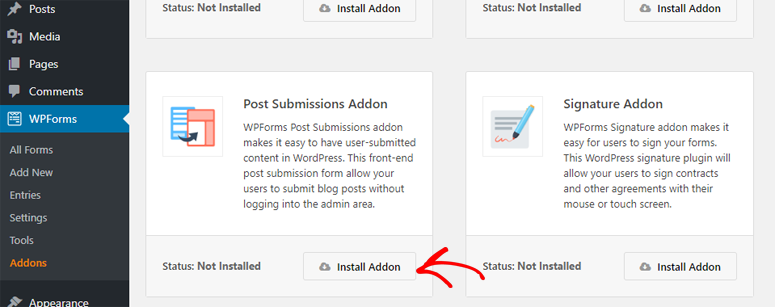
Once installed, make sure the addons are activated. Hit the activation toggle.
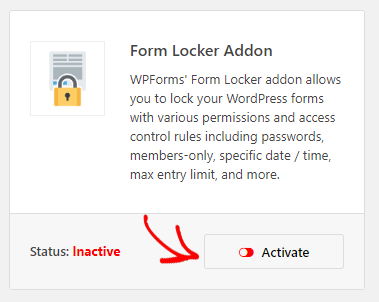
It will turn green and say “Active” if you’ve successfully activated it.
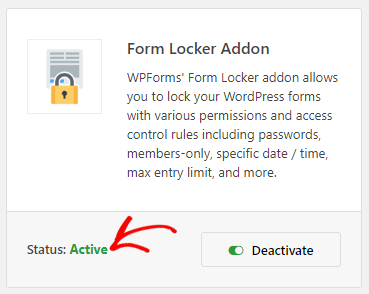
You’re good to go! It’s time to build your first form.
Step 3: Create a WordPress Form
On your dashboard, head to WPForms » Add New.
Once the WPForms editor appears, scroll down and find the Blog Submissions Form template and click on it.
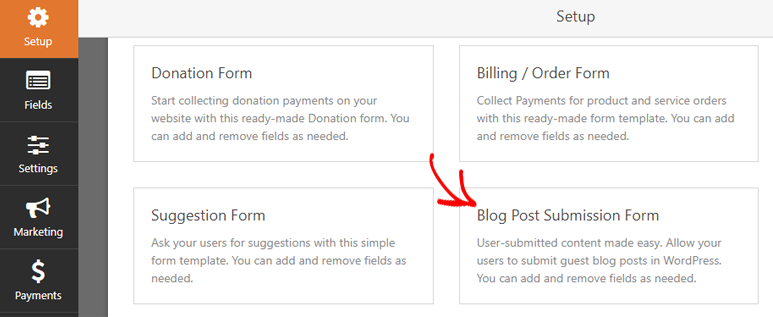
A form for accepting blog posts will appear:
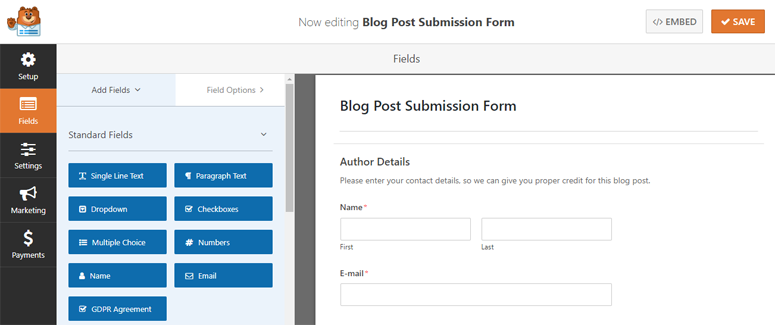
Feel free to drag and drop fields to your heart’s content. Get it looking exactly how you need it to, and then click Save.
Step 4: Enable Password Protection
To enable password protection on your submissions form, you’ll be utilizing the Form Locker addon you activated.
While still in the form editor, go to Settings » Form Locker.
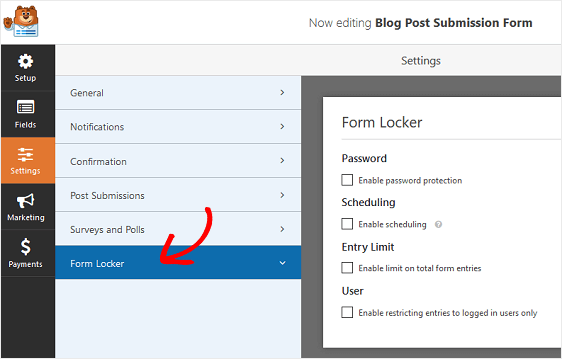
Check the Enable Password Protection box under the Password section.
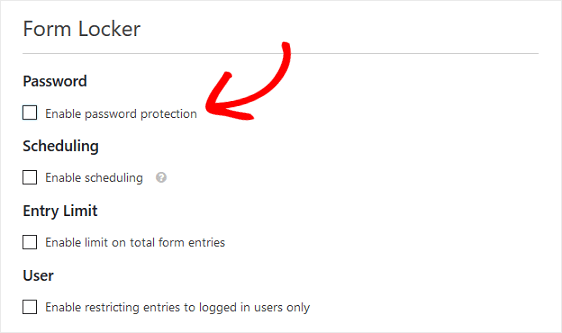
From there, you can configure the 2 password settings that appear. For Password, you can choose the password you want users to enter to access your submissions form. For Display Message, type what you want to appear above the password field so your users know they need a password in order to submit their content.
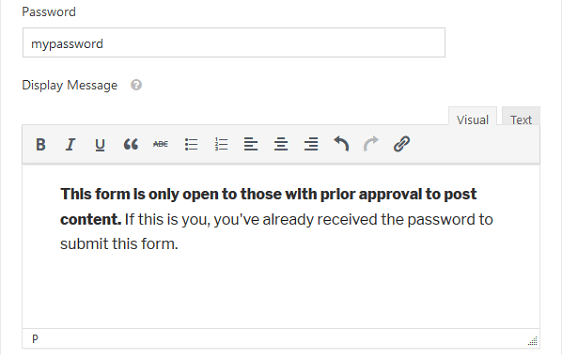
Upon finishing, click Save.
Once your form is live on your site, this message (or whatever you wrote) will appear for your users:
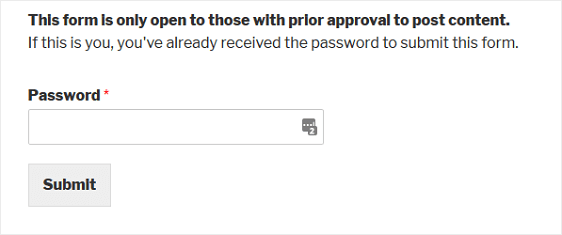
After the user enters the correct password, the submission form will appear and they’ll be able to send you their content.
Your submission form is officially password protected!
We hope this article helped you learn how to secure your WordPress forms with password protection.
If you liked this post, you might also love our tutorial on how to create a custom user registration form in WordPress.
Also, you can check our guide on how to save form progress to add the save and resume functionality on your WordPress forms.

Comments Leave a Reply