
Do you want to add social proof notifications to your site to grow your subscriber list and increase conversions?
Social proof builds trust by showcasing the activity of visitors on your site. When users see what others are doing, such as buying a product or signing up for your newsletter, they’re more likely to do the same.
In this tutorial, we’ll show you how to add social proof notifications to your WordPress site to build your subscriber list and grow your business.
What Is Social Proof?
Social proof is a marketing concept that uses a psychological phenomenon called FOMO (“fear of missing out”). In simple terms, it encourages users to do what others are doing.
By showing that people on your site are actively signing up for your offers because they’re interested in your content, you can pique their interest and increase your chances of converting them into subscribers.
Some of the ways you can spark interest and build trust through social proof include:
- Real-time statistics and activity of users on your site such as purchases, newsletter signups, social media follows, and more.
- Customer reviews and testimonials from those who have already tried and liked your product or service.
- Trust seals, certifications, and badges that you may have earned from agencies and authorities.
- Case studies where your product or service has worked effectively.
- Social media follower and subscriber count, shares, and likes.
There are plenty of ways in which you can make use of your existing customer base and social media following to establish a strong brand and get new subscribers and customers.
Now let’s turn our attention to a specific type of social proof to see how it can grow your contact list.
How Does Social Proof Notifications Help Grow Your List?
Online consumers feel more confident in making decisions when they see others have already taken the step.
This is because social proof has a number of effects on us. First, as we already mentioned, it leverages the power of FOMO to motivate your site’s traffic to take action.
Second, it establishes more credibility for your online brand. That’s because you’re showing your audience that other customers know, love, and engage with your brand.
But you may be wondering, “How can I add social proof notifications to my site if I don’t know how to code and don’t have a large budget?”
That’s exactly what we’ll be covering today.
More specifically, we’ll focus on how to use social proof notifications to display in a non-intrusive popup on your site that your visitors can’t miss.
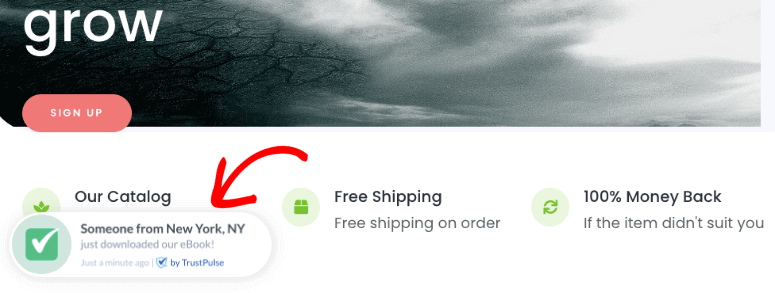
This will alert visitors about the actions others are taking to encourage them to do the same.
Growing Your List With Social Proof Notifications
The easiest way to add social proof notifications on your website is by using TrustPulse.
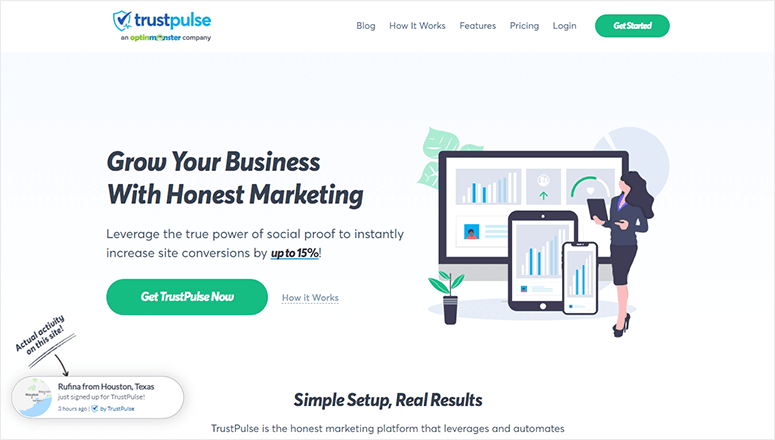
TrustPulse is hands down the best WordPress social proof and FOMO plugin on the market.
With TrustPulse, you can display real-time user activity and statistics as popup notifications. The activity can showcase people making purchases, signing up for newsletters, submitting forms, and so much more.
Step 1: Install, Activate, and Connect TrustPulse
First, you’ll need to install and activate the TrustPulse plugin on your website.
If you’ve never installed a plugin before, no worries. You can check out our guide on how to download and install plugins.
Next, visit TrustPulse from your WordPress dashboard menu and click on the ‘Get started for free’ button to continue.
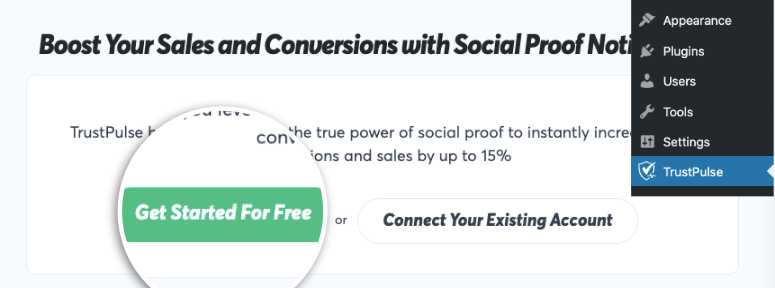
This will take you to the TrustPulse website where you can sign up for a free account. With the free plan, you get up to 500 sessions per month. If you would like to increase that number, consider signing up for a premium version.
Step 2: Create Your Social Proof Notification
After you sign up, you can create your first popup notification campaign. To get started, click on ‘Create Campaign’ to open up the campaign editor.

First, under the Campaign Type tab, you need to add a title for your campaign and choose the website that you’ve connected your TrustPulse account to.
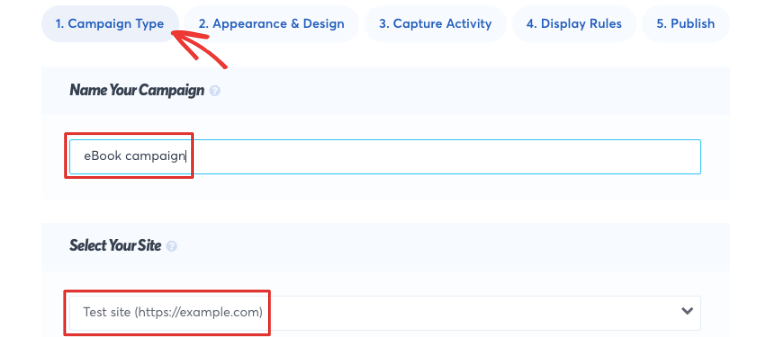
Next, you can choose your campaign type. You can select Recent Activity or On-Fire.
Recent activity displays how individual customers are interacting with your site in real-time. This can include registrations, signups, purchases, and more.
On-fire campaigns show group activity within a given period such as ‘100 people signed up for our newsletter!’
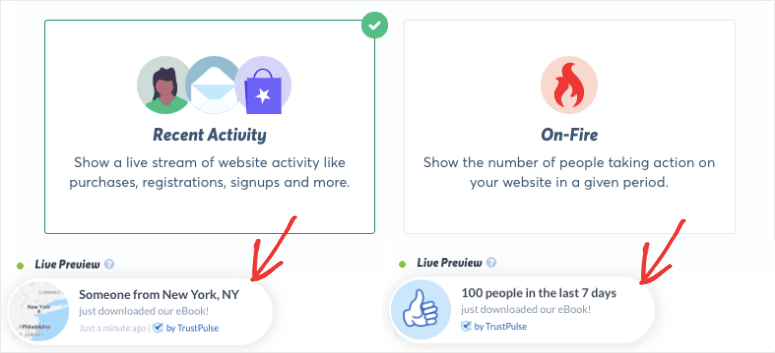
Once you’ve selected which type of campaign you want, click on the ‘Next Step’ button to continue.
Step 3: Design Your Campaign’s Appearance
On the next page, you can now choose the language and appearance of the notifications. Here, you need to change the message text and add the link to where your visitors will be taken when they click on the notification.
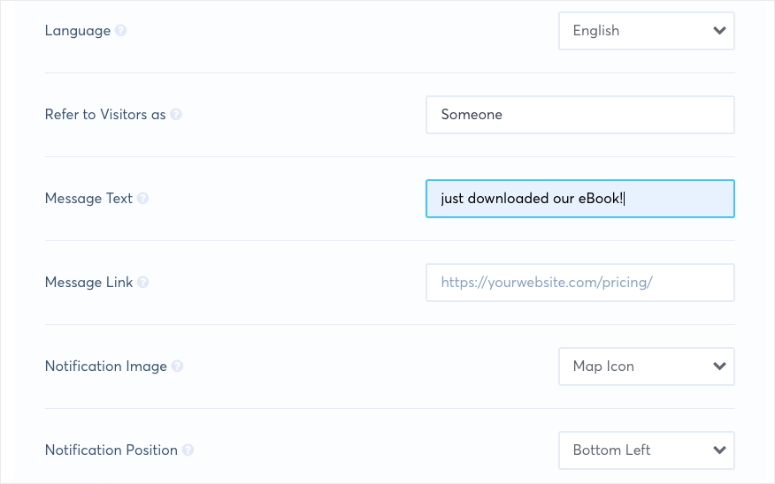
On the same page, you’ll also find options to change the image, position, style, size, and other visual aspects of your campaign. There are also advanced settings that let you completely customize the popup to match your website theme and brand.
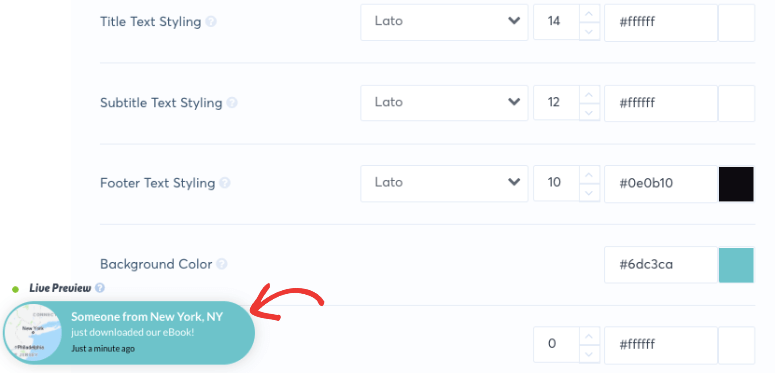
Once you’re happy with the design of your campaign, you can move on to the next step: choosing how to capture the activity.
Step 4: Capture User Activity
TrustPulse gives you two ways to capture your user’s activity. The first option is AutoMagic which allows you to capture form activity or user clicks that match different conditions.
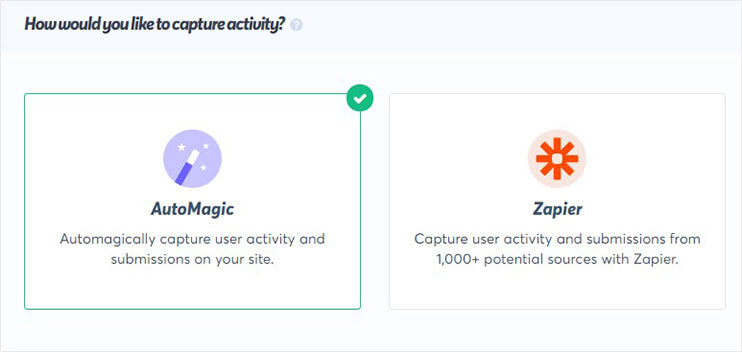
With form activity, for instance, you’ll get notifications from newsletter subscribers on a signup form or purchase activity from a checkout form.
And user clicks will showcase activity from buttons or links on your site.
For instance, it will pick up activity on buttons that allow users to download an eBook, subscribe to your YouTube channel, or follow you on social media.
You can also use Zapier which is a software that lets you integrate over 2,000 apps. By selecting this option, you’ll be able to capture activity from various 3rd-party apps that you may choose to integrate on your site.
So, for example, you could create a notification whenever someone leaves you a review on Google My Business or Yelp. Even though the activity wasn’t taken on your site, you can still show a notification whenever this event occurs.
For this tutorial, we’ll choose AutoMagic. By default, this will capture activity from forms on your website such as contact and checkout forms.
However, we’ll show you how to change this to capture activity from a button click as well.
Once you select AutoMagic, TrustPulse will ask you for more details. First, under ‘Where should we watch for activity on this site?’, you need to select ‘Activity from exact URLs’ from the drop-down menu.
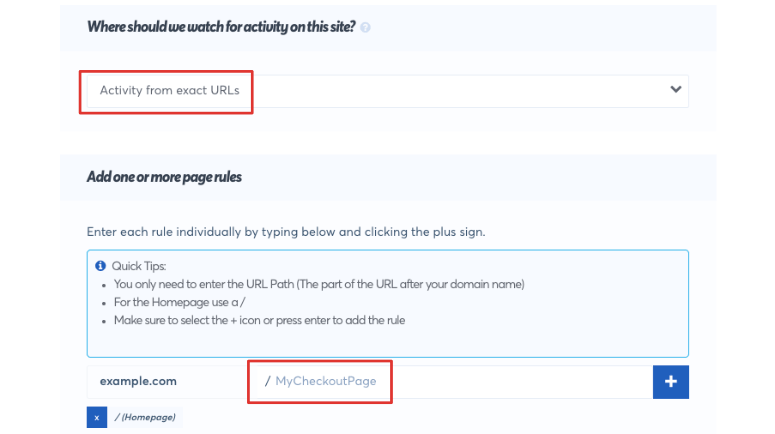
This will open up more options to enter the URL path where the button is present.
Our sign up button is on the homepage, so we simply add a forward slash to select the homepage.
Now, under ‘Select an Automagic Activity Type’, open the drop-down menu and select the ‘User Click’ option. Next, enter the name of the button that you want to track. We’ve selected the ‘sign up’ button on our site.
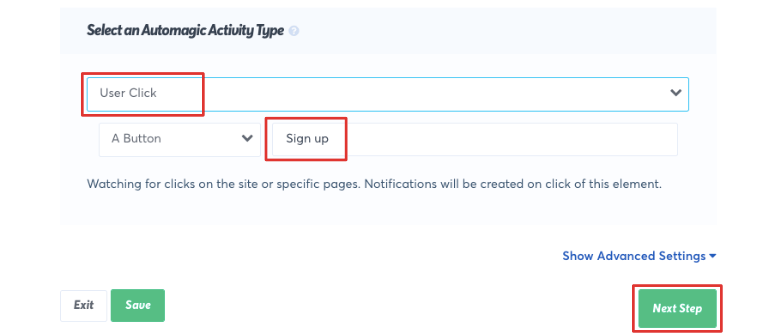
With these rules in place, TrustPulse will look for activity on the sign up button on the homepage.
Once you’ve set your capture activity preferences, click on the ‘Next Step’ button to continue customizing your campaign.
Step 5: Configure Your Campaign’s Display Rules
On the next page, you need to set up the display rules that will determine where and how your notifications will be shown.
The notifications can be displayed on specific pages or on all pages on your site.

Next, set the time gap between notifications and the duration of each notification. You’ll also need to decide whether you want these notifications to play on loop.
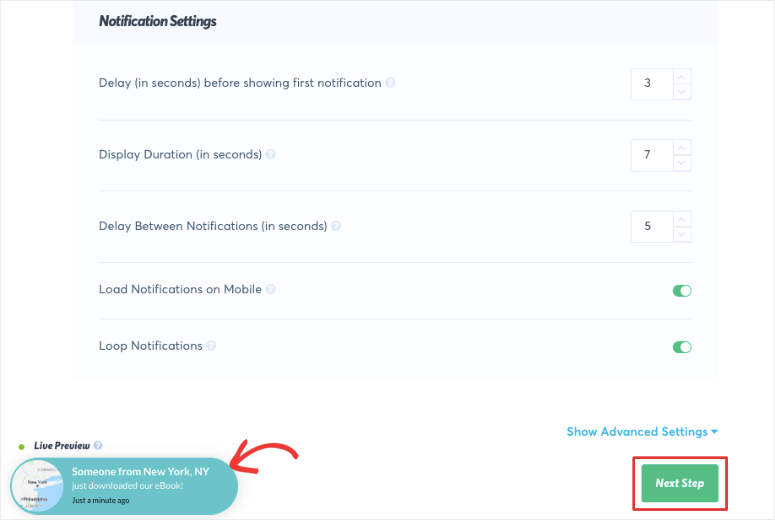
Once you’ve configured the settings of your campaign, you’re ready to launch it. First, we recommend checking out the live preview of the campaign as this is what the popup will look like when it’s live.
Next, you’ll need to click on the ‘Next Step’ button to launch your TrustPulse campaign.
When you do this, you’ll see a small preview of your campaign. Then you’ll need to click Launch Your TrustPulse Campaign.
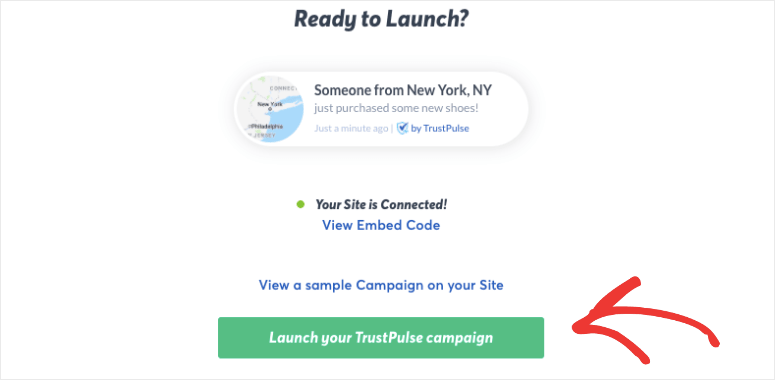
Now that your campaign is live, you can visit your website. You’ll see the social proof notification appear on your site that displays your visitor activity.
These popups will leverage FOMO to grow your list and increase conversions.
Track Your Social Proof Campaign
TrustPulse tracks the data and statistics of your campaigns so that you can see what works and what doesn’t, which pages lead to the highest conversions, and what days your visitors are most active.
All this information gives you valuable insights into your customers which you can use to create optimized campaigns to get the best results.
To track your campaign, go to TrustPulse on your WordPress dashboard. Here, you need to select ‘View all my campaigns’ to get a list of the campaigns you’ve created.
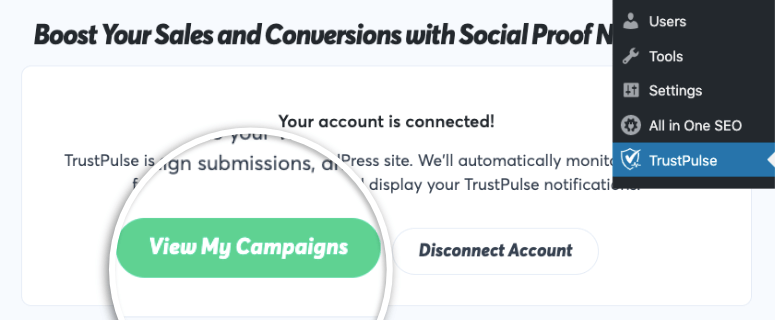
Under the ‘actions’ column, select the statistics icon which will take you to the statistics page of your campaign.

Here, you’ll see all the notifications that were displayed on your site. You’ll see how many notifications were generated, how many people viewed them, and how many clicked on them.
TrustPulse also shows you the pages that lead to the most conversions. This will help you create targeted campaigns that will give you better results.
More Ways to Grow Your List in WordPress
Social proof notifications are a great way to nudge your visitors to take action on your site such as signing up for newsletters or discounts.
When you capture visitor emails, you can connect with them further and let them know about new launches, sales, discounts, and more that would help grow your business tremendously.
If you’re looking for more ways to expand your reach and get more email subscribers and social media followers, we recommend trying OptinMonster.
OptinMonster is the best lead generation plugin for WordPress that helps you grow your list, get more leads, and increase sales.
OptinMonster lets you create visually-stunning lightbox popups, slide-ins, banners, welcome gates, and more to capture emails and leads on your site.
It has powerful features like Exit-Intent® to capture leads from visitors who are leaving your site in order to reduce cart abandonment and increase your customer return rate.

In addition to this, OptinMonster records all activity and data and turns it into actionable insights. You can use this data to tailor your campaigns and make them more effective to maximize leads and conversions. See our full OptinMonster Review »
And that’s it! You now have everything you need to add social proof notifications to your website.
We hope this article helped you understand how and why social proof notifications are such a valuable tool. If you liked this post, then you may also be interested in the following resources:
- The Best Lead Generation Plugins for WordPress
- The Best Email Marketing Services for Small Business
- 15 Conversion Rate Optimization Tools to Skyrocket Growth
These articles will help you grow your subscriber list and increase your engagement with them to ultimately grow your business.

Comments Leave a Reply