
Do you want to add schema markup to WordPress?
Schema markup is a code that you can add to your website for search engines to understand your content more easily. This way, your website looks great in the relevant searches, and you get more traffic that converts into customers.
In this article, we’ll show you how to add schema markup to your WordPress website and increase your traffic.
Why Should You Add Schema Markup to WordPress?
Schema markup is popular among search engines to display useful and additional information in search results. It helps increase your click-through rate (CTR) and increase website traffic.
You get rich snippets in Google searches by adding schema markup code to your site. This helps users understand the context of your content.
Not only does your content look more presentable in the search engines, but rich snippets encourage users to click on your link. This boosts your search rankings, and you’ll start attracting the right people to your website.
Now that you know the benefits of schema and rich snippets, let’s look at how to add schema markup in WordPress.
Adding Schema Markup to Your WordPress Website
Adding the schema markup code manually can be difficult for beginners, and it’ll take a lot of time. It requires you to add code, and if anything goes wrong, you’ll need to start all over again.
We recommend using All in One SEO (AIOSEO), the best and most powerful WordPress SEO plugin on the market. It comes with useful tools that you can use to improve your website’s SEO and also add schema markup in just a few clicks without editing any code.

AIOSEO lets you add schema code to your content, posts, and pages. You can also enable a sitelinks search box to let users directly search your content from Google.
It’s easy to do, and we’ll walk you through each process one by one.
For more details, you should also check out our complete All in One SEO review.
Now let’s dive into the tutorial.
Step 1. Install and Configure All in One SEO Plugin
First, you need to install and activate the All in One SEO plugin. If you’ve never done that before, you should check out our guide on how to install a WordPress plugin.
Upon activation, you should visit the All in One SEO » General Settings page in your WordPress admin area. There, you need to add the license key to verify your account.
You can find the license key in your AIOSEO account.
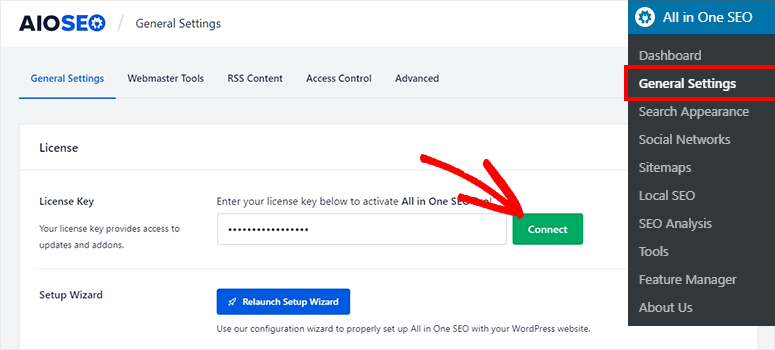
Click on the Connect button and you’ll see a success message.
Step 2. Adding Schema Markup to Your Content
Now that you’re connected to AIOSEO, whenever you edit a page or post, you’ll see a section below the post editor called AIOSEO Settings.
Here, you can open the Schema tab.
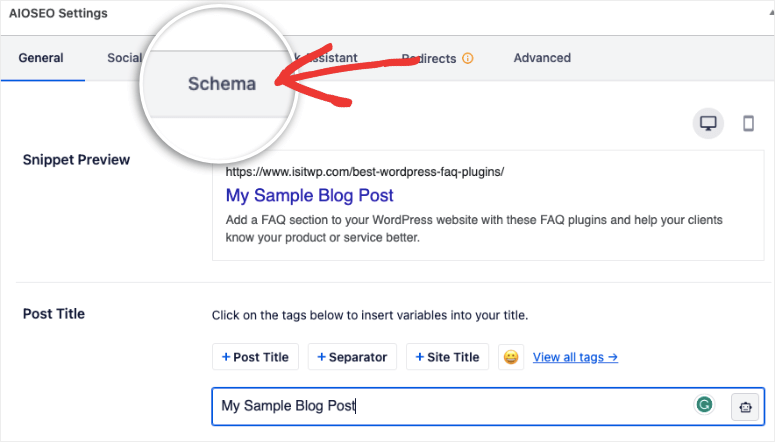
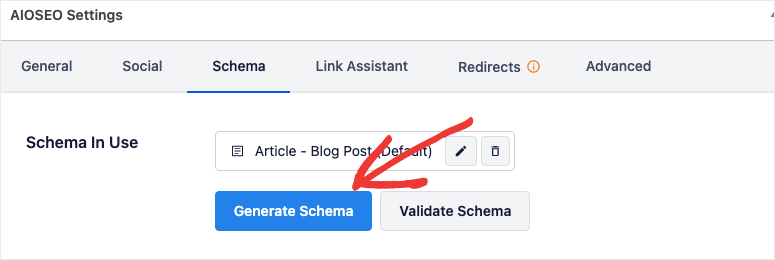
Now you can use the Generate Schema button to get started.
This will open up a page full of schema templates that you can add to your content with just a click. These include book, event, fact check, movie, music, job posting, how to, and more!
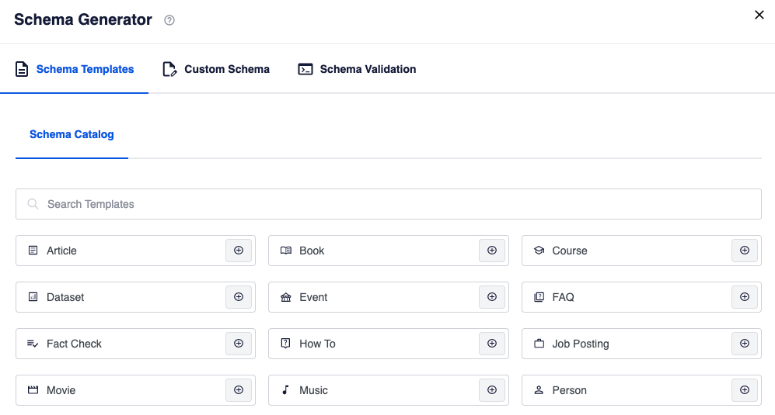
All you have to do is click on the schema type you want. It’s that simple.
Step 3. Testing Schema Markup to Your Post and Pages
AIOSEO helps improve your content with general SEO settings. It lets you test the schema markup to make sure it’s working. You need to click on the Validate Schema button and you’ll see a popup like this:
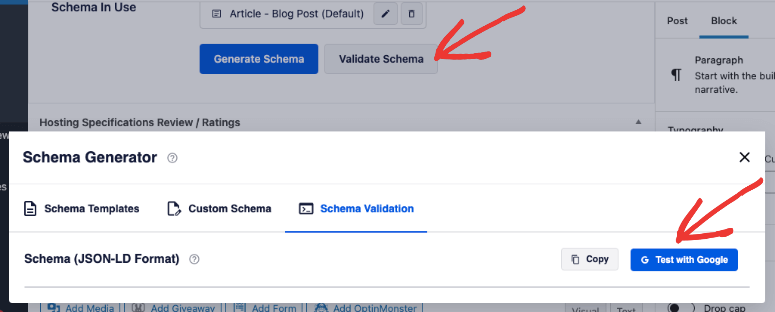
Now you can test your schema code with Google. There’s no coding or technical process. It takes just 2 clicks.
Once you’re satisfied with the schema settings, update your post or page to make sure everything works.
Step 4. Enable Sitelinks Search Box in WordPress
Sitelinks search box makes your content look great in the search engines. Once enabled, your users will see a search box below your website link and they can search your website content directly from the search engine.

To enable this setting, you need to go back to the All in One SEO » Search Appearance page. From there, visit the Advanced tab.
Simply turn on the Enable Sitelinks Search Box option and it’ll automatically generate a search box for your website in Google.
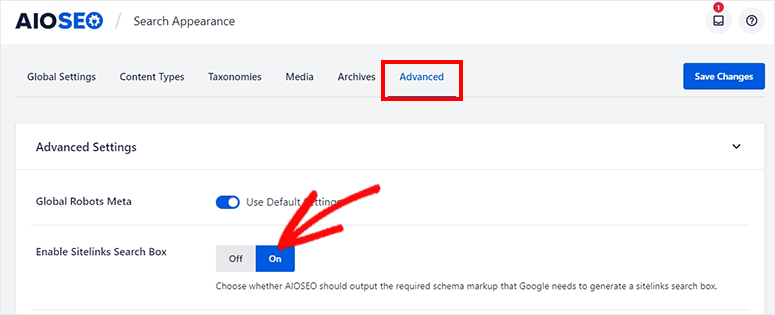
Click on the Save Changes button to store your settings.
And that’s all! We hope this article has helped you learn how to add schema markup to your WordPress website without editing any code.
You may also want to check out our complete guide on the best SEO tools to grow your website traffic.
On top of that, here are other articles you may be interested in reading.
- AIOSEO vs Yoast SEO: Which is Better?
- All in One SEO Free vs Pro: Is Paying for Premium Worth It?
- The Complete Beginner’s Guide to WordPress SEO
These articles will provide the right tools that you need to increase your organic traffic. More traffic leads to more sales!

Comments Leave a Reply