
Do you want to add a discount coupon code field to your WordPress order forms?
You don’t have to install an advanced eCommerce plugin to start providing discounts to your customers. In this tutorial, we’ll show you how to enable a coupon code field on your WordPress order forms.
Adding a Coupon Code Field to Your WordPress Order Forms
Without a doubt, adding a discount coupon code field to your order forms help you boost your conversions as well as your sales.
If you’re only selling just a few products on your website, you might not want to install a heavy plugin like WooCommerce to collect payments and offer discounts with coupon codes. All you have to do is to install a WordPress forms plugin, like WPForms and integrate it with a payment gateway. We have a step by step tutorial that shows you how to sell online without an eCommerce setup.
WPForms is the best contact forms plugin for WordPress. It lets you create a contact form, payment form, order form, donation form, or any other WordPress forms quickly and easily.
The best part is that you can also add a coupon code field to your order forms with WPForms. For more on this plugin, see our detailed review on WPForms
Before we begin, let’s be clear that this tutorial shows you how to add a discount code specificially to your WordPress form. It’s simple and easy to follow and is best suited for those who run a one-product store or sell just a handful of products online.
This method does not come with advanced features to add discounts based on percentage discounts and cart conditions for full-fledged and large eCommerce stores. For that, you’ll need to use an WooCommerce solution like Advanced Coupons.
You can add BOGO, URL coupons, cart conditions, coupon role restrictions, store credit, and more – it’s totally free to use. There is also a premium version of the plugin that gives you advanced features.
See our detailed review on Advanced Coupons plugin or get started right away and learn How to Properly Create Coupons With WooCommerce for Profit.
That said, let’s see how you can quickly add a simple discount option to your WordPress form using WPForms.
Step 1: Installing WPForms
To add a coupon code to your order form, you first need to install and activate the WPForms plugin on your site.
Step 2: Creating Your Order Form
The next step is to create your order form with WPForms. To create your form, go to WPForms » Add New. Now you’ll be directed to a new page where you can select a template. Here select the Billing/Order Form template.
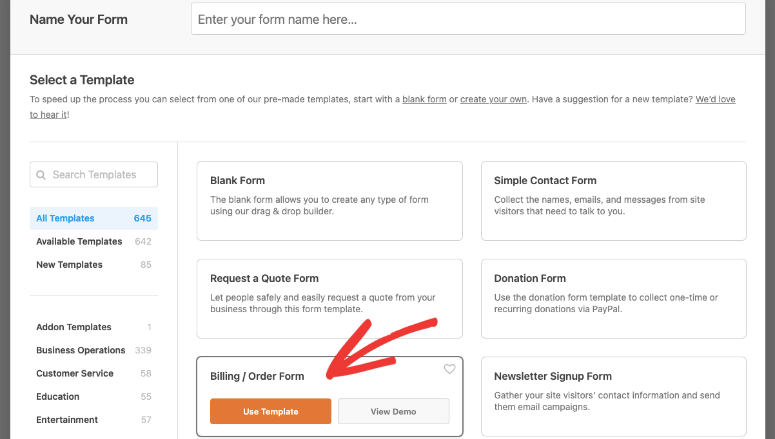
You’ll now be directed to the form builder with all the fields on your left and the form on your right. You can simply drag the form fields and drop them in the order form. To edit a field, you can just click on the field and add your input to the left side of your form.
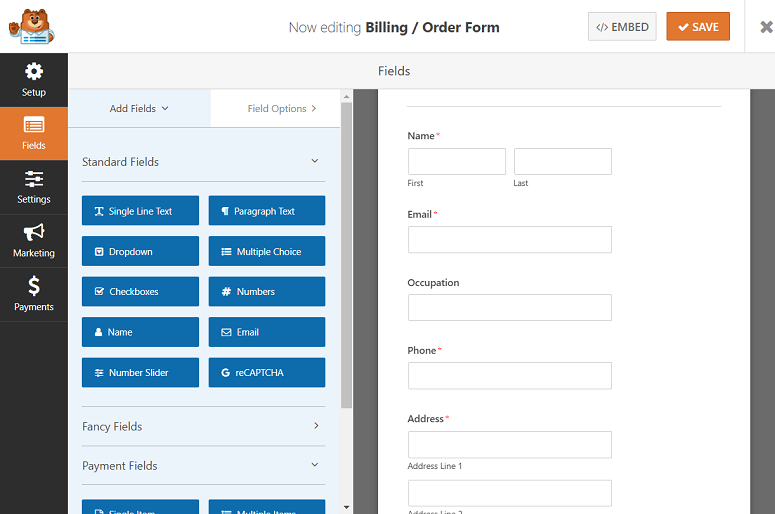
While the order form template gives you a head start, the beauty of WPForms is that you can customize it the way you want.
Step 2: Using Conditional Logic to Add a Coupon Code Field
For the best results, it’s only recommended to display the coupon code field to the customer who actually has a coupon code to redeem.
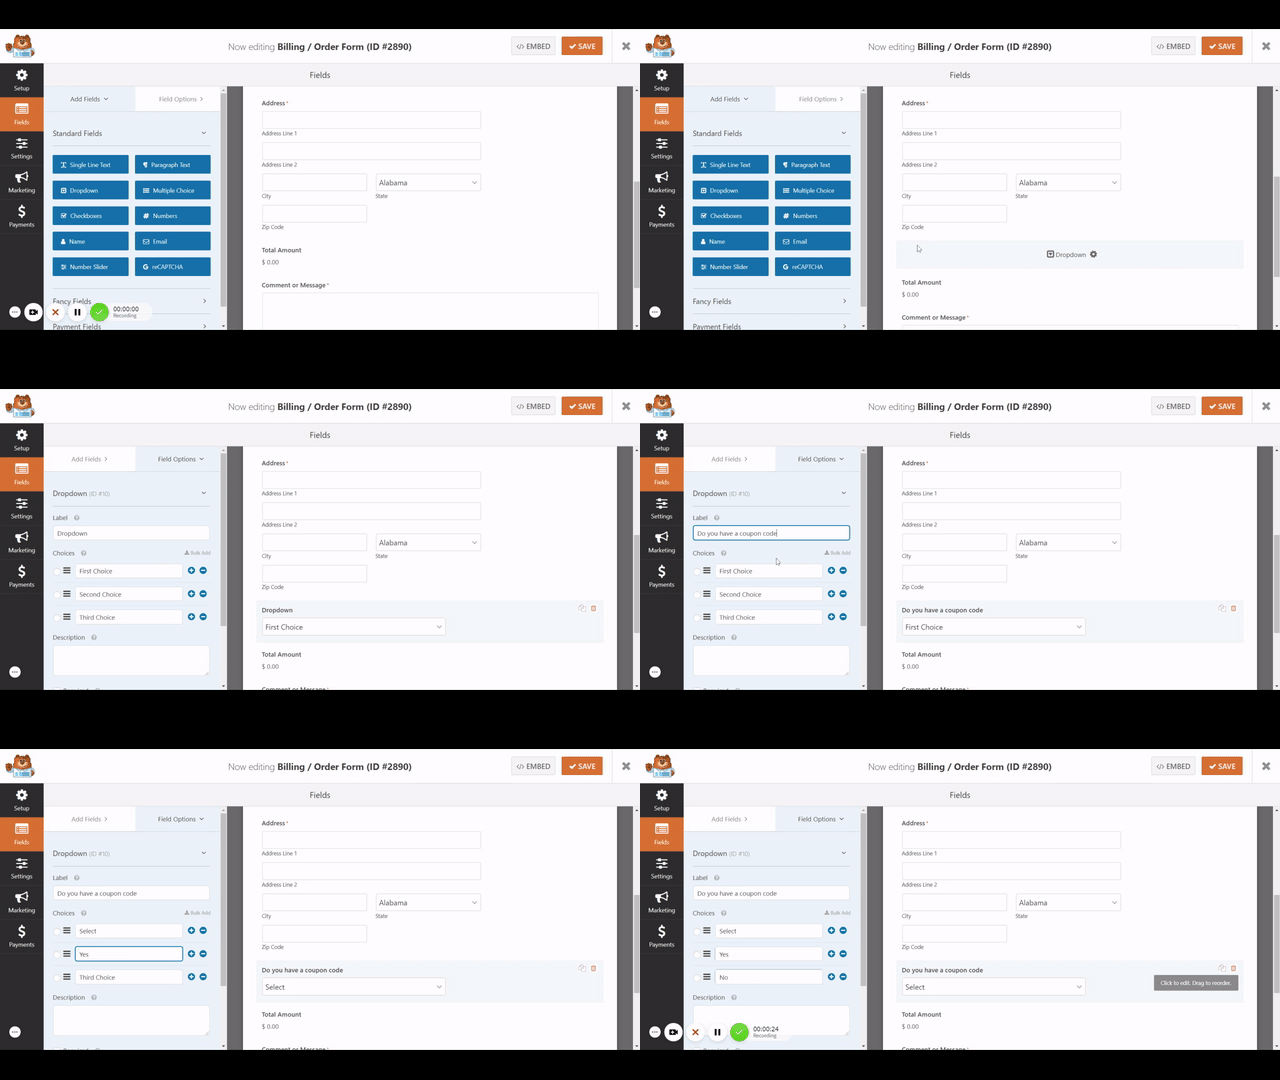
Let’s create a dropdown field on your form to ask whether the customer has a coupon code. To do that, add the Dropdown field to your form under the Standard Fields section.
Now you’ll have to customize this field. Just click on the field option and change the label to Do you have a discount coupon code. Next, change the:
- First choice to Select
- Second choice to Yes
- Third choice to No
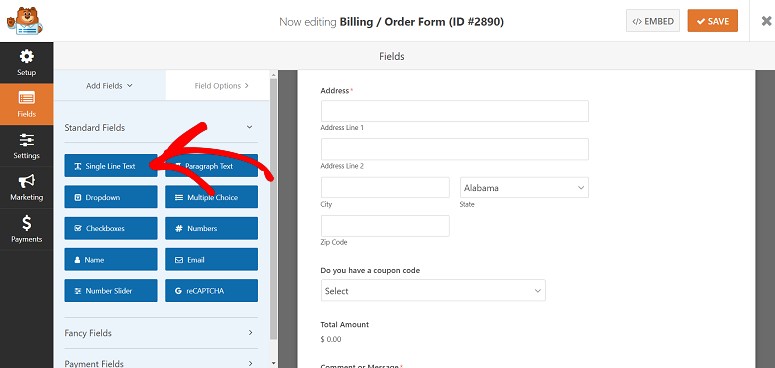
Next, you need to add a field where your user can enter the discount coupon code. So drag the Single Line Text field from the left and drop it just below the Yes/No field on your form.
Now rename this field as Discount Coupon Code. To do that, just click on the field and change the text on the right-hand side of your screen.
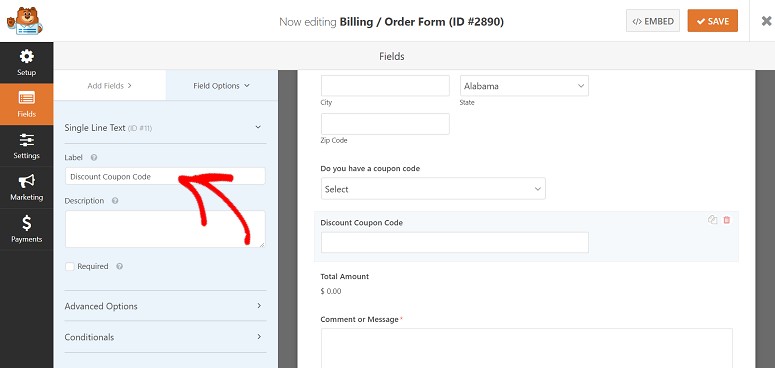
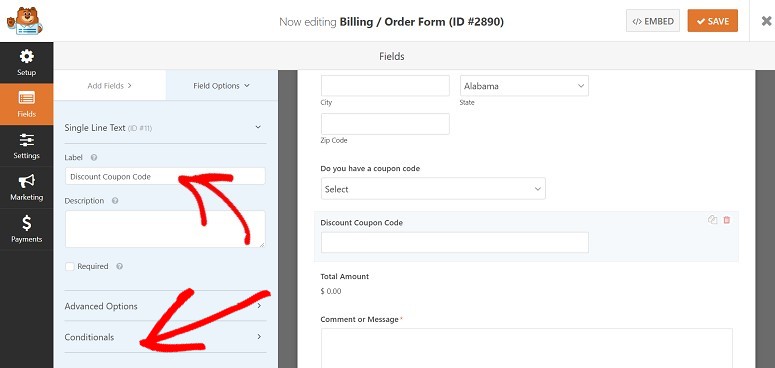
Now it’s time to enable the conditional logic. For that, scroll down the screen to find the Conditionals option.
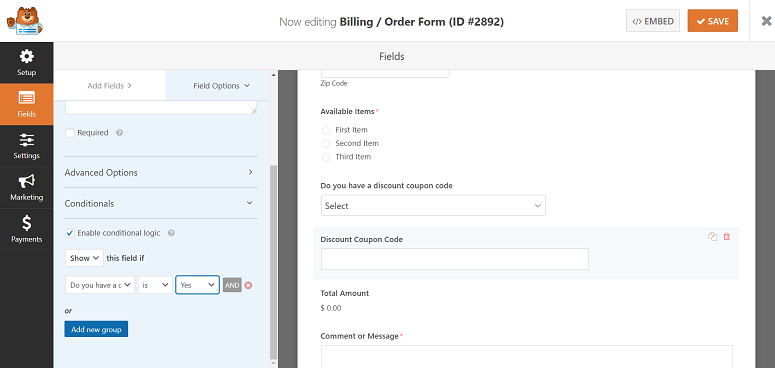
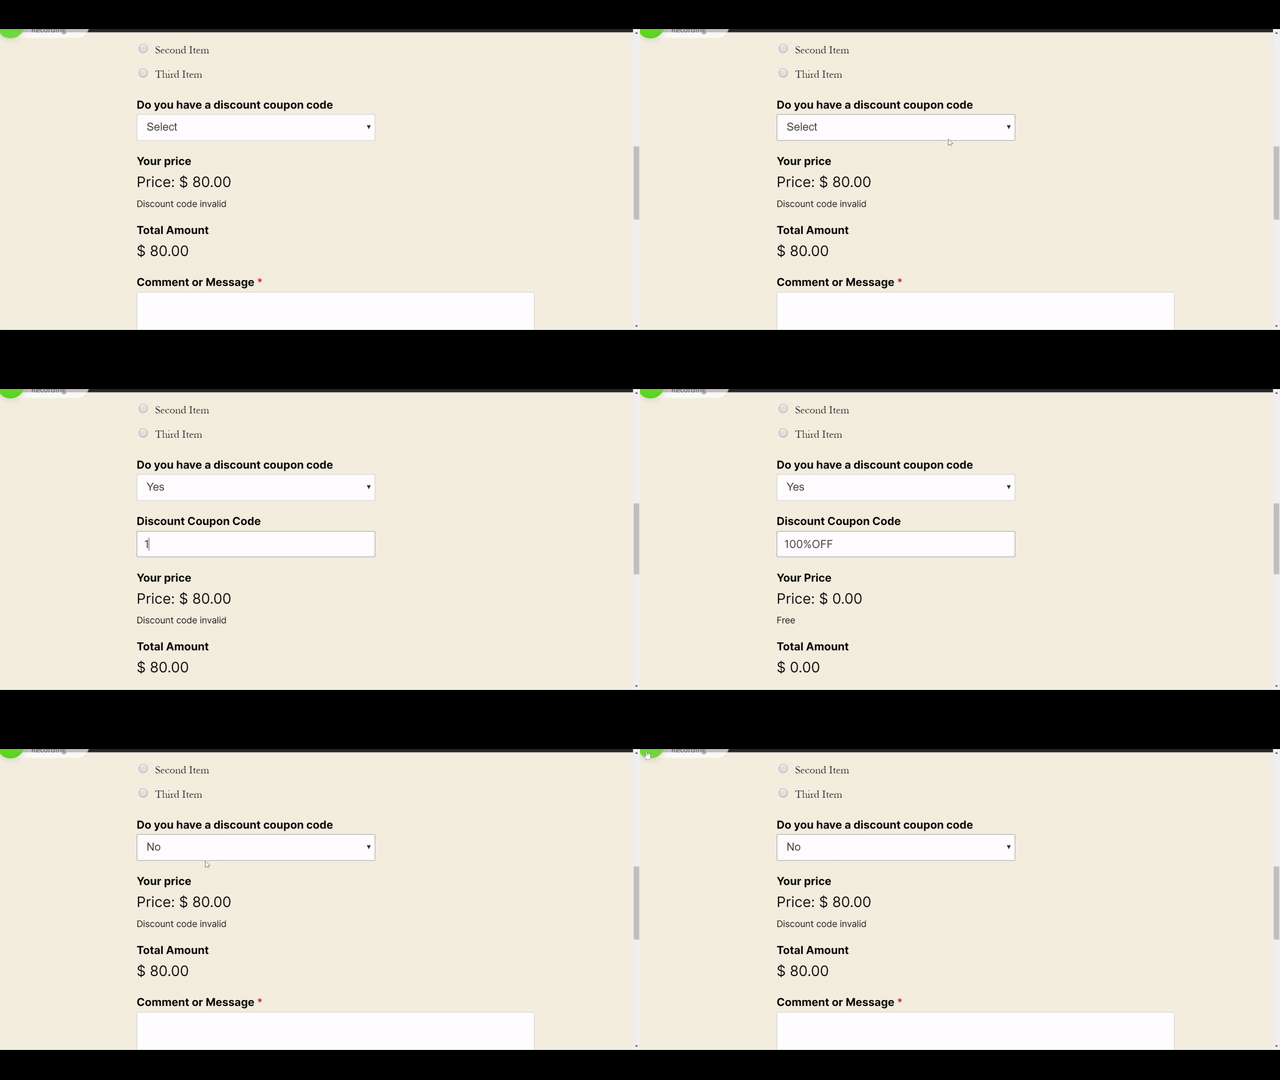
Just below that select the checkbox to enable conditional logic. Your conditional logic should state Show this field if “Do You Have a Discount Code” is Yes just like in the screenshot below.
That means the Discount Coupon Code field will only display if a user confirms that they have a coupon code to redeem.
Step 4: Creating Validations For Your Coupon Code Field
The next step is to add validations to your form that you created with WPForms. With this step, you can show your users whether their coupon code is valid or not. For that, go to the Payment Fields tab. Now add Single Item fields 2 times just below your Discount Coupon Code field.
Now click on each of these fields. Let’s use the first field to redeem the coupon and the second field to display an error message if the coupon code isn’t correct.
In the first one, edit the label to Your Price. Under the Description field, explain the discount you wanted to offer. In the Item Price, add the discounted price.
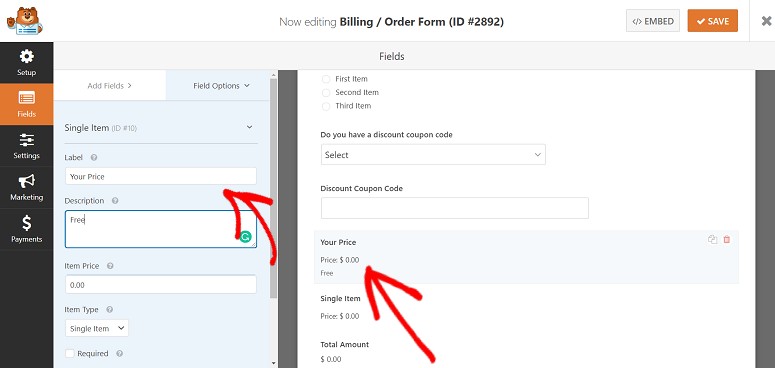
Next, scroll down to the Conditionals tab and select the checkbox Enable conditional logic option. Here you can set up when people should see this Single Item field. Now add whatever you want your discount code to be. Let’s say your code is 100%OFF.
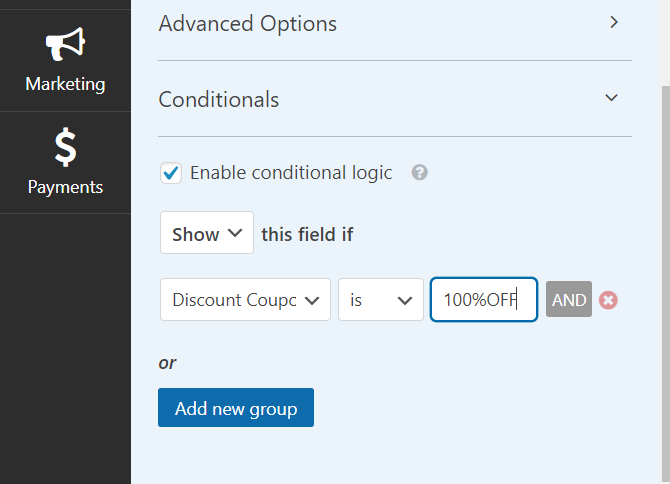
You can add more than one discount code by clicking on the Add new group option just below it.
As mentioned above, let’s use the second field to display an error message if the coupon code isn’t correct.
To do that, for the second Single line item, add the label as Your Price. In the Description, let’s say Discount code invalid. Keep in mind that this field should be shown when the coupon code is invalid. To do that, scroll down to Conditionals and select the checkbox Enable Conditional Logic option.
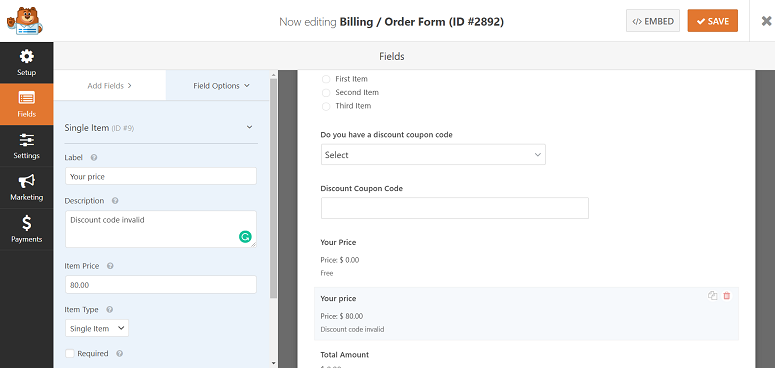
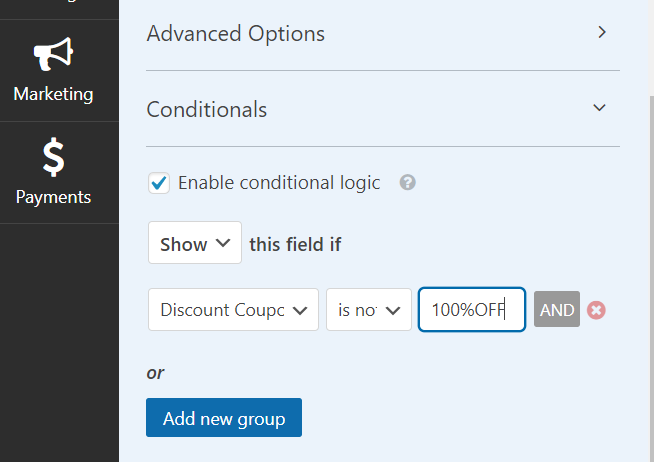
Under that let it show the field if Discount coupon is NOT 100%OFF. If you have more discount coupon code, add them by using the Add new group button.
Once done, hit the Save button on the top right corner of your screen. Your form is now ready to be published.
Step 5: Publishing Your Form on WordPress
The next step is to publish your form. For that, go to the page or post editor where you want to display your form. Now click on the + sign on the top left corner of your screen. Then using the search button look for WPForms.
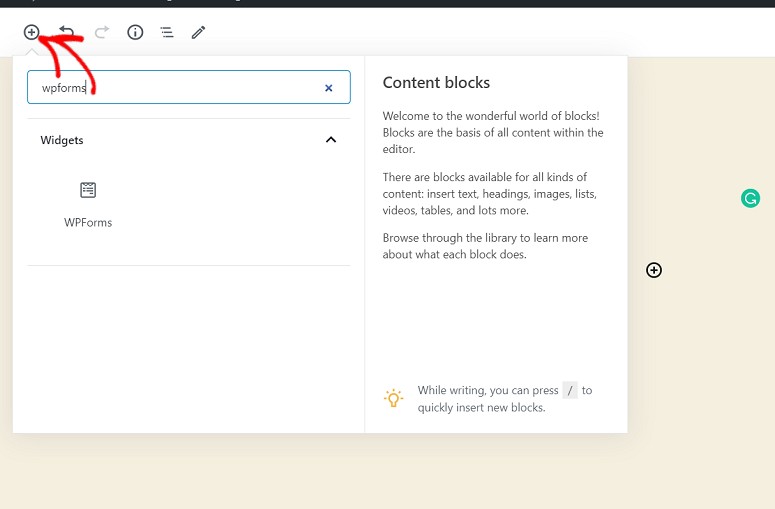
When you find WPForms, click on it. You can now select your form by clicking on the dropdown arrow. Your form will now be added to your page. Then make sure you publish the form by updating your post.
That’s it. You’ve successfully added a coupon code field to your WordPress order form.
As your online business grows, you might need to move to a more advanced solution. Then you may need to sign up for Advanced Coupons. We suggest you bookmark the page or make note of this plugin for a future date.
We hope you liked this tutorial. If so, you might also want to read more of our resources:
- 11+ Best WordPress Testimonial Plugins
- How to Add Social Proof Notifications in WordPress
- 15 Conversion Rate Optimization Tools to Skyrocket Growth
These posts will help you boost your online business and gain the trust and confidence of users.

So you can only do a set price for your discount code? Why not give the option for a percentage off? Why not make it possible for a field to have a negative amount that could subtract from the total? Or make it multiply the Total by a percentage for a discounted price of 20% off or something? I’ve spent all this time making my form in WPforms & now I’m hamstrung by this lack of capability.
If you need a full-fledged coupon plugin then you may want to try Advanced Coupon Plugin instead.
That is nice indeed, but the real problem is how to add a quantity field.
The only reason I do not have my online shop with plain WPforms is just for it lack that field.
Thanks for stopping by Rene,
You can add a quantity field by either choosing the dropdown or the Radio menu. Here’s an article from WPForms that shows how to do it.