
Do you want to create a sitemap for your WordPress website?
Well, you’ve come to the right place!
We’ll explain everything you need to know about sitemaps and show you how to create one for your site in under 2 minutes!
First, let’s be clear on what a sitemap is exactly.
What is an XML Sitemap?
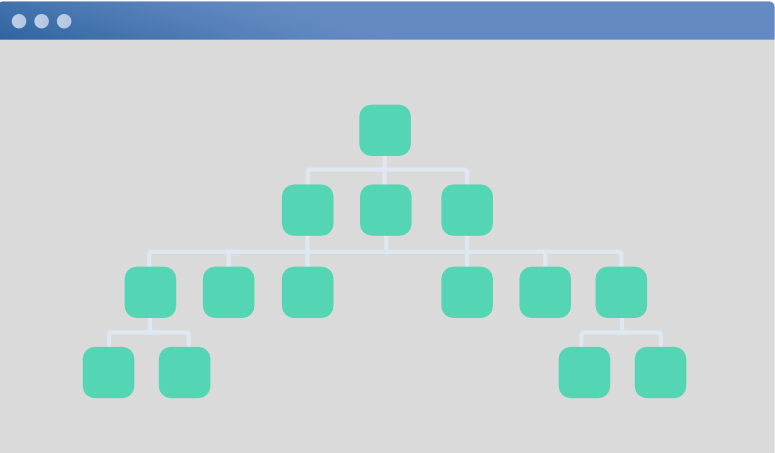
A sitemap is simply a map of your website.
Just like a traditional map helps you navigate and find your way around a city, a sitemap helps search engines navigate and understand the structure of your website.
Think of it like a blueprint that outlines all the important pages and content on your site.
Do you really need to have a sitemap?
Well, no, but sitemaps come with their benefits.
They help search engines like Google discover and index your content more efficiently. When search engines crawl your website, they follow the links in your sitemap to find all the pages and posts on your site. This means that your site has a better chance of showing up in search engine results, making it easier for people to find you.
Plus, it only takes a minute or two to set this up, so why miss out on improving your site’s SEO?
Let’s jump straight into the tutorial.
How to Set Up an XML SiteMap in WordPress
A few years ago, you needed to hire an SEO (search engine optimization) expert to create a sitemap file for you, which usually took weeks!
Thankfully those days are over. You can generate sitemaps on your own with just a few clicks thanks to a tool called All in One SEO (or AIOSEO).

All in One SEO is a powerful WordPress SEO plugin used by 3+ million people. It’s free to use and it’s beginner-friendly.
Aside from sitemaps, it helps you improve the overall SEO of your website. Here are a few highlights you may want to know about:
- Automated SEO site audit
- Suggestions and tips to improve SEO
- Headline analyzer
- On page SEO editor
- Rich snippets and schema
- Advanced SEO modules
There’s so much more to this plugin. We did a complete All in One SEO Review that you’ll definitely want to check out to make the most of this plugin.
Now let’s set up your sitemap.
Step 1: Activate All in One SEO
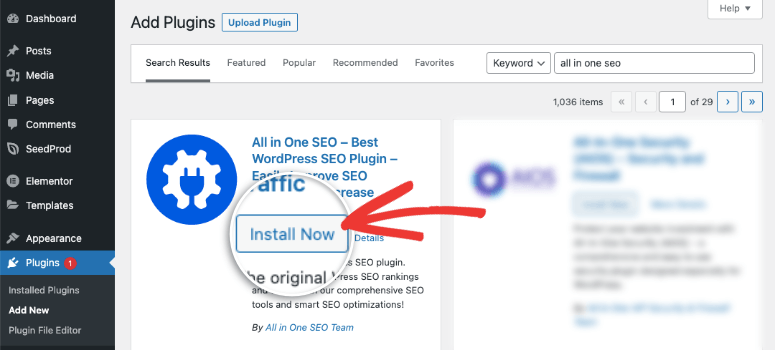
All in One SEO has a free and pro version. To install the free version, head over to your WordPress admin and open up the Plugin » Add New page. Here, search for All in One SEO and install and activate it.
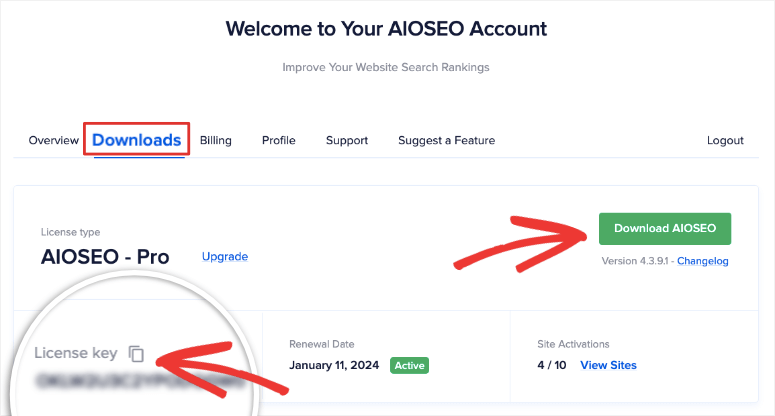
If you prefer to have all the advanced features to really up your SEO game, then you can sign up for the pro version. Then, inside your AIOSEO account, you’ll get a plugin file to upload to your site along with a license key to activate your premium access.
Not sure how to install and activate the plugin? No worries, follow our guide here: How to Install a WordPress Plugin.
If you’re not sure whether you should sign up for the free or pro version, then you’ll want to read our comparison of All in One SEO Free vs Pro: Is Paying for Premium Worth It?.
Step 2: Setting Up AIOSEO
When you activate AIOSEO, it will automatically launch the setup wizard. This makes it so easy for you to set up the right SEO settings for your site.
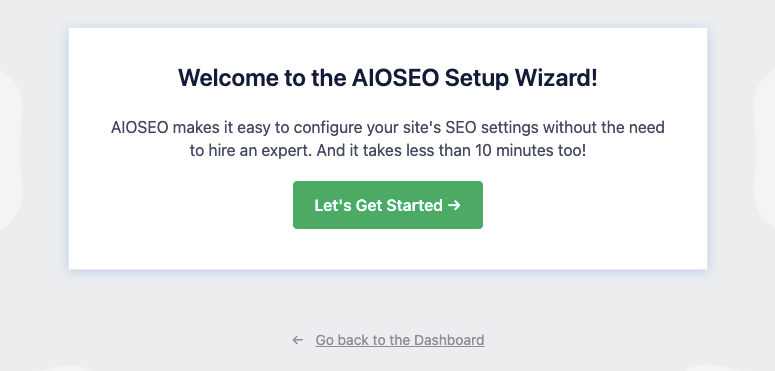
When you get started with the wizard, you’ll see questions like this to tell the plugin what your site is all about and also to configure your preferred settings.
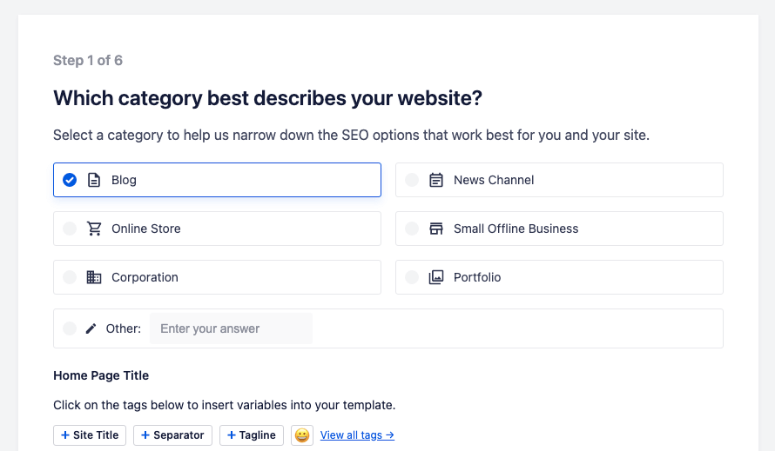
We won’t go through the whole wizard in detail because it’s self-explanatory and really easy to follow on your own.
In step 3 of the wizard, there’s an option to enable sitemaps:
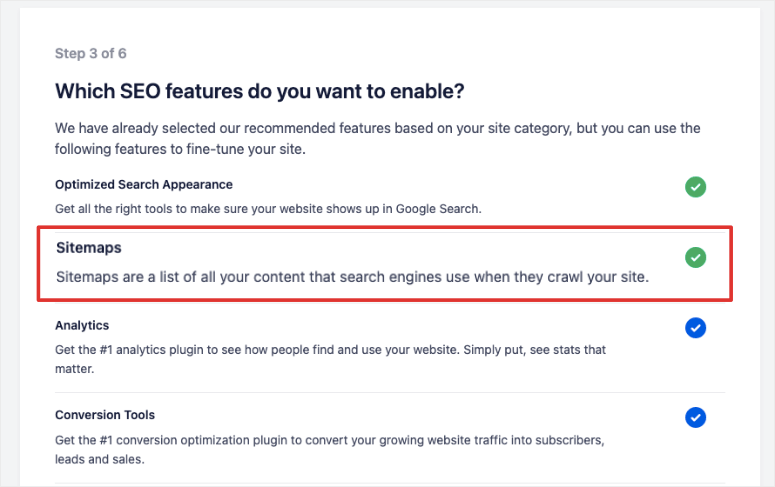
By default, the XML sitemap feature is already enabled and you don’t have to do anything more.
If you scroll down further on this page, you’ll also see advanced options to create video and news sitemaps if you need them. You’ll need to subscribe to the pro plan for these features.
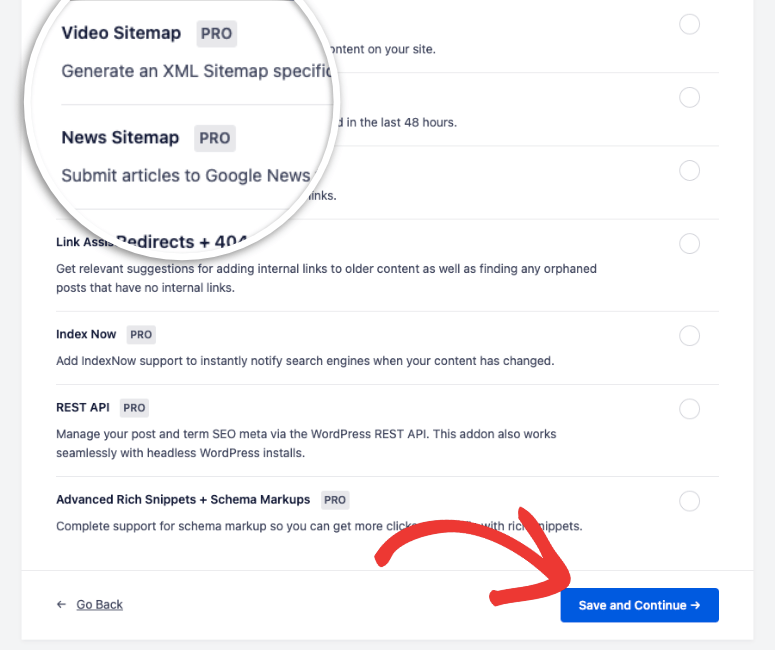
There’s nothing more you need to do here! Save and continue. Once you complete the wizard setup, All in One SEO will automatically create the XML sitemap for you.
Awesome, isn’t it?
Now, you need to tell Google you’ve added a sitemap
Step 3: Submit Sitemap to Google
If you want to let Google know about your new sitemap, you need to access a Google Search Console account. If you don’t have that yet, sign up for Google Search Console, it’s free.
Inside your Search Console dashboard, go to Sitemaps in the left taskbar.
You’ll see the Add a new sitemap box at the top of the screen.
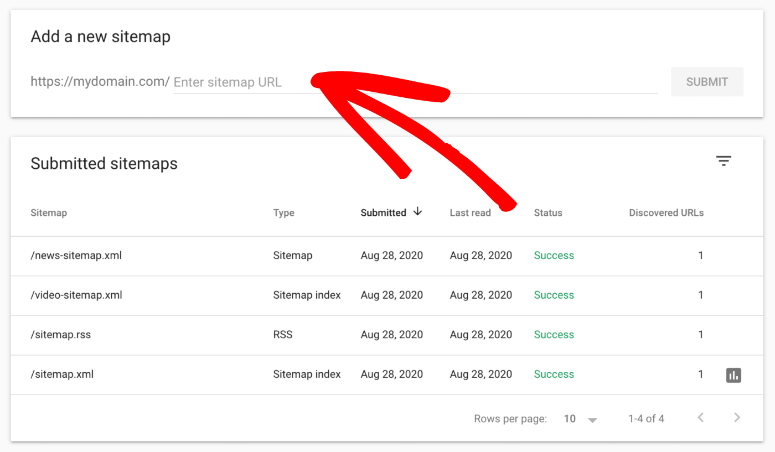
All you have to do is enter the URL of your sitemap and Submit it.
You only need to enter the last part of the URL as the domain name is already filled out for you. If your domain is example.com, you don’t need to include that, just ‘sitemap.xml’.
The default names for the sitemaps created by All in One SEO are:
- XML Sitemap: sitemap.xml
- Video Sitemap: video-sitemap.xml
- News Sitemap: news-sitemap.xml
- RSS Sitemap: sitemap.rss
If you’ve used a different plugin like Yoast SEO, then the file name will be different like sitemap_index.xml.
Now we’ll show you how to access these sitemaps to view them or enable/disable them anytime you need.
Step 4: Access the XML Sitemap
You can access your sitemaps under the AIOSEO » Sitemaps tab. Here, you’ll see a top menu bar with different sitemaps that you can enable for your site.
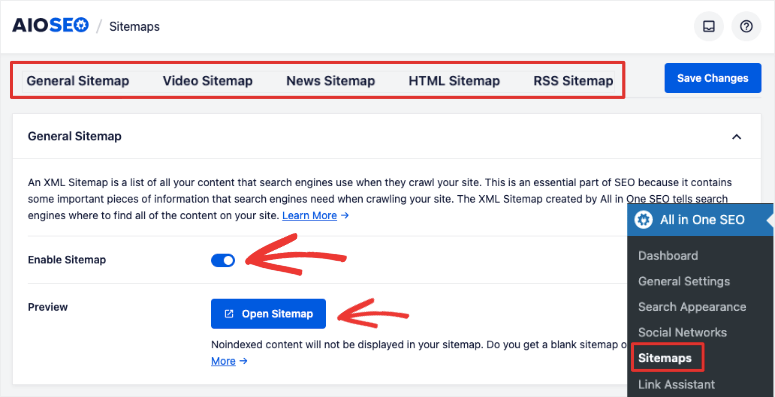
Let’s look at the General Sitemap we just set up. You’ll see a toggle switch to enable/disable sitemaps at any time. You can also preview your sitemap by clicking on the ‘Open Sitemap’ button.
This will launch a new tab where you can see your sitemap like this:
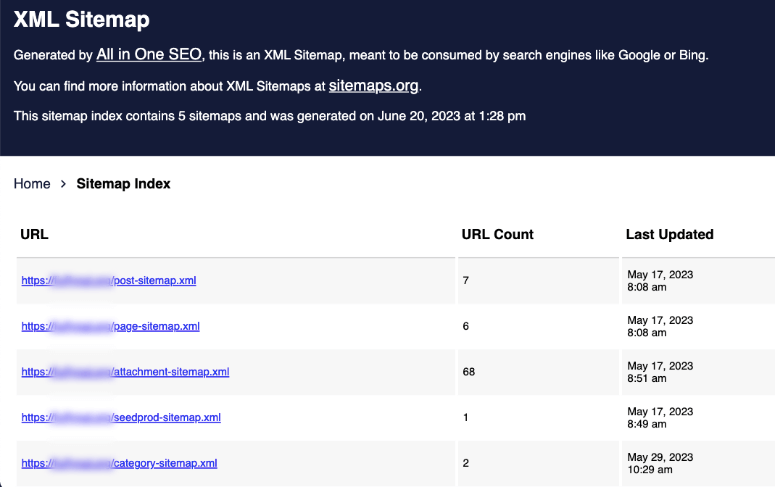
That’s all you need. However, All in One SEO does have advanced settings that we’d like to explore with you. It may come in handy when you want to refine your XML sitemap.
Step 5: Customize the Sitemap
In the same sitemap section, scroll down and you’ll see more options to configure your sitemap.
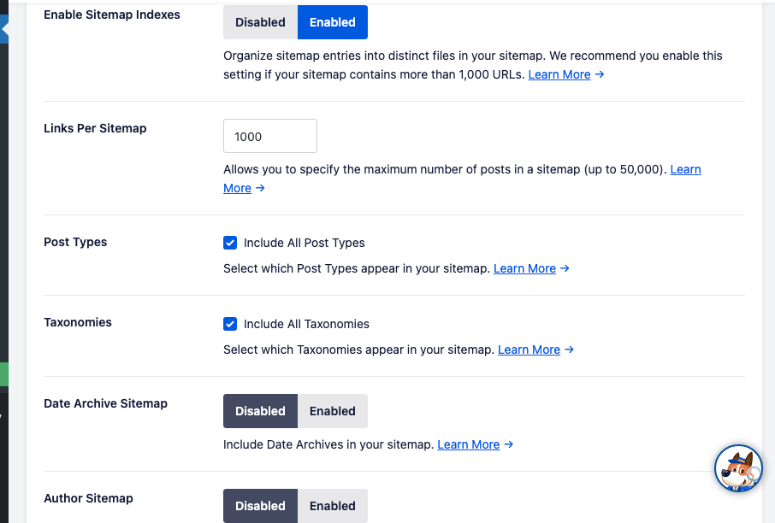
Let’s explain what these sitemap settings mean:
- Enable Sitemap Indexes: This will organize your sitemap entries into distinct files. If your site contains over 1000 URLs, you should enable this setting.
- Links Per Sitemap: This lets you limit the number of posts in a single sitemap. You can have multiple sitemaps for your website making. it easier for search engines to crawl your site.
- Post Types: Choose which custom post types to include such as posts, pages, products, media, attachments, and movie files.
- Taxonomies: Select which categories, tags, and genres to include.
- Date Archive: Lists all the posts published on a specific date, month, or year.
- Author sitemap: Lists all the posts published by a specific person.
Next, if you want to add any website URLs to your sitemap which aren’t a part of your WordPress installation, you can enable ‘Additional Page’. For example, if you have a contact form that you would like to be included on your sitemap, you can enter the information manually.
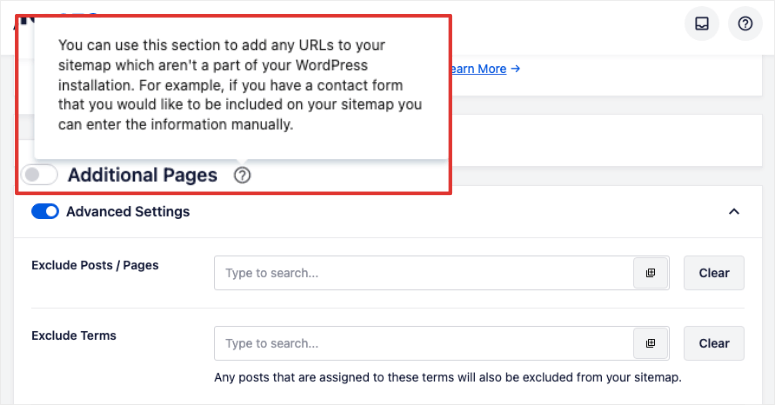
To learn more about this setting, click on the question mark icon right next to it, and you’ll see a popup explanation.
Right below this, you’ll see Advanced Settings. Here, you can finetune the sitemap functionality.
- Exclude specific posts/pages
- Exclude specific terms
- Add a priority or taxonomy score
- Include or exclude images
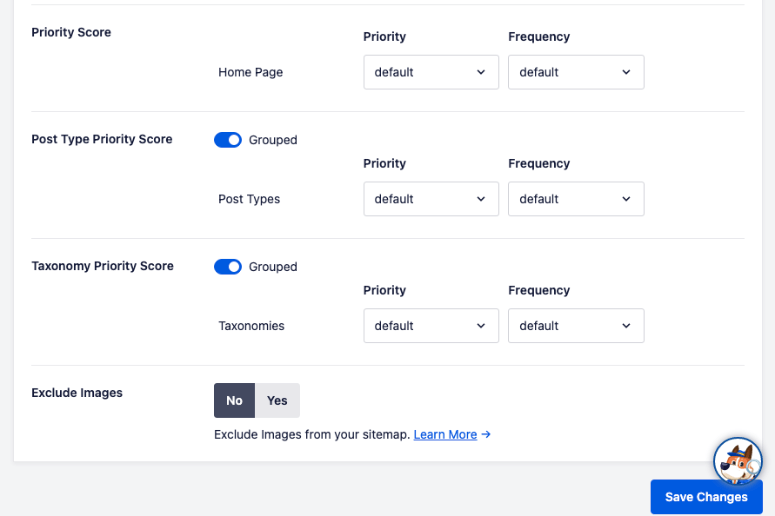
With these settings, you get complete control over your sitemap. No longer do you manually have to edit and change your sitemap. Everything can be done right from your WordPress dashboard with All in One SEO.
Other Sitemaps You Can Create with AIOSEO
All in One SEO is a really powerful sitemap generator. It not only lets you create XML sitemaps but lets you generate more specific sitemaps. These include:
- Google News Sitemaps
- Video Sitemaps
- HTML Sitemaps
- RSS Sitemaps
Google News Sitemaps
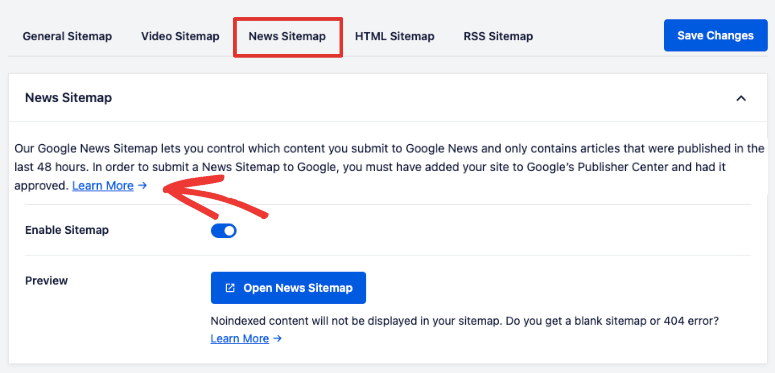
Submit your latest news articles to Google News and get higher rankings and drive more traffic to your site. Follow our tutorial on How to Submit Your WordPress Site to Google News.
Video SEO Sitemaps
All in One SEO includes a video sitemap generator that you can switch on with just one click. This functionality will tell search engine crawlers which are specifically video content.
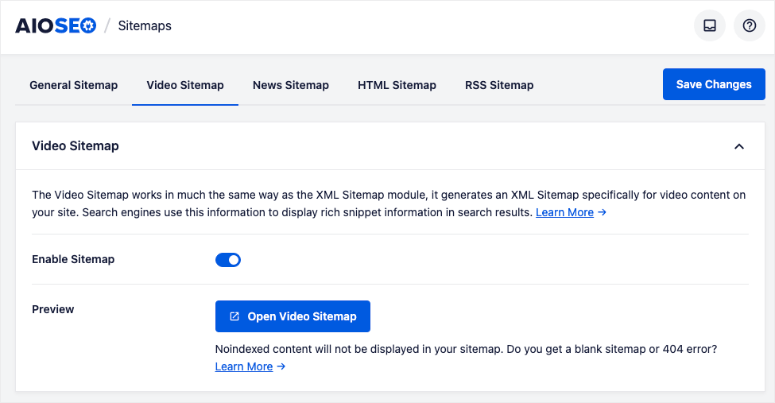
It helps you get featured in Google’s video carousel widget.
HTML Sitemap
HTML sitemaps make it easier for visitors to navigate your website’s content and find new or latest things you’ve published.
If you enable the HTML sitemap, AIOSEO will automatically create one for you. Then you can choose to display the map on a dedicated page. You can also Gutenberg blocks, shortcodes, widgets, and PHP code to create and display your sitemap on any post or page.
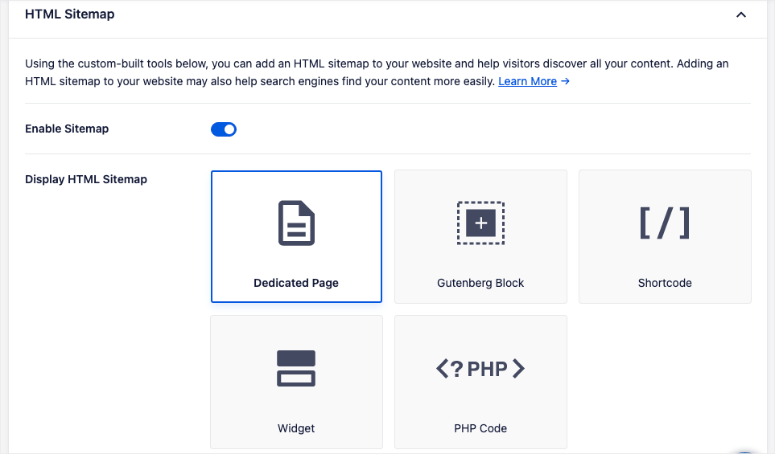
RSS Sitemap
If you have an RSS feed, this will generate a separate RSS Sitemap which can be submitted to Google, Bing, and any other search engines that support this type of sitemap.
Keep in mind the RSS Sitemap will only include an RSS feed of the latest updates to your site content.
Before we wrap up, we’ll answer some questions we get asked often by our users.
WordPress SML Sitemap FAQs
What does XML mean in a sitemap?
XML stands for extensible markup language. It is a set of codes, or tags, that describes the text in a digital document. In simpler terms, the XML Format lets you define and store data in a manner that’s easy to share between computers, apps, and websites.
Is it mandatory to have a sitemap?
No, you can choose to have a sitemap or not. However, sitemaps help search engines discover pages on your website and they can help your content rank better.
Which is the best XML sitemap generator?
We recommend All in One SEO for WordPress sites. It’s hands down the best tool for everything SEO. You may also want to the Yoast SEO plugin. For more options, check out our list of the Best WordPress Sitemap Plugins for Your Website.
Can I create a sitemap for free?
Yes, you can create a sitemap for free using All in One SEO. It takes just 2 minutes to set it up.
What’s the difference between HTML and XML sitemaps?
HTML sitemaps are mostly created for humans (such as site owners and blog readers to navigate the site). They appear as formatted links at the bottom of a web page. They usually have limited SEO value.
XML sitemaps are usually created for search engine bots. These are usually generated automatically with SEO tools. The maps come with tags to identify the types of data present making it more efficient for search engines to crawl the site.
You can create both kinds of sitemaps with All in One SEO.
How to create an HTML Sitemap?
The easiest way to create an HTML sitemap is using All in One SEO. You can enable the sitemap in just a click.
Then you can use a dedicated page, Gutenberg blocks, shortcodes, widgets, and PHP code to create and display your sitemap.
Which sitemap is best for SEO?
XML sitemaps are best for SEO as they are more structured and defined making it easier for search engines to know exactly what your site content is about.
Is there a size limit for sitemaps?
Yes, Google recommends a single sitemap to 50MB (uncompressed) or 50,000 URLs. If you have a larger file or more URLs, you must break your sitemap into multiple sitemaps.
How many sitemaps can be submitted to Google?
Google lets you submit up to 500 sitemap index files for each site in your Search Console account.
Will Google index content that is not in the sitemap?
Yes, Google and other search engines can still index your content and display it in search results even if it’s not included in your sitemap.
Does Google skip crawling certain pages on my site?
Google may decide to skip duplicate content, pages with no content or very little content. It will also exclude pages listed in your website’s robots.txt file.
Does AIOSEO automatically update the sitemap?
Yes, the AIOSEO plugin regularly checks for new content published on your site and will add it to the sitemap based on your preferences added in the settings section.
How to manually create a sitemap?
You can get a sitemap template online and then manually copy-paste each URL of your website. This is extremely time-consuming and not needed at all. There are free tools like AIOSEO to do the job for you in seconds. It will even update the sitemap so you’ll save time with that as well.
That’s all we have for you today. We hope this guide helped you generate sitemaps easily. Now you can customize your sitemap settings any time.
Next, we have more helpful guides for website owners like yourself:
- 10 Best SEO Tools to Grow Your Website Traffic, FAST!
- 8 Best Online Content Optimization Tools for Better SEO
- How to Create a Custom WordPress Layout
These posts will help you up your SEO game and create stunning layouts for your site.

Thank
Im using Google sitemap generator 4.0.7 on http://www.brightverge.com . search this plugin on wordpress.org and install with easy steps all settings are default. i strongly recommend this wp plugin.
The tutorial is clear except for one thing. Will this yoast plugin update the pages that are newly added to a website? or do we have to use a sitemap software like creately?