Need to quickly create a great-looking contact form on your WordPress website? Then you need a forms plugin. Ninja Forms is one of the most popular free contact form plugins, but is it the easiest to use? Find out whether it measures up in our Ninja Forms review.
Why You Need a Contact Form Plugin
Every website should have a contact form. It gives your visitors confidence in your trustworthiness, and an easy way to get in touch with you. Displaying your email address on your website instead of using a contact form looks unprofessional, and can also attract lots of spam.
Surprisingly, WordPress doesn’t offer a form builder out of the box. Instead, you’ll need to install a plugin in order to create a contact form, or any other kind of form.
With Ninja Forms, you can also create:
- Order forms: Sell your products and services online and get paid upfront.
- “Request a Quote” forms: Create custom forms to ask for all the information you’ll need to give a client a quote or estimate for your work.
- Subscription/Opt-in forms: Get more subscribers to your newsletter by creating opt-in forms or by adding a subscribe option to your other forms.
- Surveys: Base your website strategy on data from actual users by offering a survey on your site.
- Post submission forms: Allow visitors to add their own blog posts and edit them from the front-end of your site.
About Ninja Forms
Ninja Forms is a free contact form plugin for WordPress, built and maintained by WP Ninjas. The plugin stands out from their competitors by selling addons separately. That means if you only want to use one or two addons, then you don’t have to purchase a costly bundle. Instead, you can purchase the required addons separately.
The free version of the plugin is available to download from the WordPress.org repository. The plugin has already been installed by over 1 million websites around the globe.
How to Set Up Your First Ninja Form
Start by downloading the plugin for free from the WordPress.org directory. Then, install and activate the plugin.
Step 1: Build Your Form
Navigate to Forms » Add New.
You’ll see a form builder that looks like the screenshot below. In the column on the left, you’ll see a number of buttons you can click to add those fields to your form.
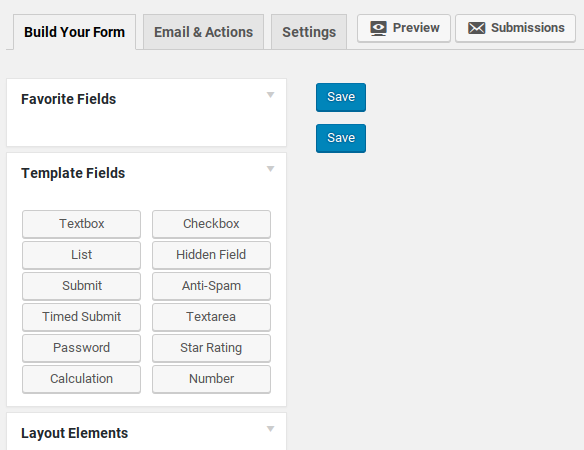
To create a simple contact form, we’ll add fields for the user’s name, email address, and message.
Click First Name under the User Information tab.
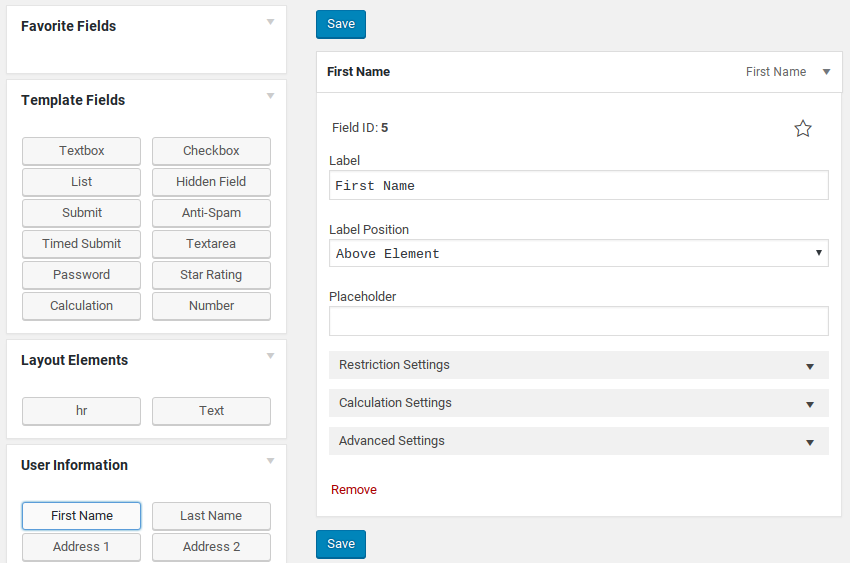
Here, you can customize the field’s label and placeholder text. You can also set advanced options to validate the field input, add custom CSS classes, and more.
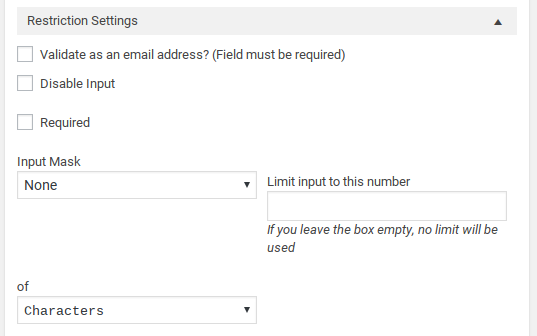
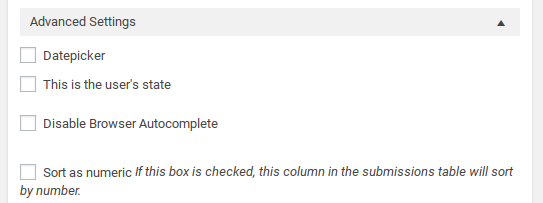
You can click the arrow at the top to collapse the options.
For the message field, click on the Textarea button, and change the label to “Message.”
Be sure to check the “Required” checkbox under Restriction Settings. You don’t want users to be able to send you blank emails!
Don’t forget to add a Submit button to your form! It’s in the Template Fields box on the left. Ninja Forms doesn’t add a submit button automatically.
Once you’ve finished selecting fields, click 1 of the blue Save buttons at the top or bottom of your form.
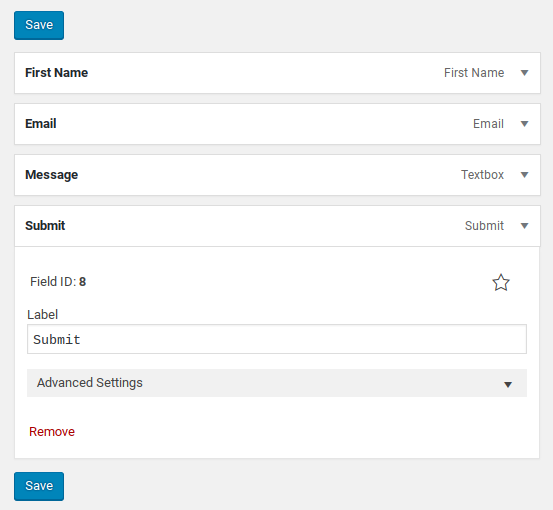
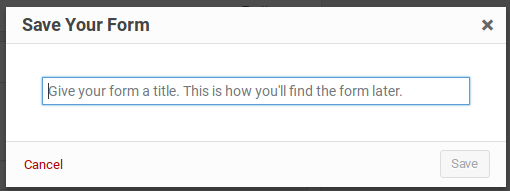
In the popup, type in a name for your form.
Step 2: Add Notifications
Now you’ll want to make sure the message is sent to your email when someone fills out the form. Click on the Email & Actions tab, and then click Add New.
This form can be a little unintuitive for beginners. Here’s how it works:
- Under Action Name, just type in something for your internal reference, like “Email Me” or “Email the Team.”
- Under Type, leave it as the “Email” option. You’ll notice you can also add actions to redirect users or display a success message.
- Click on the From Name field, and your form fields will appear as options. Select the “Name” field you created.
- Under the From Address field, select the email form field. This will set it so contact messages will be from the user’s email address.
- Enter your email address (and/or whoever you’d like to be notified) under the To field.
- Type in an email subject line.
- In the Email Message field, you can click the Insert All Fields button to include all the user’s information and message in the email notification you’ll receive. Be sure to at least include the message field here, or you’ll get an empty notification.
Click Save to set up your notification.
Step 3: Add Confirmation for the User
By default, when a form is submitted, the user then sees a blank screen.
You’ll have to add an action to display a success message, or redirect them to a particular page.
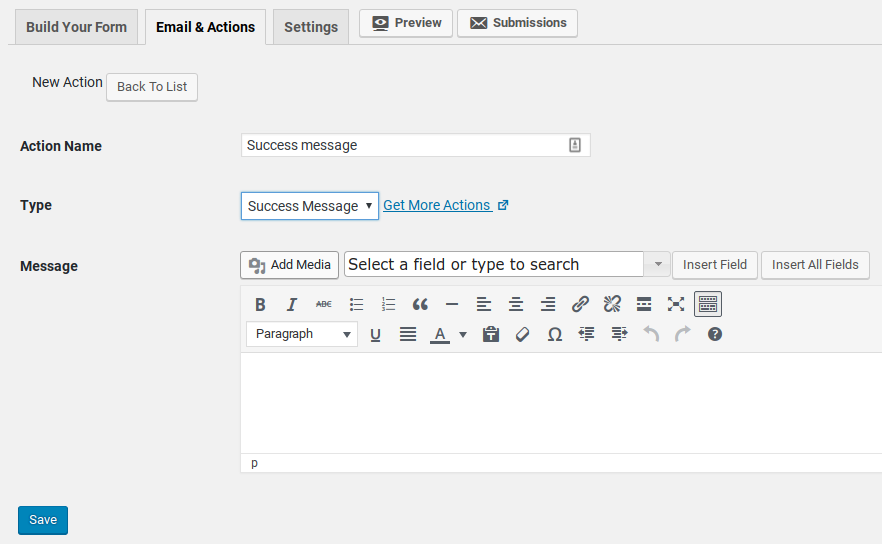
To do that, go back to the Email & Actions tab, and click Add New again.
Name your action, and under Type select “Success Message.”
Type in the message you’d like to display in the Message field below.
Step 4: Publish Your Form
To publish your form, you’ll need the shortcode. Navigate to Forms » All Forms and you’ll see the form you just created.
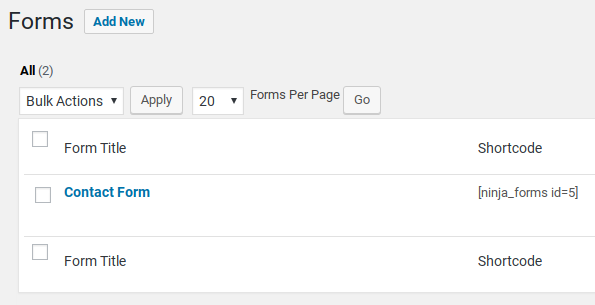
Copy the shortcode and paste it on the page or post where you’d like to display your form.
Be sure to test it to make sure it’s working the way you want it to.
Extend Your Options With Add-ons
The free plugin allows you to create basic forms, but if you want to create anything more complicated you’ll need add-ons.
There’re a lot of premium add-on plugins available that allow you to:
- add advanced options to your forms, like conditional logic, file uploads, or multi-page forms
- integrate with your email newsletter service, including Campaign Monitor, AWeber, Constant Contact which is a great alternative to MailChimp and more.
- accept payments and track your accounting with Paypal, Freshbooks, Stripe, or others add-ons.
- track leads and convert to sales with Zoho, Batchbook, or Insightly integration
- automate your business with Zapier, webhooks, WebMerge, and other tools.
Each plugin, when sold separately, can get quite expensive; but there’re a couple of bundles available with discounted pricing.
Ninja Forms Pros and Cons
Below are a few benefits of using Ninja Forms on your site.
Pros
- Free: The core plugin is always free. You only have to purchase the pro version if you want to enhance the plugin with addons.
- Ease of use: It comes with a drag and drop builder that lets you easily build a form.
- Flexibility: Ninja Forms allows you to enhance your contact form with premium addons without having to purchase a costly bundle. You can purchase the required addons separately.
Cons
Now let’s take a look at the disadvantages of Ninja Forms.
1. The Core Plugin Lacks Features
The core plugin comes with a limited features set. For example, if you want to create dynamic forms based on users’ selections, then you’ll need to install the conditional logic addon for $49. However, their competitors, like WPForms, offer conditional logic with the core version, no add-ons required.
2. Costly
At first, purchasing addons individually might seem like a nice strategy because you’ll only have to pay for what you need. However, as your needs grow, Ninja Forms will become more expensive than any of their competitors. The good thing is that there’s a 14-day money back guarantee if you’re not satisfied.
Ninja Forms vs. Other Contact Form Plugins
There are a lot of form plugins out there, including Jetpack’s Contact Form module, Contact Form 7, and Gravity Forms.
If you’re looking for the most beginner-friendly contact form plugin — one that will let you quickly and easily create a beautiful form, without having to mess around with code or tons of options — we highly recommend WPForms. With its templates and easy interface, you can create a form in mere minutes. Plus, the form design looks great out of the box.
To get started with WPForms, see this tutorial on How to Create a Contact Form in WordPress (Step by Step).
If you need to create forms with conditional checks and other advanced features such as user post submission, we recommend Gravity Forms. We rated it 5 stars in our Gravity Forms review. It’s more user-friendly and intuitive than Ninja Forms.
Our Verdict on Using Ninja Forms on Your Site
Ninja Forms is a popular and highly-rated form plugin. It works well and has a lot of add-on plugins available to expand its features and create all kinds of advanced forms.
However, the user interface isn’t great for beginners. We found it odd that submit buttons aren’t added automatically, and that there isn’t a default success message. A beginner could easily create a form without a submit button, or a form that displays a blank page after a form is submitted. Some of the advanced options don’t make sense for the form fields, either.
While the add-ons vastly enhance the plugin’s functionality, the cost for all these add-ons adds up quickly.
We give Ninja Forms 4 out of 5 stars. Here’s the breakdown of our review scores:


 4.0 / 5.0


 4.0 / 5.0


 5.0 / 5.0


 4.0 / 5.0


 4.0 / 5.0


 3.0 / 5.0


Just purchased basic version for 49$. But conditional logic and multi step form – do not work properly. When I make form for client its not acceptable that so important features do not work good (step of form do not show despite it was created), conditional logic do not move user to part that i was him to move.
Hey that’s not good. You should check out our comparison post on WPForms vs. Ninja Forms.
We highly recommend WPForms as it’s the most beginner-friendly WordPress forms plugin. WPForms gives you access to features like Conditional Logic, multi-step form, multi-page form, etc.