Do you want to create a Typeform style form in WordPress?
Typeform is an online form tool that allows you to create and embed forms on any website. One of the unique features of Typeform is conversational form, an interactive web form that blends into your page for high conversions.
In this article, we’ll show you how to create a Typeform style conversational form in WordPress.
Creating a Typeform Style Form in WordPress
Creating a Typeform style conversational form comes in handy when you want to build long forms, such as user registration form, donation form, job application form, survey form, etc.
The best part about conversational forms is that it adds creativity to your simple WordPress forms and helps reduce form abandonment.
Typeform is an online form builder tool that requires you to log into their site for creating and embedding a form on your website. In addition, all form entries are stored in your Typeform account.
To create a conversational form on your WordPress site, we always recommend using a WordPress form plugin, like WPForms. WPForms allows you to build forms and store entries right within WordPress. It’s been used over 6 million WordPress sites and is the most easy-to-use form plugin in existence.
It’s a perfect alternative to Typeform and comes with tons of built-in features, such as drag and drop form builder, newsletter tool integration, and more.
Also check: Best Website Builders Compared

Let’s take a look at how to create a Typeform style form in WordPress.
Step 1: Installing a Conversational Form Plugin – WPForms
First off, you’ll need to install and activate the WPForms plugin.
You can use IsItWP’s WPForms Coupon to get 50% OFF on all their licenses.
For more details, check out this article on how to install a WordPress plugin.
After activating the plugin, you’ll need to go to WPForms » Settings. From here, you’ll need to verify your license key to access all WPForms features.
You can get the license key from your account on WPForms website.
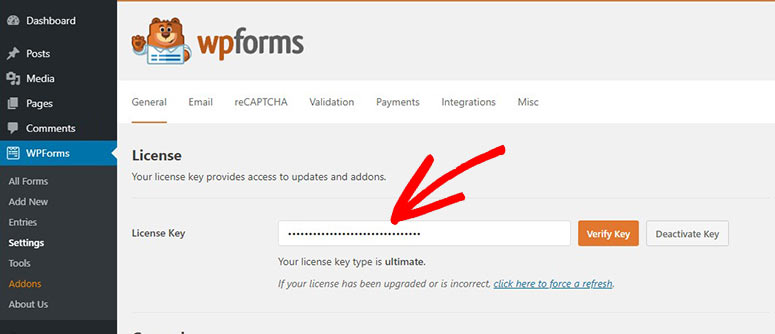
Click on the ‘Verify’ button to continue.
Step 2: Activating the Conversational Forms Add-on
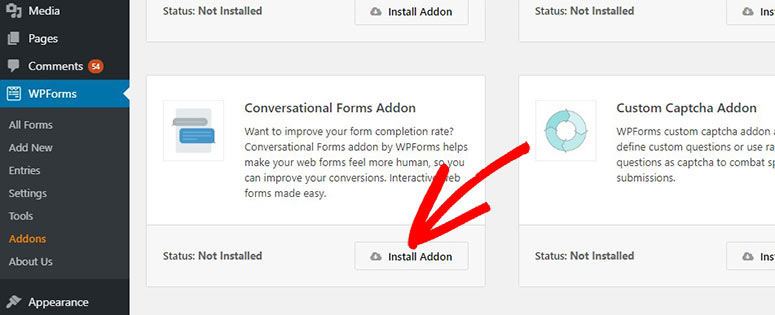
Once verified, you need to navigate to the addons page by visiting WPForms » Addons and then, install and activate the Conversational Forms add-on.
Next, you’ll see the status Active on the add-on.
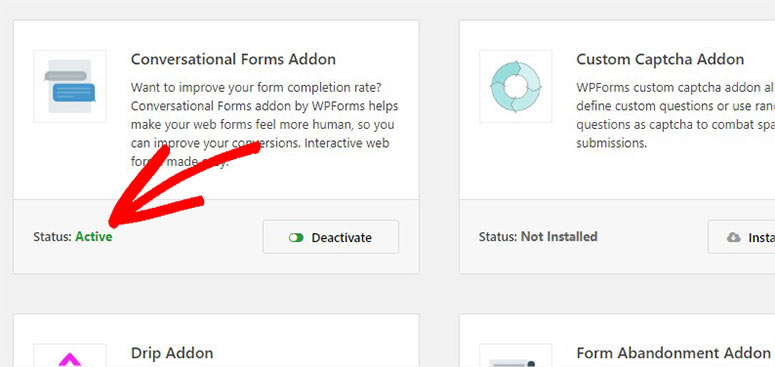
This addon allows you to create Typeform style forms from scratch. Plus, you can transform your existing forms into conversational forms.
Conversational forms reduce the length of the web page by showing questions one by one. It engages your users, and they most likely fill your long forms happily.
Step 3: Creating a New Form in WordPress
Conversational forms are perfect for all types of forms, but comes in handy especially for long forms.
For this guide, we’ll create a survey form.
Let’s create a new survey form by visiting WPForms » Add New. WPForms comes with multiple form templates to quickly launch your required form. It also has a drag-and-drop form builder, which makes it easier to add and manage form fields.
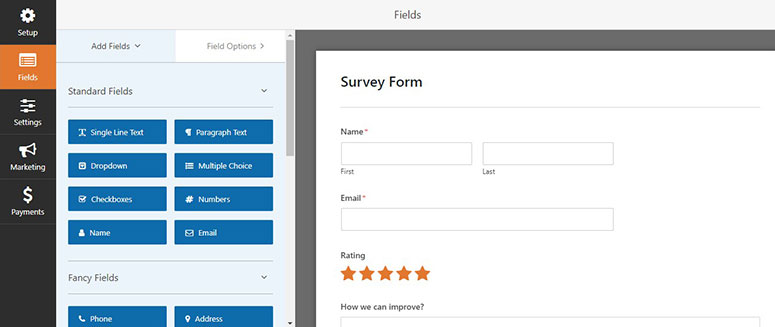
After creating a survey form, you can go ahead and enable conversational form mode from the Settings page.
Step 4: Enable and Modify Conversational Form Settings
To enable conversational form mode, visit Settings » Conversational Forms from the left side of your screen. Then, checkmark the Enable Conversational Form Mode option.
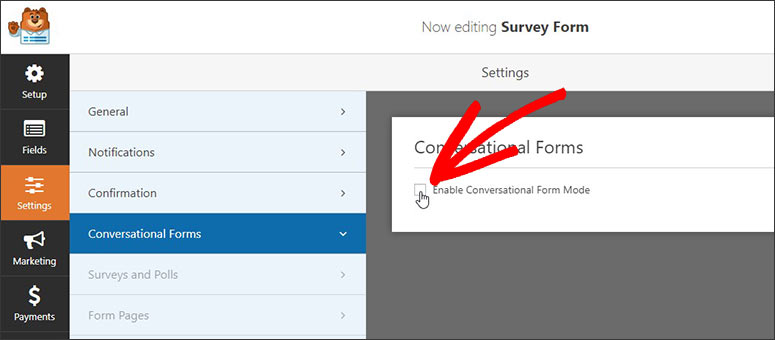
Once enabled, you’ll see all the customization settings for the conversational form. It allows you to add a custom logo, change the background, etc. You can also transform a normal page into a landing page with the conversational form on it.
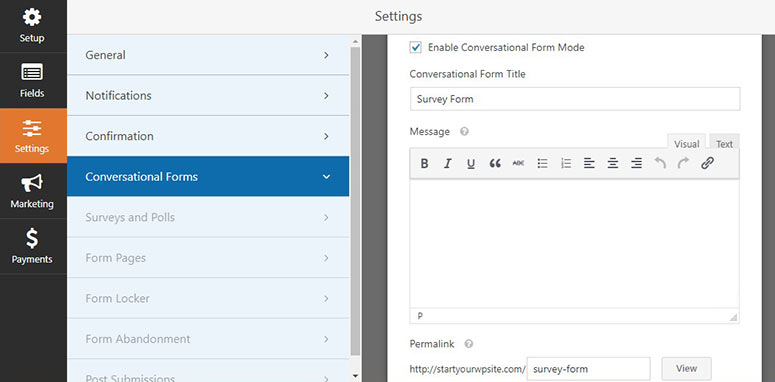
First, you need to enter the title in the Conversational Form Title field. Make sure that it’s short and explanatory.

After that, you can add a custom message for your users in the Message textbox. This message can work as a stimulator for users to take the survey.
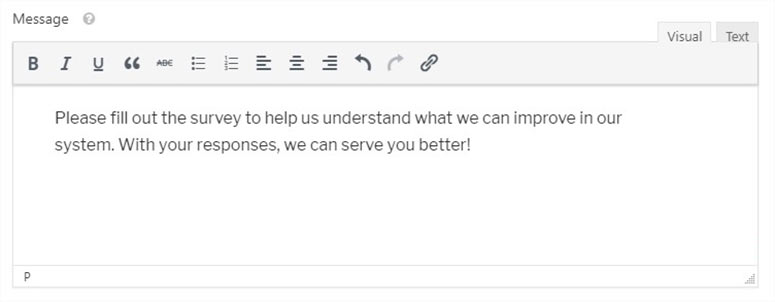
Next, you’ll find the ‘Permalink’ setting.
Normally, the ‘Conversational Form’ add-on automatically generates permalink or URL for your landing page. You can leave it as is or customize it to add your permalink.

It’s recommended that you keep it short so it looks professional and memorable.
In the next step, you should add a custom logo for your conversational form’s landing page. Under the Header Logo option, hit the Upload Image button to add your logo.

You’ll also see the Hide WPForms Branding checkbox. If you check off this option, the WPForms message from your conversational form page will be hidden.
Next, you need to select a color scheme for customizing your landing page. This color scheme will follow the background and buttons of your page.
You can either select a pre-built color or open the color picker tool to add a custom color scheme.

In the last setting, you can choose how the progress bar that denotes form completion should be shown.
Step 5: Preview and Save the Conversational Form
Once you’re done with all the settings, you can scroll up and click on the Preview Conversational Form button to preview the form.
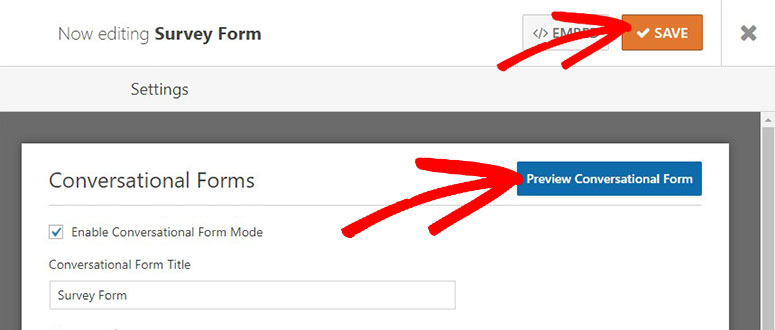
If you’re satisfied, then come back to the customization page and click on the Save button to store these settings.
It’s ready!
You can visit the permalink of your conversational form landing page to see it in action.
We hope this article helped you learn how to create a Typeform style form in WordPress. You may also want to check out our guide on how to create a multi-page form in WordPress.
You may want to see our full WPForms Review as well to see what you can really do with this form builder.

Comments Leave a Reply