
Do you want to learn how to easily create a Twitter landing page?
When you redirect your Twitter followers to your website homepage or products page, they’ll have a hard time navigating your site to find what they clicked for.
That’s why you need a separate landing page for your Twitter audience to display the information they are looking for in one click. This will help you drive more traffic towards your content and increase engagement.
In this article, we’ll show you how to easily create a Twitter landing page in WordPress so you can boost your conversions.
But first, let’s learn what a Twitter landing page is.
What is a Twitter Landing Page?
A Twitter landing page is a dedicated web page that is created to encourage your Twitter followers to sign up for your email list or purchase a product.
This page can be used as the link in bio page for your Twitter profile. So your visitors can click on the landing page link to learn more about your brand.
With a Twitter landing page, you can focus on a certain product or service and promote it without distractions, such as banner ads and nav menus. It is a must-have if you want to launch paid Twitter campaigns to boost your product sales.
Here’s an example of a Twitter campaign by Beats by Dre. Users click on the given link to know more about the offer.

When Twitter users click on the link, they are redirected to the product landing page that includes more details about the product and the offer specified in the post.

Like this, you can also create a Twitter landing page for your site. Here are some page elements you should consider adding to your landing page:
- Eye-catching headline that makes the visitors stay for more
- Clear and compelling copy that matches the offer in the Twitter post
- Attractive images to showcase your products. For example, if you’re selling your eBook, you need to add your pictures of the eBook
- Call-to-action (CTA) buttons and sections to motivate visitors to subscribe or purchase your product
- Customer reviews or testimonials to show customer stories and gain the trust of the visitors
Now that you know what page elements to add, let’s learn how to create a Twitter landing page to convert your followers into subscribers and customers.
Creating a Twitter Landing Page in WordPress
With the help of page builders, you can easily create a landing page for your Twitter campaigns without any coding knowledge.
For this tutorial, we are using SeedProd, the best landing page builder plugin for WordPress.
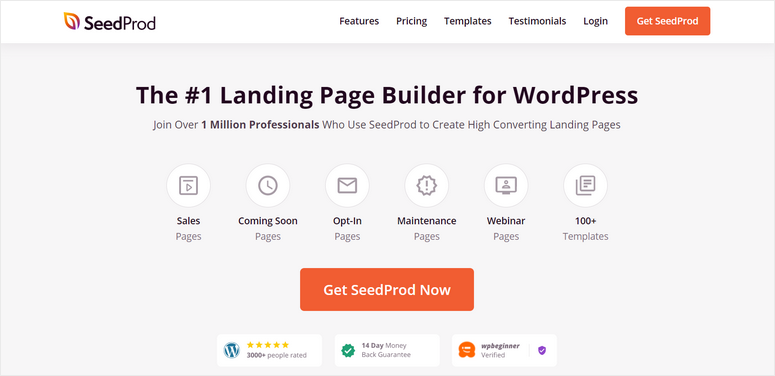
SeedProd is a powerful page builder that lets you create any type of landing page for promoting your products and services.
With its simple drag-and-drop page builder, you can easily add and remove page blocks. You’ll get more than 40 content blocks that you can use to create a stunning Twitter landing page.
SeedProd also comes with a library of 150+ beautiful landing page templates. So you can select the one that meets your requirements and customize the page as you like.
Here are some of the features that make SeedProd the best choice for creating your Twitter landing page:
- Responsive: All the landing pages you create will load fast and beautifully on all types of devices.
- SEO friendly: Integrate SEO tools like All in One SEO and Google Analytics to improve your search result rankings.
- Unique page blocks: Add high converting content blocks such as optin forms, testimonials, countdowns, and CTA buttons.
- Smart sections: Choose from a collection of templates to easily add sections such as hero header, call to action, footer, and more.
- Email Marketing Integrations: Build your email list by connecting with email marketing services such as Constant Contact, AWeber, Active Campaign, and more.
- Spam Protection: Protect your landing page from hackers and spambots with the Google reCAPTCHA option.
Along with this, SeedProd offers a built-in Coming soon page, 404 pages, login page, and maintenance mode. This helps you notify your customers whenever your site is down or under construction.
With that said, let’s learn how to create a Twitter landing page using the SeedProd plugin.
Step 1: Install and Activate SeedProd Plugin
First, you need to sign up for a SeedProd account.
After you sign up, you’ll find the download file and your license key in the Downloads tab.
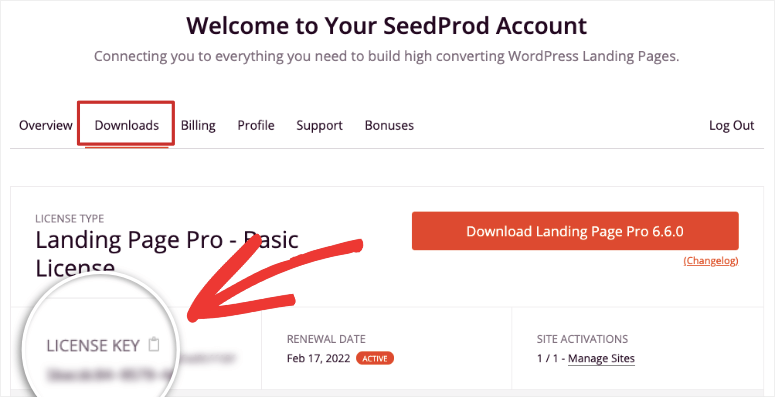
Then, install the SeedProd plugin on your site. For more details, you can check our guide on how to install a WordPress plugin.
Once you install and activate the plugin, open the SeedProd » Settings tab and enter your license key here.

Click on the Verify Key button to see the verification successful message.
Now you can start creating your dedicated Twitter landing page.
Step 2: Create a New Landing Page
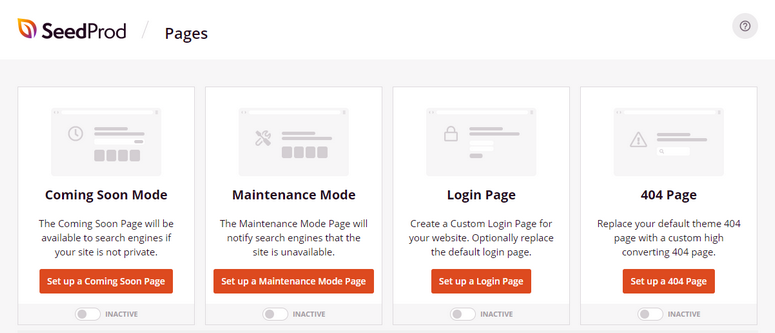
To create a new landing page, navigate to the SeedProd tab from your admin dashboard.
Here, you can see the options to set up Coming Soon Mode, Maintenance Mode, Login Page, and 404 Page for your site.
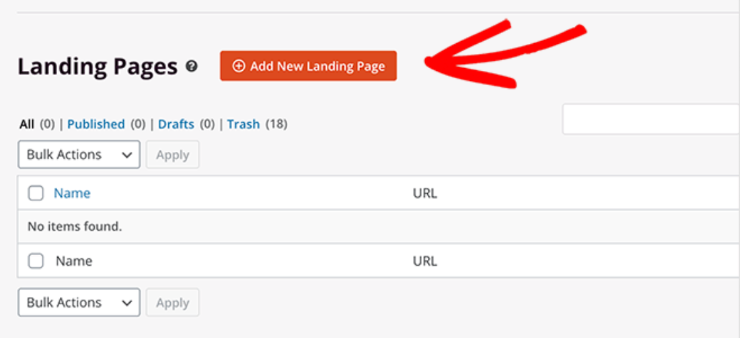
If you scroll down, you’ll find the Add New Landing Page button to create a new landing page.
Then, you’ll see the template library that offers more than 100 landing pages designs to help you get started. You can use a Blank Template and create a page from scratch.
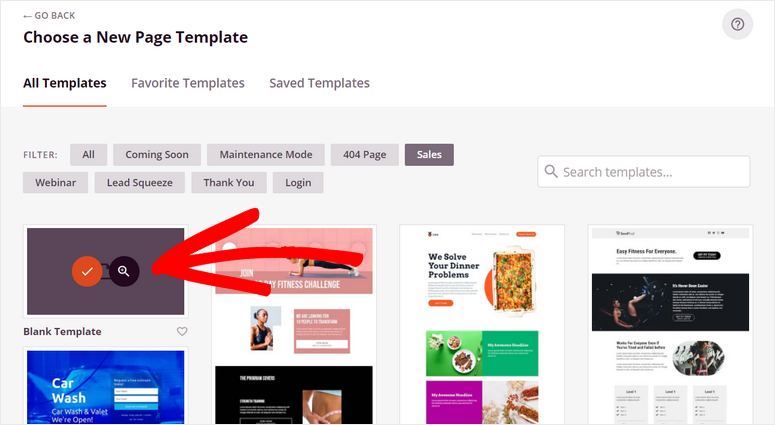
Or, use the filters such as coming soon, webinar, lead squeeze, thank you, and others to find the right template for your site.
When you hover over a template, the magnifying glass icon appears. You can click on it to preview a template on the same page.

We are using the Keto Sales Page template as an example for this tutorial.
After you select the template, you’ll need to enter the name and URL for your Twitter landing page.
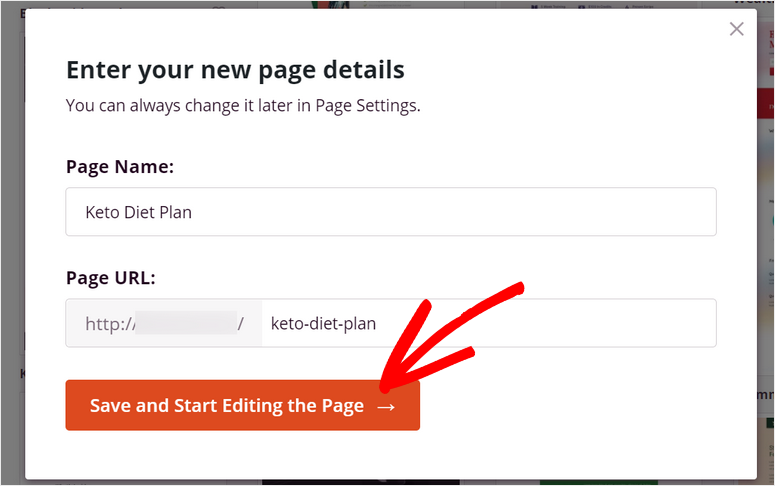
Click on the Save and Start Editing the Page button to launch the SeedProd page builder.
Now, we’ll show you how to customize the landing page template to fit your preferences.
Step 3: Customize Your Twitter Landing Page
With the help of SeedProd’s drag-and-drop page builder, you can easily edit your landing page without touching a single line of code.
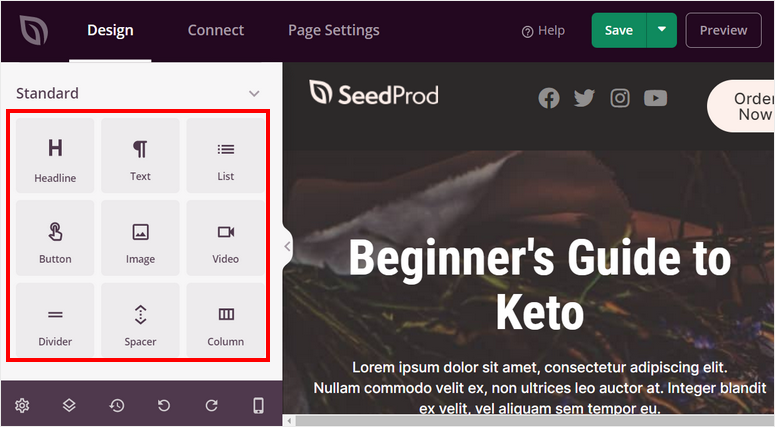
On the left side of the page builder, all the content blocks are divided into 3 sections: Standard, Advanced, and WooCommerce.
In the Standard section, you’ll find the basic content blocks such as headlines, images, CTA buttons, and more.
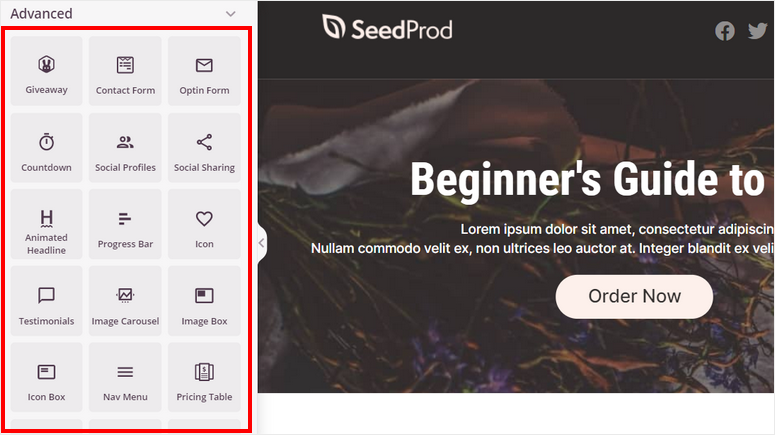
In the Advanced section, you’ll find more content blocks that will help you convert better. Some of the blocks are:
- Optin form
- Giveaways
- Countdown
- Animated headline
- Testimonials
- Social sharing
- Star rating
In the WooCommerce section, there are content blocks related to WooCommerce like add to cart, checkout, cart, and more.
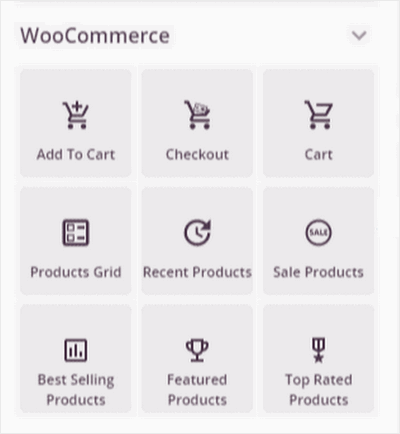
You can add these blocks and connect with WooCommerce to sell your products straight from your Twitter landing page.
To add any of these content blocks, all you need to do is drag and drop the blocks on the right side of the page builder. For example, we are adding an optin form on our landing page.
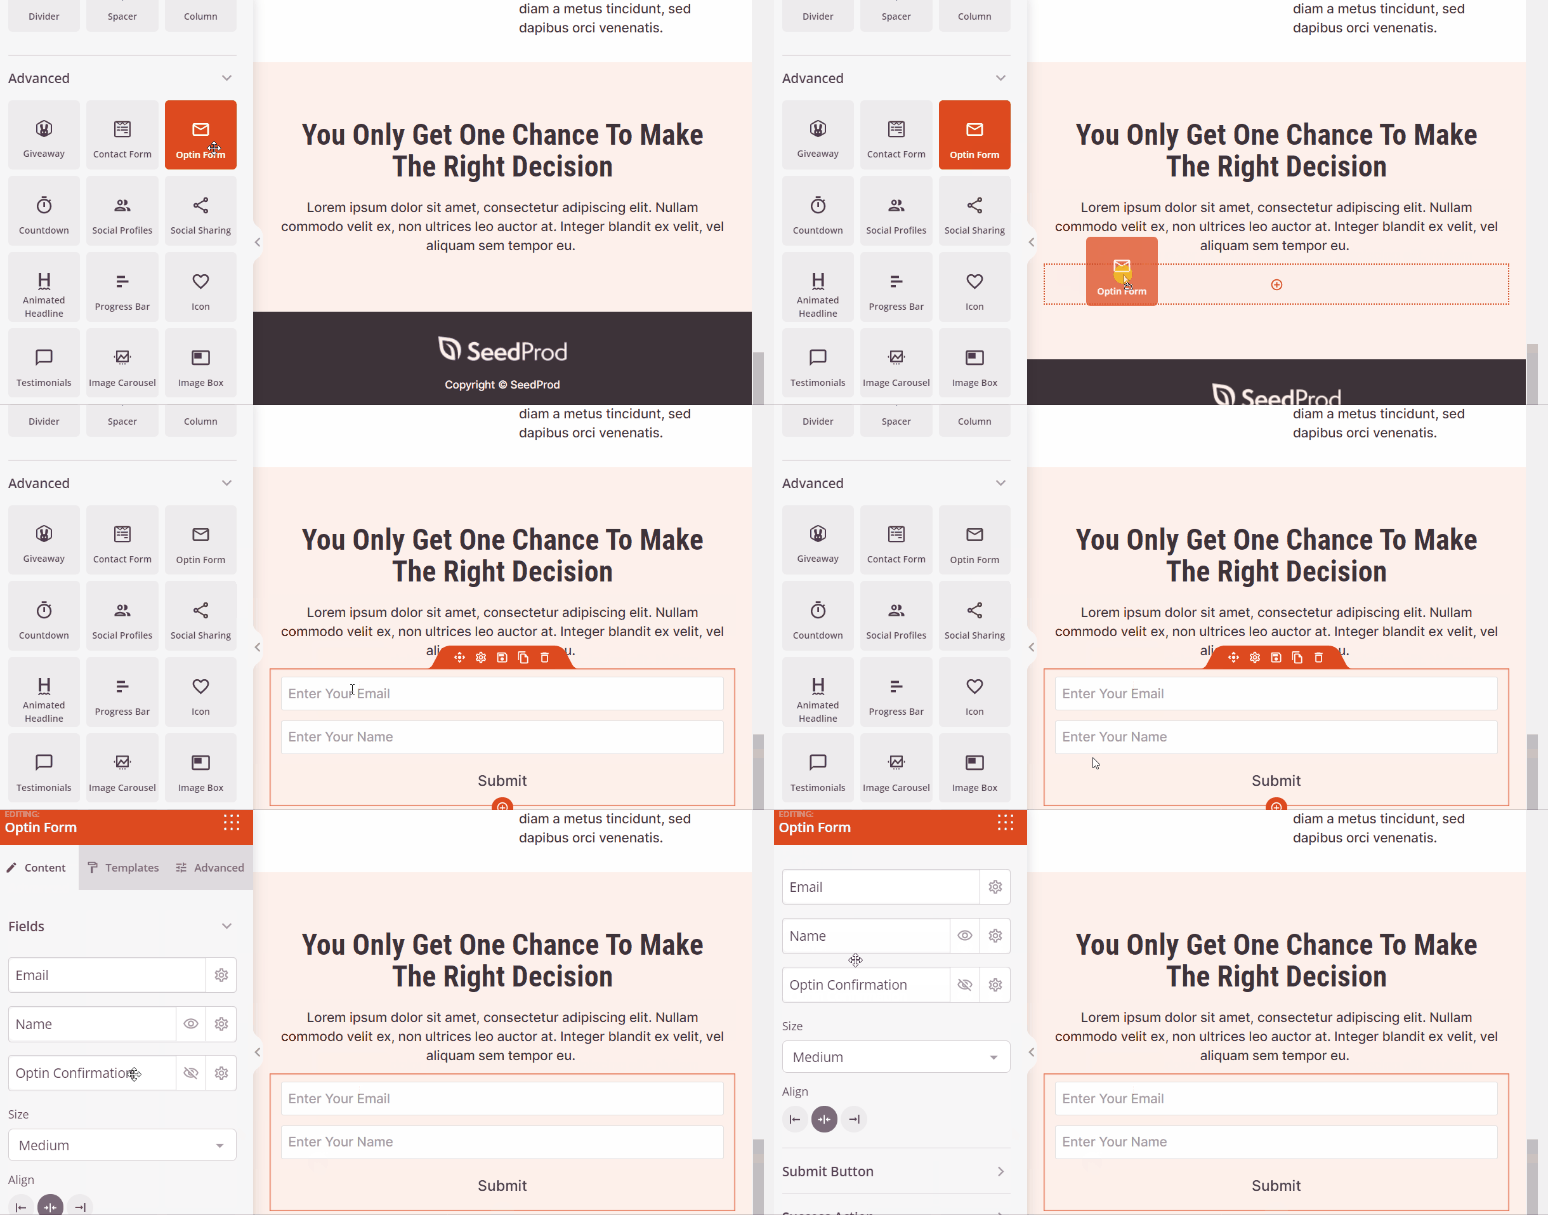
If you want to edit any content block, you can simply click on it and you’ll see the block settings. Now, change the text, font, and other options to match your style.
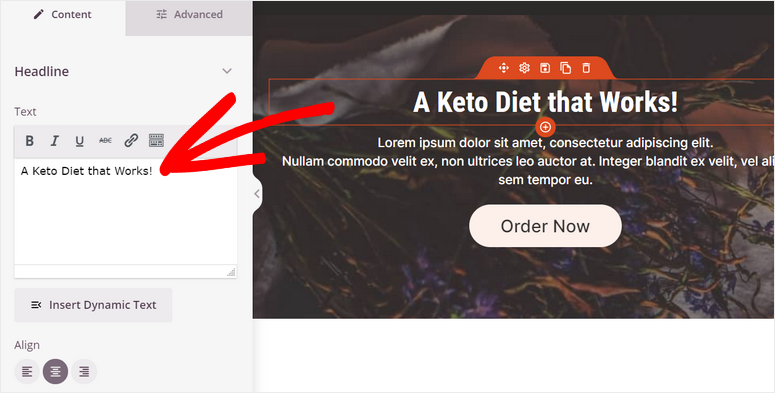
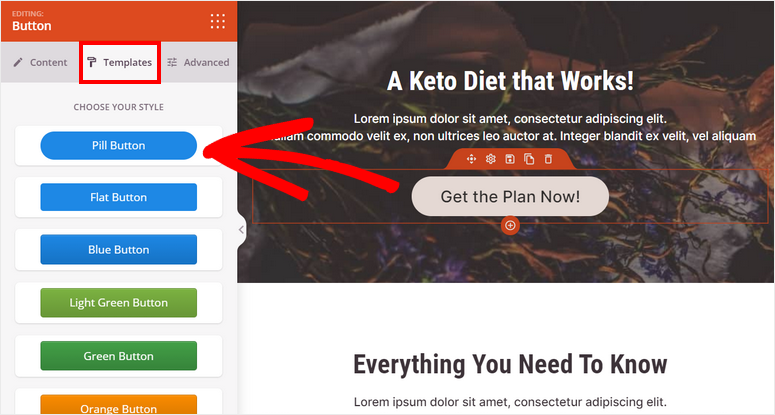
Also, SeedProd lets you edit your CTA button so you convert better. There are options to change the text, color, fonts, and template of the buttons.
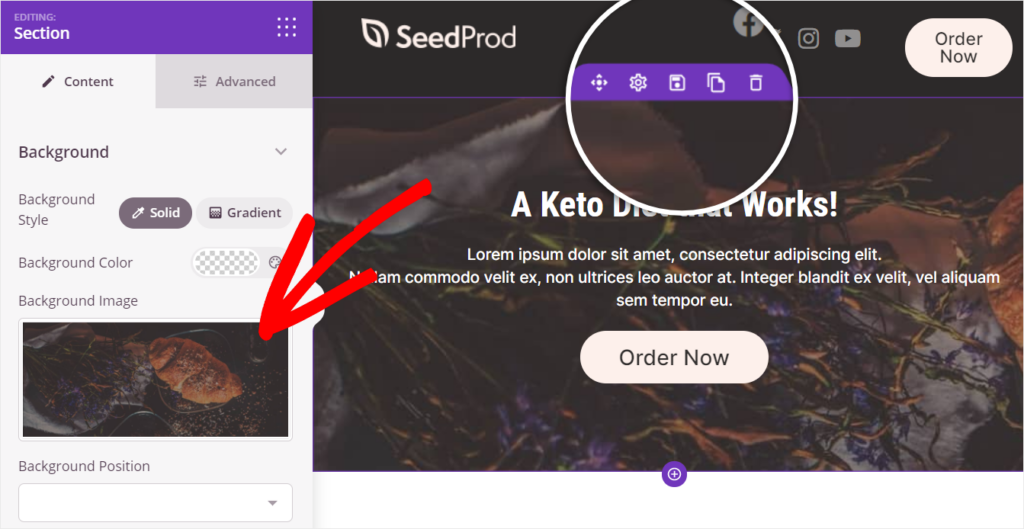
Other than this, you can edit a whole section by clicking on the page preview side of the page builder. It allows you to change the background image, color, and more.
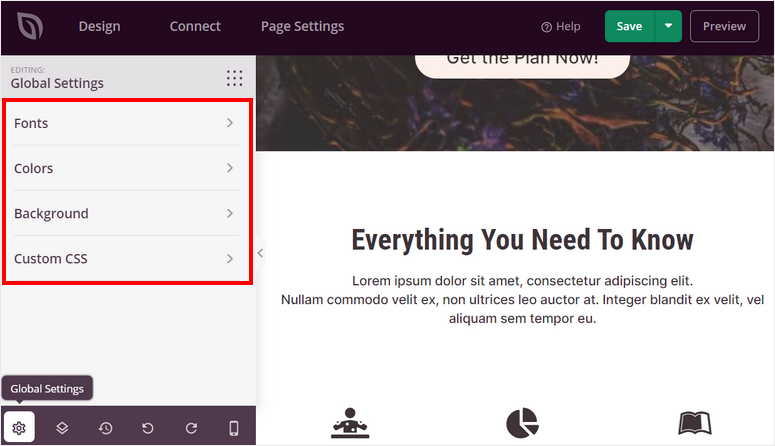
Once you are done with editing the content blocks and sections, head over to the Global Settings on the bottom-left corner of the page builder. There are 4 options including fonts, colors, background, and custom CSS.
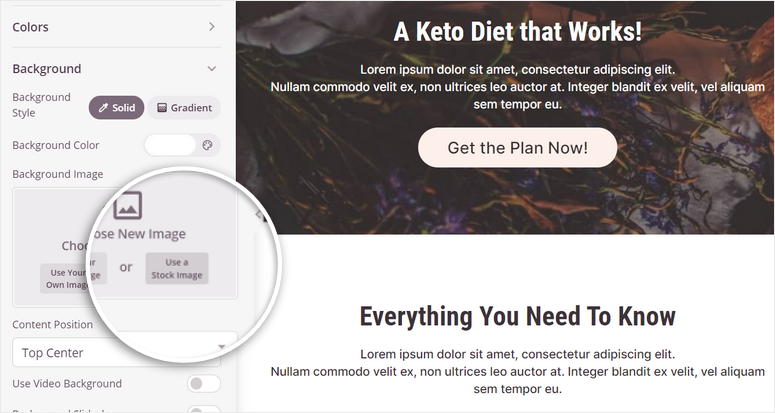
Here, you can change the font, color, and background image for the entire Twitter landing page. SeedProd allows you to search and add stock images directly in the page builder.
After you set up the global settings, don’t forget to hit the Save button.
Now you are ready to connect your Twitter landing page to your email service provider
Step 4: Connect Your Email Service Provider
SeedProd lets you integrate with email marketing services like Constant Contact, Aweber, ConvertKit, and more. This means you can automatically import the contact information of the users who sign up on your site.
It also lets you segment your contacts and send them to different email lists according to the user input.
To connect your email marketing list, open the Connect tab at the top of the page builder. Here, you can see all the email service providers that you can connect with.
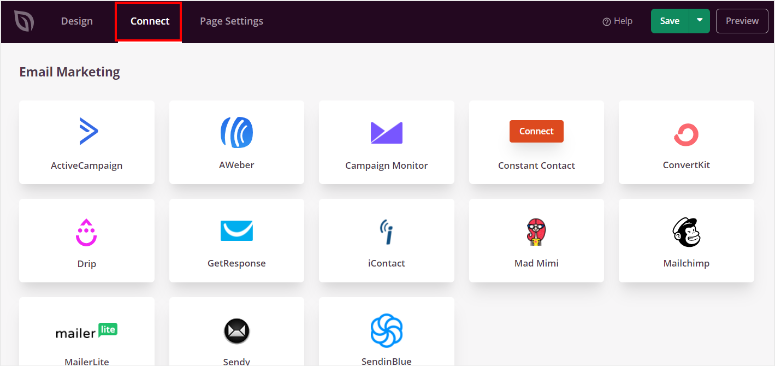
Select your email service provider and click on the Connect New Account button. Then, follow the instructions that are displayed on the screen.
The popular email service providers will ask you to enter your API key to connect your account. You can get yours from your email account dashboard.
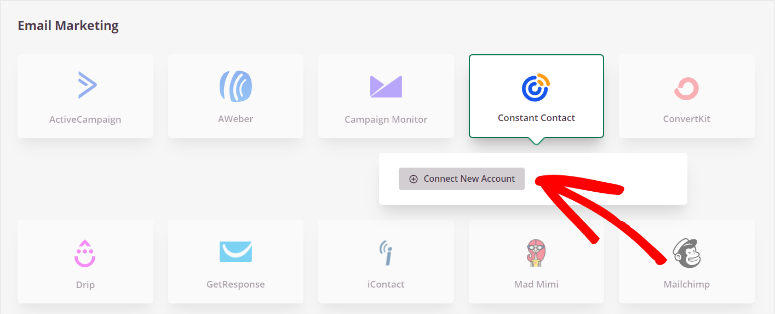
Save your settings after you’re done. Now you’re ready to set up autoresponder emails for your subscribers.
One last thing you need to do before you publish your landing page is customize your page settings.
Step 5: Configure Page Settings
To optimize your site for performance and SEO, you’ll need to configure the page settings. You can access it through the Page Settings tab on the top bar of the form builder.
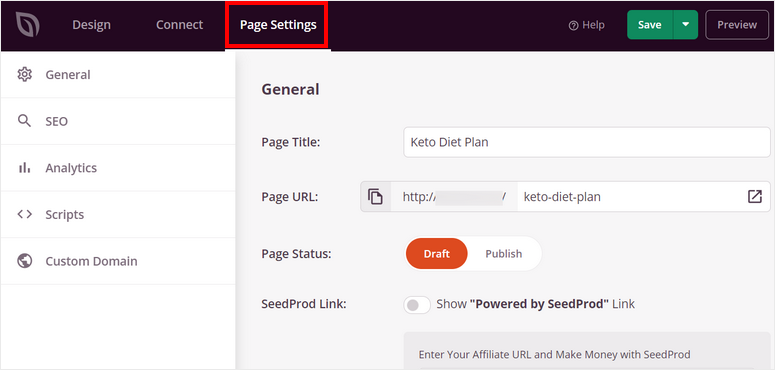
Here, you’ll see these pages settings:
- General Settings: Edit the page title, URL, and status. There is also an option to show or hide the “Powered by SeedProd” link on the page.
- SEO: Integrate with All in One SEO plugin and optimize your Twitter landing page for better SEO rankings.
- Analytics: Track the traffic on your landing page with analytics plugins like MonsterInsights.
- Scripts: Add custom code to customize the page style even more. You can leave this part if you are not comfortable with coding.
Once you’re done with the settings, click the Save button.
All you need to do now is publish your landing page to your WordPress site.
Step 6: Publish Your Twitter Landing Page
To publish your landing page, click on the dropdown arrow next to the Save button and click on the Publish option.
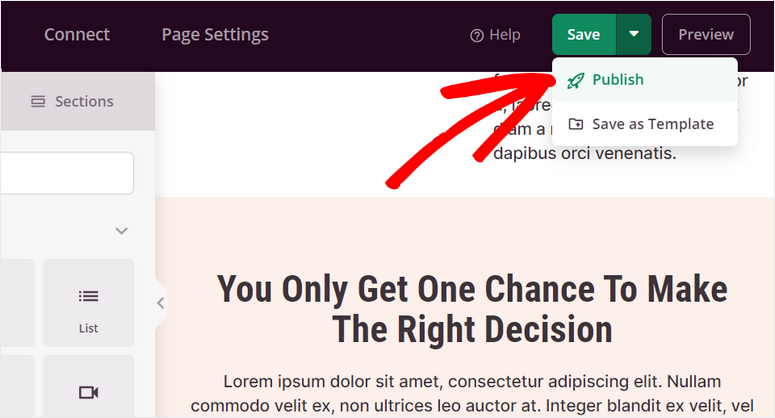
After your page is published, you’ll see a popup with a success message. Here, you can click on the See Live Page button to see how your Twitter landing page looks.
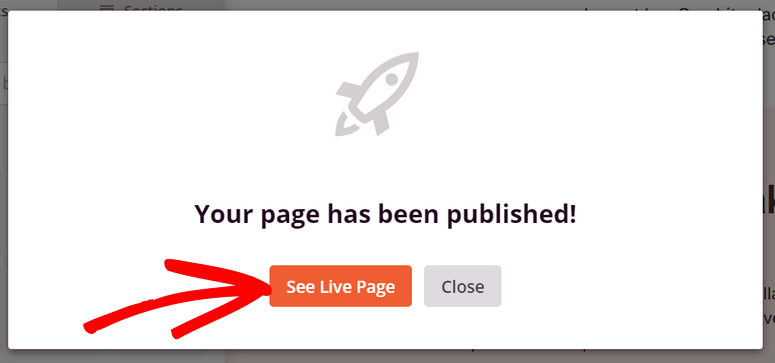
Congrats! You’ve successfully created a landing page for your Twitter campaign to boost your conversion rate.
We hope this tutorial helped you learn how to easily create a Twitter landing page in WordPress.
SeedProd is the #1 landing page builder plugin for WordPress sites. It offers a beginner-friendly page builder that lets you create high-converting landing pages for any purpose.
With SeedProd, you can easily create and customize a landing page for your Twitter campaigns. You can also create landing pages for your other social media campaigns.
Also, another great tool for maximizing your marketing results is OptinMonster. It lets you create all types of campaigns such as floating bars, popups, welcome mats, and more.
To increase your conversions, you can set targeting rules to display your marketing campaigns to the right people at the right time.
For your next steps, you can check out these resources:
- Best Twitter Plugins for WordPress
- Automatically Share WordPress Posts to Facebook and Twitter
- Top WordPress Plugins to Make Your Site Mobile Friendly
These posts will help you connect your Twitter account with your WordPress site and easily share automated posts. The last one will help you optimize your landing pages for mobile users.

Comments Leave a Reply