Do you want to create a landing page in WordPress without spending a dime?
Landing pages are easy to create but if you’re looking to increase sales and conversions, then you need to be sure your page is visually appealing and engaging.
There are multiple landing page builder plugins for WordPress, and most of them offer a free solution. However, you’ll want to choose one that gives you customizable templates that are optimized for conversions.
At IsItWP, we’ve created many landing pages over the years, and in this tutorial, we’ll show you the best way to create a free landing page in WordPress.
What Do You Need to Create a Free Landing Page in WordPress?
Manually creating a landing will take a lot of time and coding skills. You can also hire a professional developer to set up landing pages on your website, but it won’t be FREE.
A better and easier way to create a landing page is by using SeedProd, the best drag and drop WordPress landing page plugin.
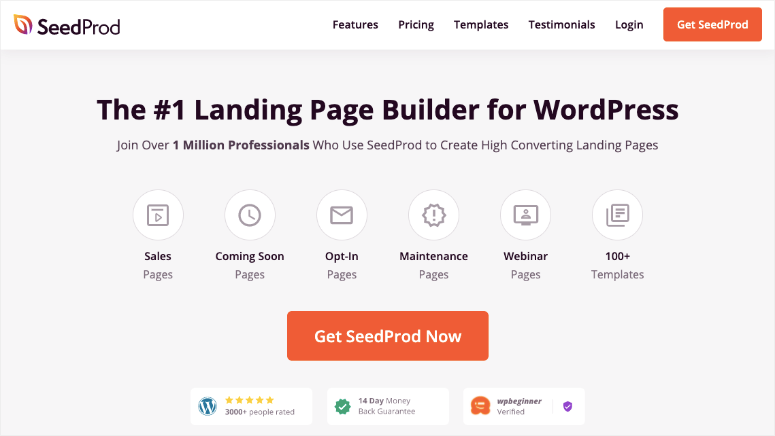
SeedProd has a free version that you can use to create a stunning landing page in WordPress. It comes with dozens of landing page templates that are designed to look good on any screen size.
You’ll find a template for just about any purpose such as sales, promotions, and lead generation. The plugin even comes with built-in coming soon and maintenance mode so you can hide your website while it’s under development.
SeedProd makes it incredibly easy to create landing pages with point and click tools. So you’ll be able to set up and customize your free landing page without editing any code. You can add dozens of basic and advanced elements, custom blocks, and smart sections.
Moreover, SeedProd has premium integrations to connect your landing page with email marketing services, SEO and analytics tools, WooCommerce, and payment solutions.
Some of the key SeedProd elements include:
- Signup forms
- Contact forms
- Social profiles
- Progress bar
- Countdown timer
- Star rating
The best part about SeedProd is that it’s easy to configure, even for absolute beginners. You can use the visual editor to design and customize landing pages on your website.
Without further delay, let’s show you the step-by-step process of creating a free landing page with SeedProd.
Step 1. Install and Activate SeedProd Plugin
The first thing you need to do is to install and activate the free SeedProd landing page plugin.
You’ll need to visit the Plugins » Add New page from your WordPress admin area and search for the SeedProd plugin.
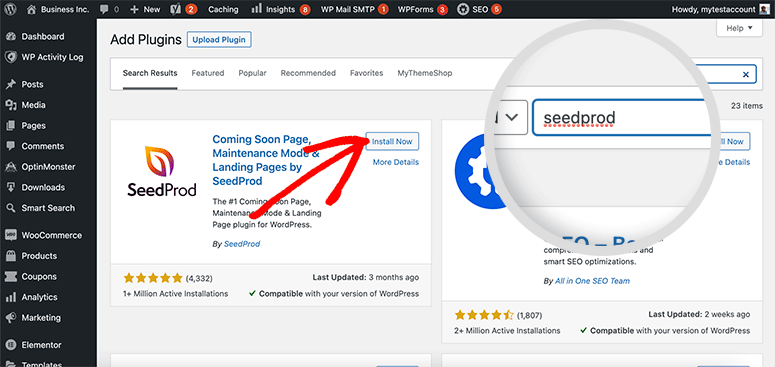
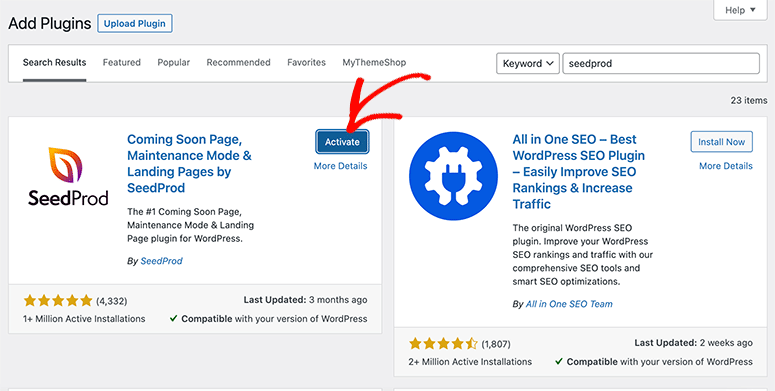
Click on the Install Now button and then click on the Activate button.
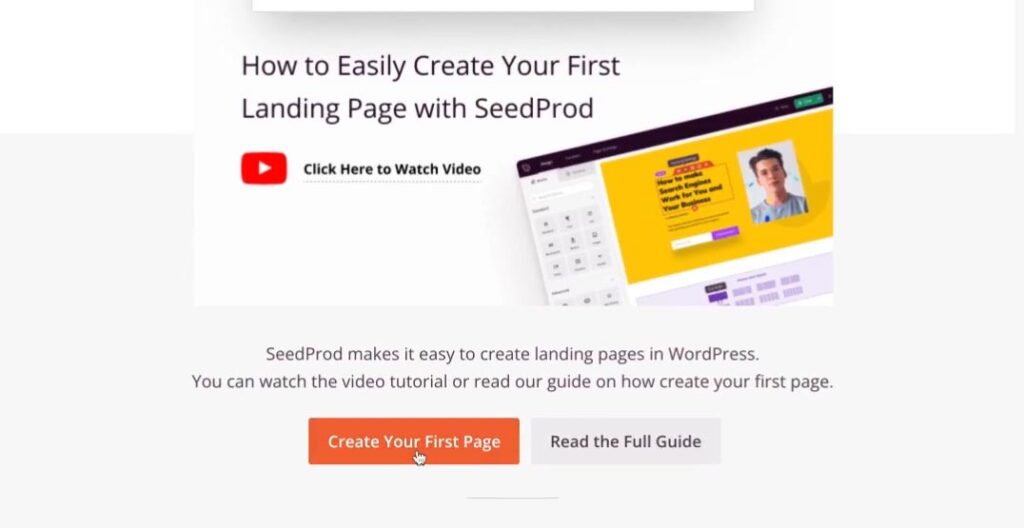
Upon activation, it’ll redirect you to a welcome screen. You need to scroll down on the welcome page and click on the Create Your First Page button.
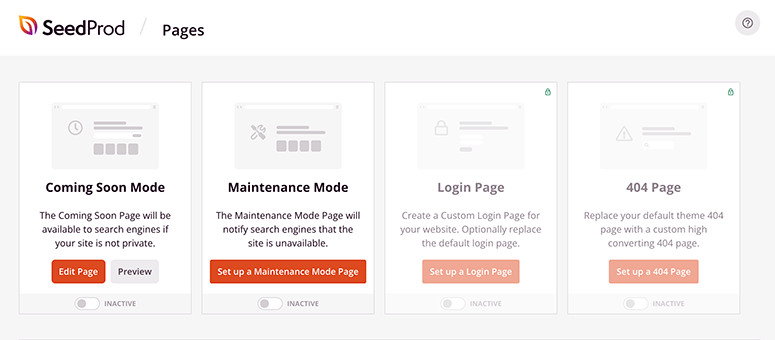
On the next page, you’ll find SeedProd’s top suggestions:
- Coming Soon page
- Maintenance Mode page
- 404 page
- Login page
The SeedProd free landing page plugin includes coming soon and maintenance mode pages. If you want to create a login page or 404 page, you’ll need SeedProd’s premium version.
Next, we’ll show you the process to add a new landing page in WordPress.
Step 2. Create a New Landing Page in WordPress
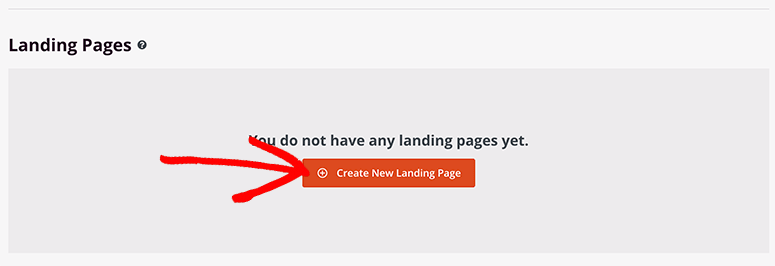
You’ll need to scroll down on the same page and click on the Create New Landing Page button.
This will open up a library of SeedProd’s landing page templates. If you want to select a specific template, you can use the filters given at the top of your screen.
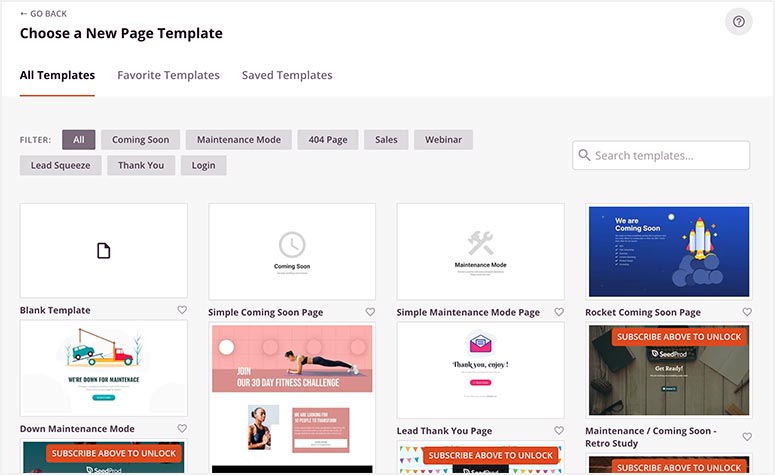
You’ll get 7 free landing page templates with the free version. If you subscribe to SeedProd’s email list, you’ll also get 10 more templates for free.
To access the complete SeedProd templates library, you need to upgrade to the SeedProd Pro plan.
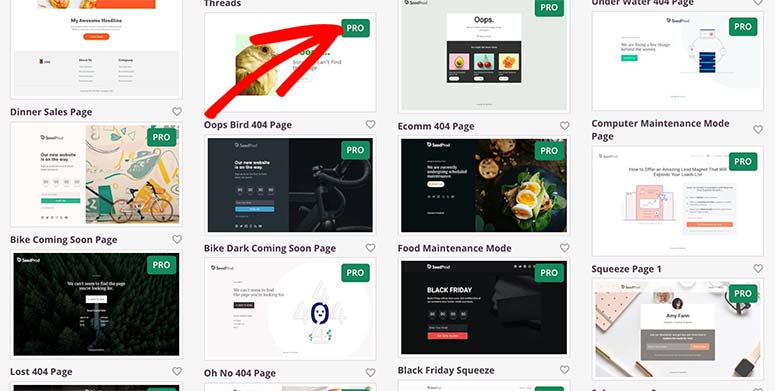
SeedProd’s templates are designed to look great out of the box. Plus they are fully customizable so you can make small changes or even complete change the design if you want.
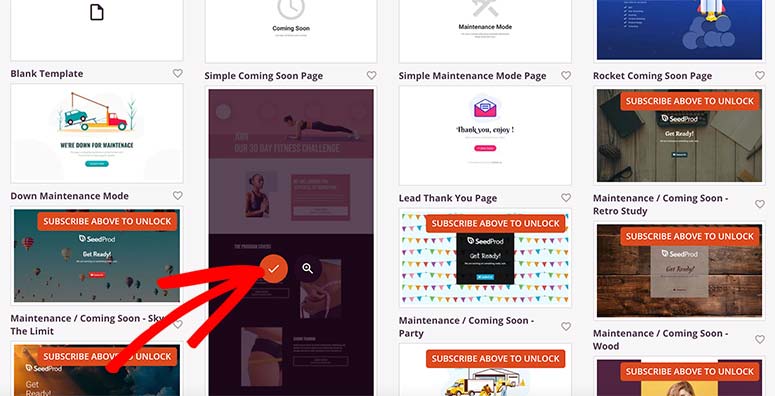
For now, let’s start with the Fitness Sales Page template. You need to move your mouse over the template and click on the tick icon.
A popup will open where you need to enter the Page Name. It’ll automatically generate the Page URL. You can change this information later, so feel free to add any page name.
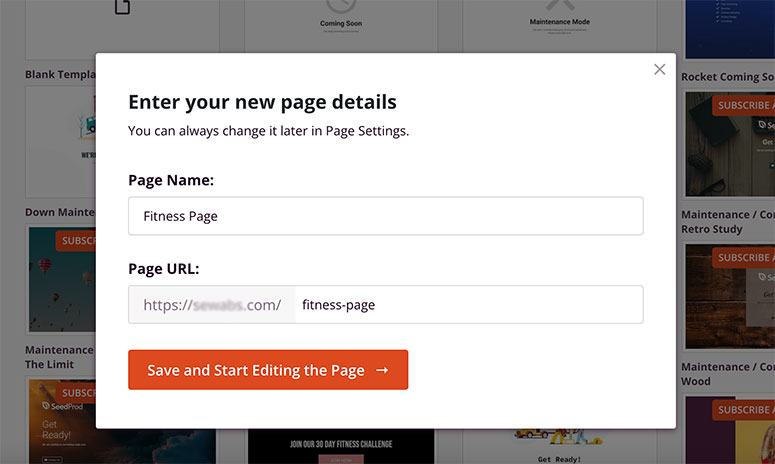
Now click on the Save and Start Editing the Page button. Now you should be inside the SeedProd landing page builder where you can edit and customize your free landing page.
Step 3. Add Content to Your Free Landing Page
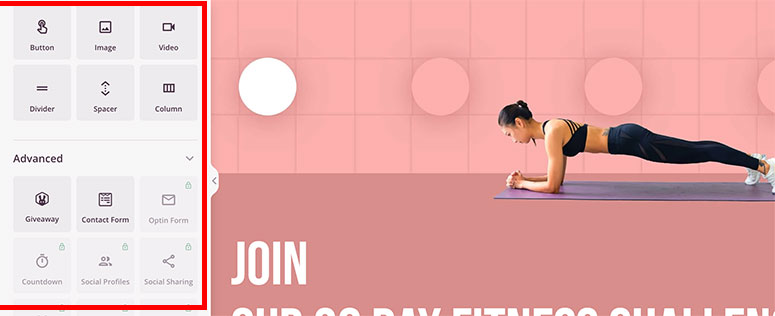
The SeedProd page builder has custom blocks and sections on the left side and the live preview of your landing page on the right side of the screen.
SeedProd’s free landing page plugin includes all standard blocks and a few advanced blocks. To unlock all blocks, you’ll need the SeedProd Pro version.
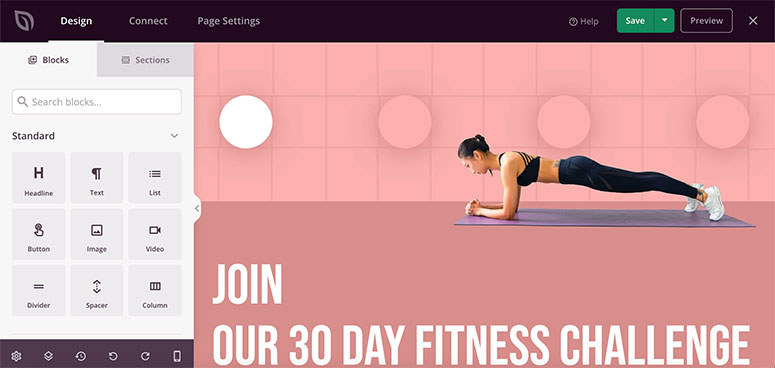
You can drag and drop any custom block from the left panel to your page preview on the right side. SeedProd comes with multiple useful custom blocks.
- Headline
- Text
- Image
- Video
- Giveaway
- Contact Form
- Spacer
- Divider
- And more…
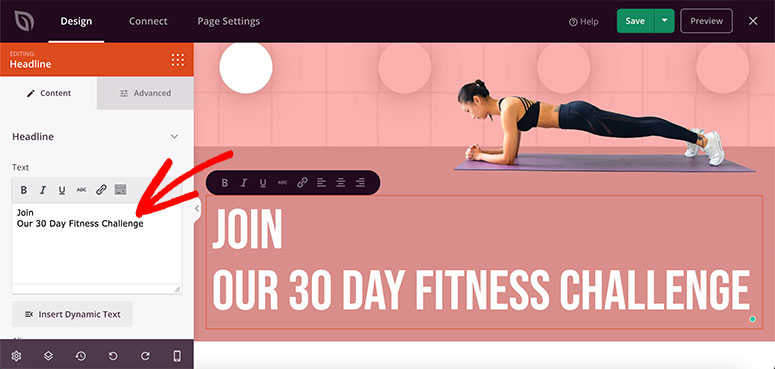
If you click on any section in the page preview, you’ll see the editing options on the left side. SeedProd has an inline text editor that lets you customize the content of your landing page in real-time.
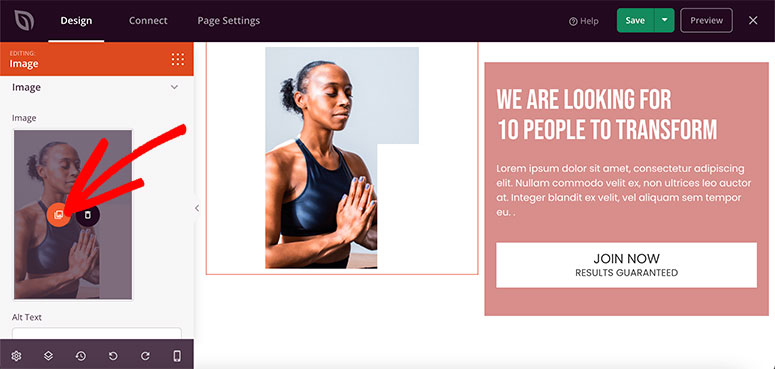
It works the same for images and videos. You can click on a dummy image from your landing page template’s live preview, and it’ll display the options on the left panel.
You can replace images/videos by uploading the media content from your computer or your website’s media library.
Add all your content and images to the free landing page template. Once you’re done, go ahead and click on the Save button from the top-right corner of your page.
Step 4. Customize Your Landing Page Design
By default, the SeedProd landing page templates are professionally designed with great color combinations and beautiful fonts. They are optimized to grab a visitor’s attention and get them to take action on your site.
However, you can also customize the design of your page template to match your website or brand assets. You’ll need to click on the gear icon from the bottom left corner of your screen to access Global Settings.
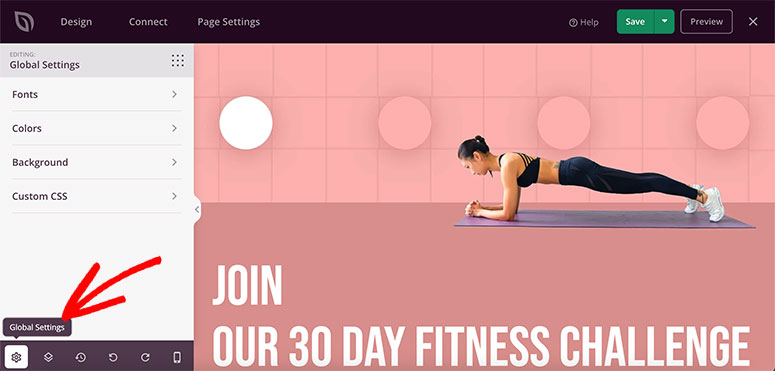
These settings include,
- Fonts
- Colors
- Background
- Custom CSS
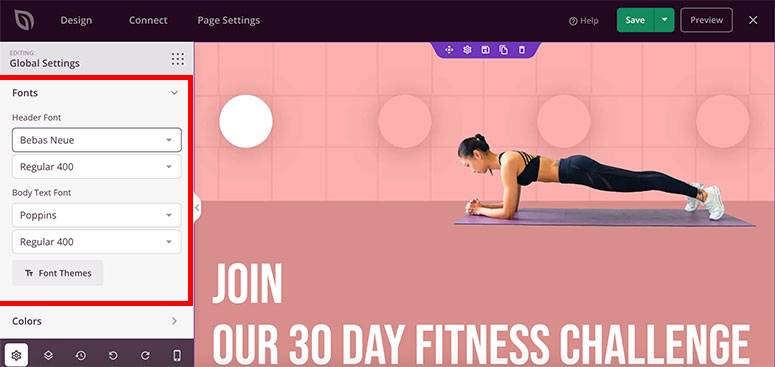
First, click on the Fonts tab. This includes font type and font size for your header and page content.
Click on any dropdown to change the font style or size. It also offers built-in font themes to completely change the text styling of your page template.
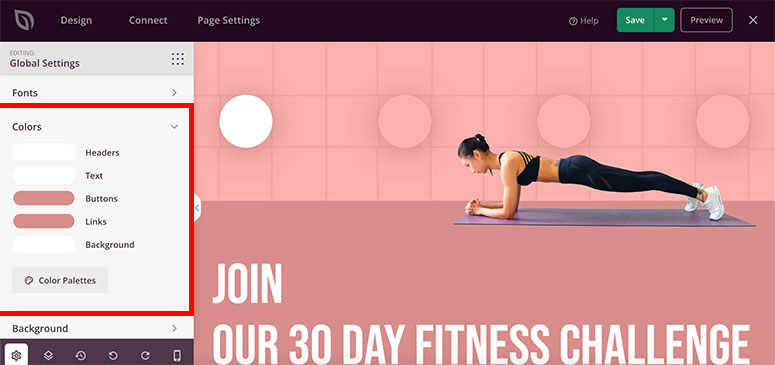
Next, under the Colors tab, you can change the colors for all page elements, including headers, text, buttons, links, and more. There are also premade color palettes that you can choose from to get an aesthetically-pleasing look.
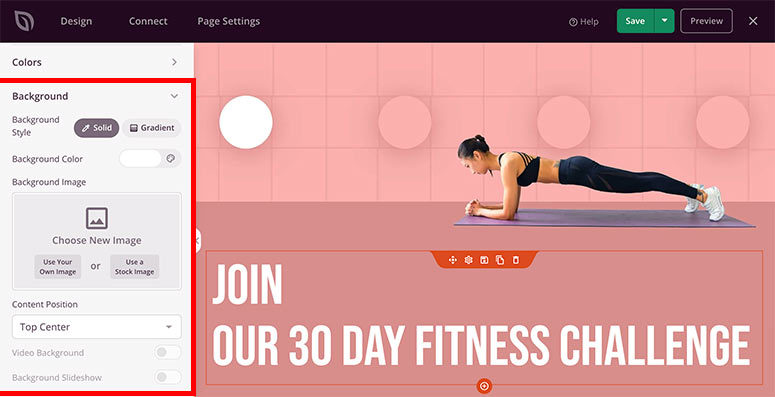
In the Backgrounds tab, you can select between solid and gradient background styles. It also includes the background color, background image, content position, video background, slideshow, and more.
The Custom CSS section is designed for developers who want to customize the page using coding, so let’s skip it. Don’t forget to click on the Save button to store these settings.
Step 5. Configure Page Settings in SeedProd Builder
SeedProd lets you completely control your page settings. To access these options, open the Page Settings tab from the top navigation menu.
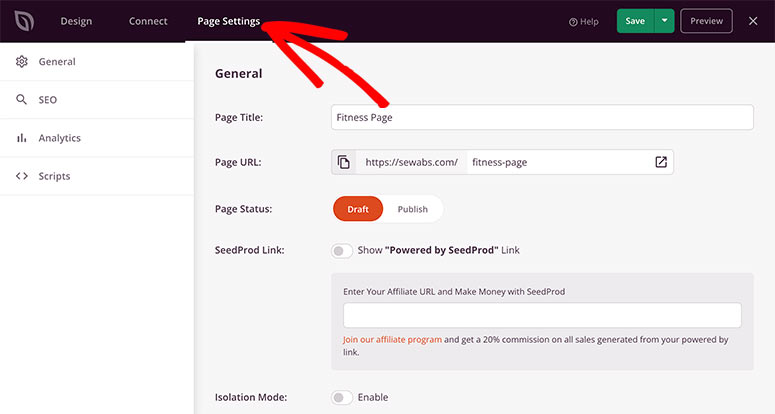
The page settings are divided into 4 sections:
- General: These settings include page title, page URL, page status, and more.
- SEO: This will help optimize SEO for your landing page. You need to use the All in One SEO plugin for WordPress to manage SEO settings.
- Analytics: In this section, you can view the traffic and visitors on your landing page using the MonsterInsights plugin.
- Scripts: Here you can add custom scripts, for example Facebook Tracking Pixel code.
After you’re satisfied with all the page settings, click on the Save button to continue. And your landing page is ready to roll.
Step 6. Publish and Display Your Free Landing Page
Now that your landing page is ready, you can publish and display it to your website visitors.
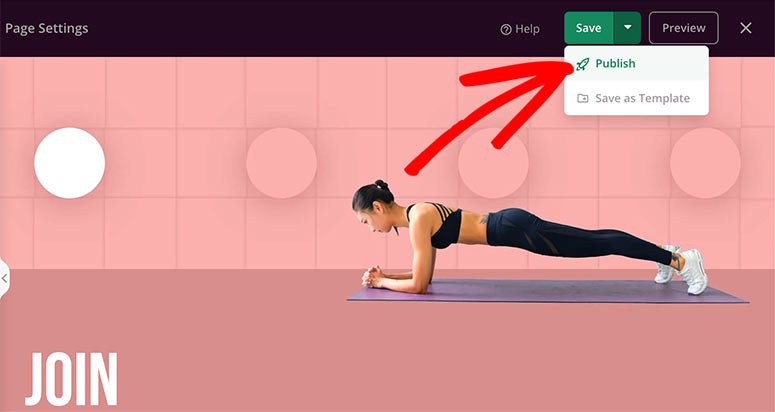
It’s easy to do so. Click on the down arrow option next to the save button and then click on the Publish option.
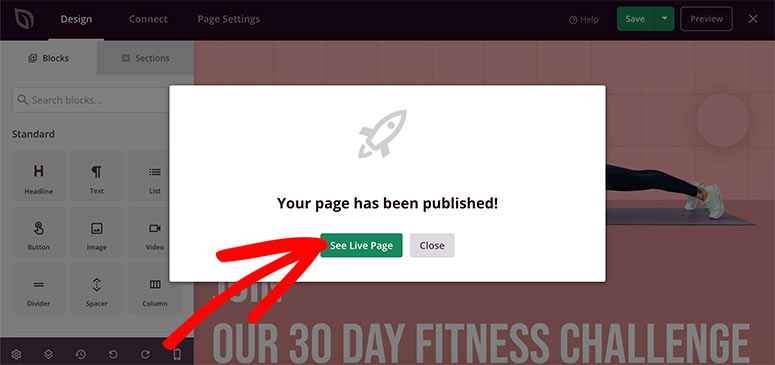
A popup will open, confirming that your landing page is live now. You can click on the See Live Page button on it.
Take a good look at your content and images. The landing page is now visible to everyone on your WordPress website.

Wasn’t that easy? You just learned how to create a landing page in WordPress without spending a penny!
Remember, you can go back and customize your free landing page anytime. You can also look into SeedProd pricing to learn about the premium plans that’ll give you access to more features and options.
Moving forward, we recommend you check out some of the popular and helpful guides:
- How to Create a Stunning Splash Page for Your WordPress Site
- How to Make a High-Converting Squeeze Page in WordPress
- 8 Best Drag and Drop WordPress Page Builders
These articles will further help you create beautiful and engaging landing pages that convert more leads into customers. And, the last one is a comparison of the most popular landing page builders you don’t want to miss!

Comments Leave a Reply