Are you looking for a landing page builder for your WordPress site? If so, you’re in the right place.
Landing pages are excellent tools that businesses use to create optimized marketing campaigns, promote their products, drive traffic to their site, and more.
That’s why, today, we’re going to teach you step-by-step how to create a landing page in WordPress. But first, let’s get clear on what a landing page is.
What’s a Landing Page?
A landing page is any page of your website where you drive traffic, usually with the goal of getting a specific conversion. That means, technically, your homepage could be considered a landing page if you’re sending traffic to it from paid ads, for example.

But more often than not, we refer to a landing page as a page on your website dedicated to a singular campaign or piece of content. It focuses on a product or offer with the goal to increase conversions and user engagement.
It’s important for customers to interact with your landing page so you can reach your marketing objectives and see positive results.
Put simply, landing pages are powerful tools designed to speak to your target customers and encourage them to take action on your site. Whether you want to grow your email subscriber list or increase sales for a specific product, creating an optimized landing page is a surefire way to get there.
The Benefits of a Landing Page
There are endless benefits to creating a landing page for your campaign. It’s a powerful marketing tool that emphasizes a specific offer or product to increase sales, build an email list, generate traffic, and more.
Let’s look at a few benefits of landing pages.
1. Reach Your Marketing Goals Faster
Landing pages are valuable because they can turn your site traffic into paying customers and increase your business’ revenue. It’s easy to introduce new visitors to your products and services when you highlight their amazing features and give them reasons to engage.
What’s useful about landing pages is that you can create a new one for each campaign to target specific customers, add personalization, and boost sales. You can reach your goals faster by focusing on the content you want to promote.
2. Collect User Data
Through your website analytics, you can collect valuable user data and information used to improve future campaigns and conversions. Tracking user behavior is vital to narrow your target audience, refine your content, and enhance the overall effectiveness of your campaign.
Knowing how visitors spend time on your site and where they bounce tells you what areas you need to improve and what elements work. From here, you can create a future campaign with the best-working elements that your site visitors enjoy.
3. Grow Your Email List
Email lists are essential for businesses that want to stay in touch with their customers and continue marketing to them. They’re also good at improving lead generation, strengthening customer relationships, and personalizing content.
Landing pages are the perfect opportunity to collect email addresses and other user information so you can contact them later. People won’t mind giving you their information if you have an offer that’s too good to refuse.
Building an email list strengthens customer loyalty and personalizes your message. You already know that the people who opted into your offer are interested, so it’s easy to send them relevant offers tailored to their needs.
Now, let’s get into the best landing page creation tool and how to use it to build stunning landing pages in minutes.
Building a Landing Page: 2 Methods
In this post, we’ll show you how to build a landing page in 2 different methods:
- Method 1: Building a Landing Page With SeedProd
- Method 2: Building a Squeeze Page (Short Landing Page) With OptinMonster
Method 1: Building a Landing Page With SeedProd
With SeedProd’s powerful drag and drop WordPress landing page builder plugin, it’s easy to skyrocket leads, grow your email list, and promote your business.
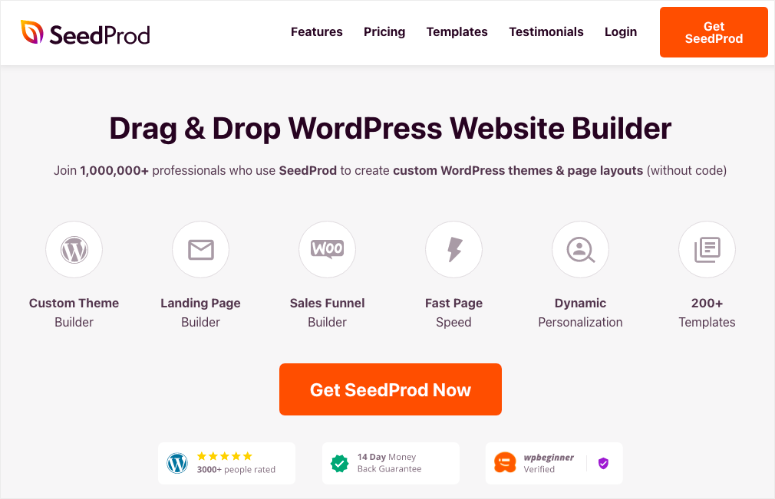
Some of the powerful features that come with SeedProd include:
- Drag-and-drop page builder: No coding knowledge is necessary because SeedProd’s drag-and-drop builder makes it easy for beginners to create the landing page of their dreams.
- Premade templates: Choose from 50+ beautiful premade templates that are easy to customize and look great on your site.
- Mobile-friendly: The plugin is mobile-responsive so your landing page looks stunning no matter what device users are on.
- Bloat-free code: SeedProd uses “bloat-free” code that minimizes your site elements and allows it to run faster. The faster your site, the happier your visitors.
- Color schemes: Choose from 20 built-in color schemes to customize your page’s look or simply create your own.
- Blocks: The drag-and-drop builder uses Blocks so it’s easy for you to manage different sections of your landing page and add only the most necessary components.
- Smart sections: The builder comes with pre-built smart sections, such as Headers and CTAs, so it’s easy to design a specific layout.
These aren’t all the amazing features that come with the SeedProd landing page builder, either. There are tons more to explore when you use the plugin.
In this article, we’re going to go step-by-step on how to create a landing page using SeedProd’s Landing Page Builder plugin for WordPress.
Let’s get started.
Step 1: Download and Activate the SeedProd Plugin
First, you need to download the SeedProd plugin. Choose your pricing plan, enter your information, and download the file. You’ll receive a license key you’ll need later, so keep that handy.
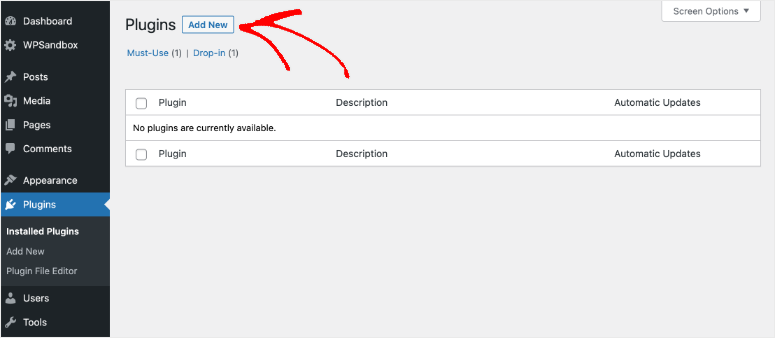
From your WordPress dashboard, click Plugins » Add New:
Click Upload Plugin:

Choose the .zip file you just downloaded and click Install Now:

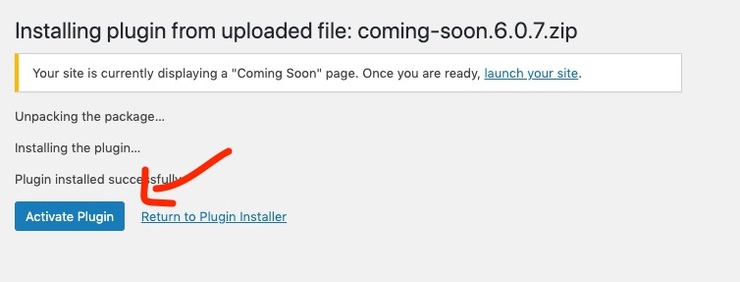
Then click Activate:
The next page asks you to enter your license key to unlock SeedPro’d pro features. Enter the key and hit Verify Key:
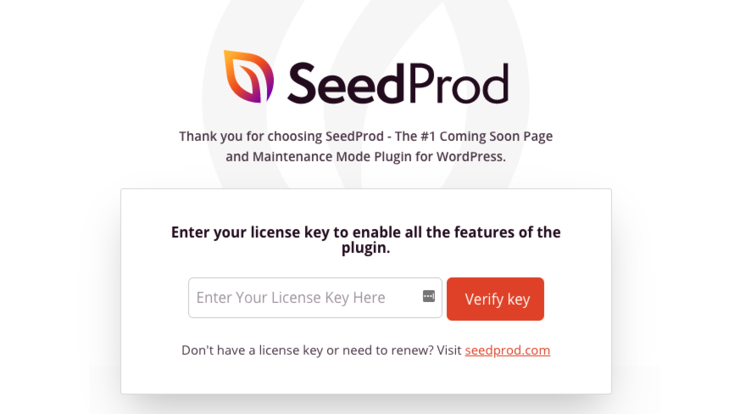
You finally have a SeedPro Pro account! Now it’s time to set up your landing page.
Step 2: Select a Landing Page Template
SeedProd Pro’s landing page builder comes with tons of premade templates for users to choose from. What’s great is that you can customize any single element you want to match your WordPress theme and stay on brand.
From your WordPress dashboard, click on SeedProd » Pages on the lefthand sidebar:
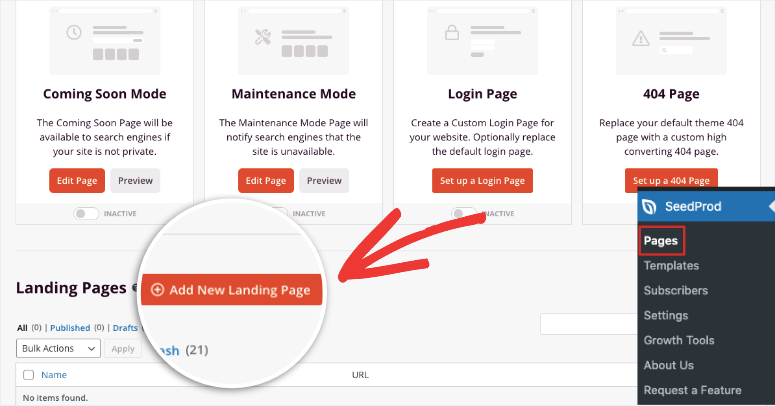
Scroll down and click Add New Landing Page:
On this page, you’ll see all of SeedProd’s premade templates. You can choose between 404, coming soon, maintenance mode, webinar, and more depending on your objectives.
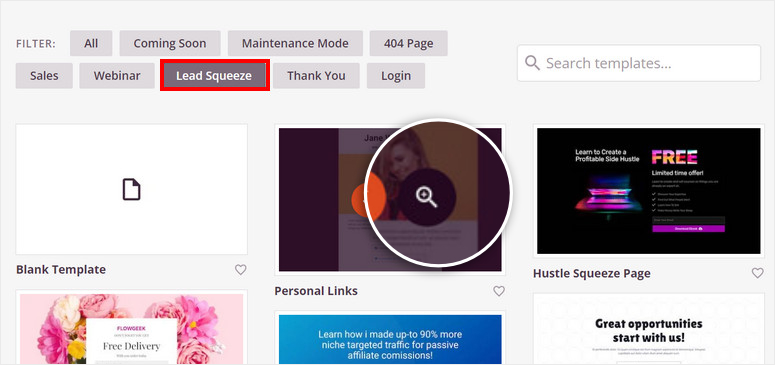
Or, you can create your landing page completely from scratch to customize it exactly the way you prefer by selecting Blank Template.
When you click on a template, you’ll need to enter a page name and a URL will be created:
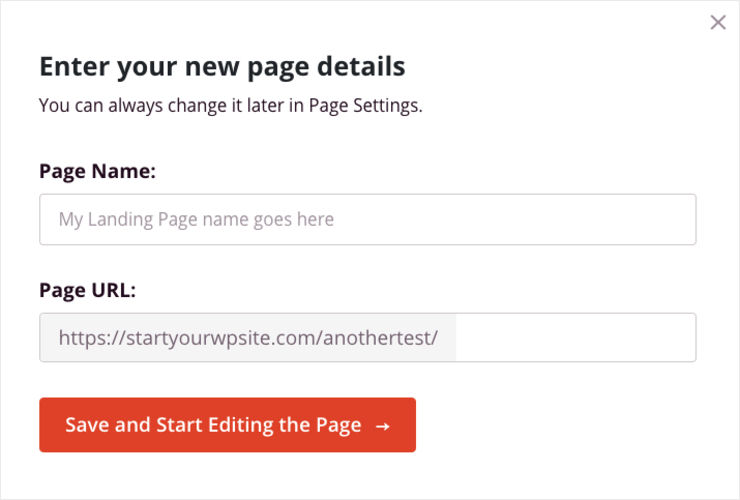
When you’re done, click Save and Start Editing the Page.
Now it’s time for the fun part: adding your landing page content.
Step 3: Add Your Landing Page Content
This is what your landing page builder looks like as soon as you select a template:
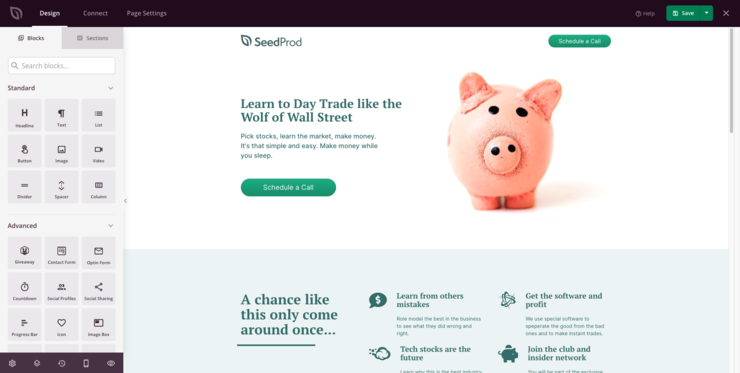
Let’s break down the different sections so you know how to use them.
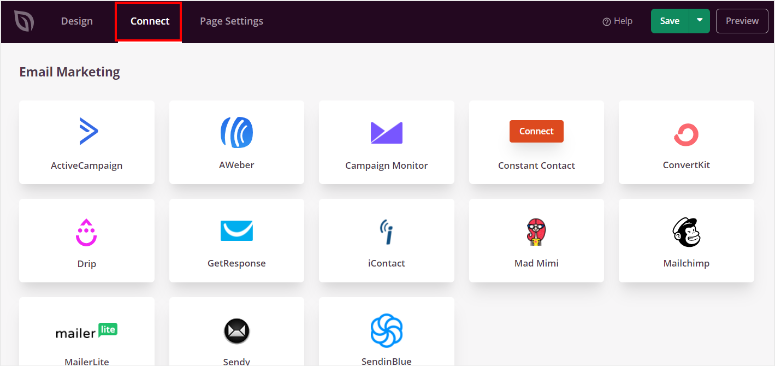
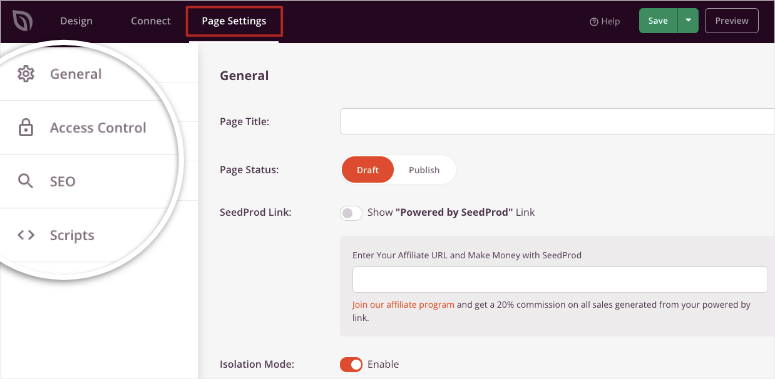
At the top, you’ll see three tabs: Design, Connect, and Page Settings:

Design: Here is where you add headlines, images, buttons, dividers, and other elements to your page to customize it the way you like.

Connect: When your campaign is ready, you go here to choose your email marketing provider and connect it with SeedProd. That way, you can send your campaign directly to your email subscribers.
Page Settings: From here, you can edit your URL, publish your campaign, and more.
With SeedProd Pro, you can review your campaign analytics and optimize for SEO by downloading MonsterInsights and AIOSEO. That way, you can see its performance straight from your SeedProd dashboard without having to leave the builder.
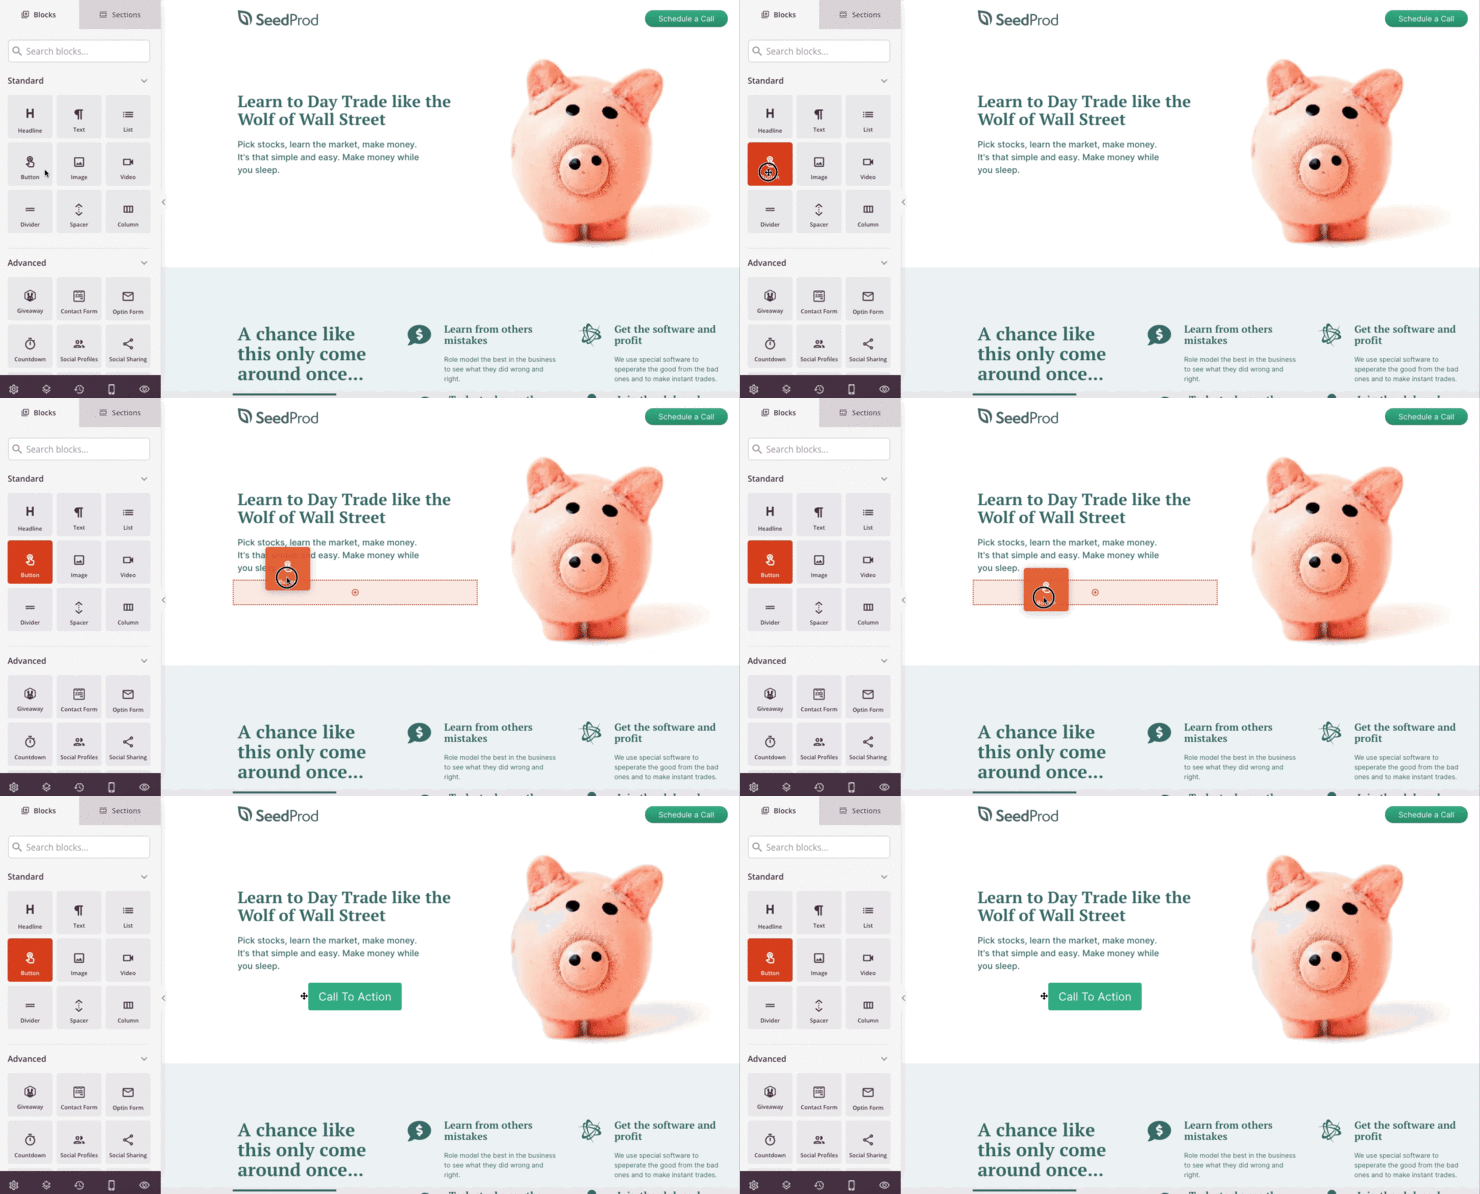
Back in the Design tab, it’s time to add landing page elements to create your campaign. Depending on your goals, you can add different components like contact forms, countdown timers, and optin forms.
SeedProd’s drag and drop builder makes it easy to create customizable landing pages that look and feel the way you want them to. It’s simple to add, delete, and edit components as you see fit.
At the bottom of the Blocks section, you’ll see a Settings icon:

When you click it, you’ll see options to edit fonts, colors, your background, and add custom CSS for further customization.
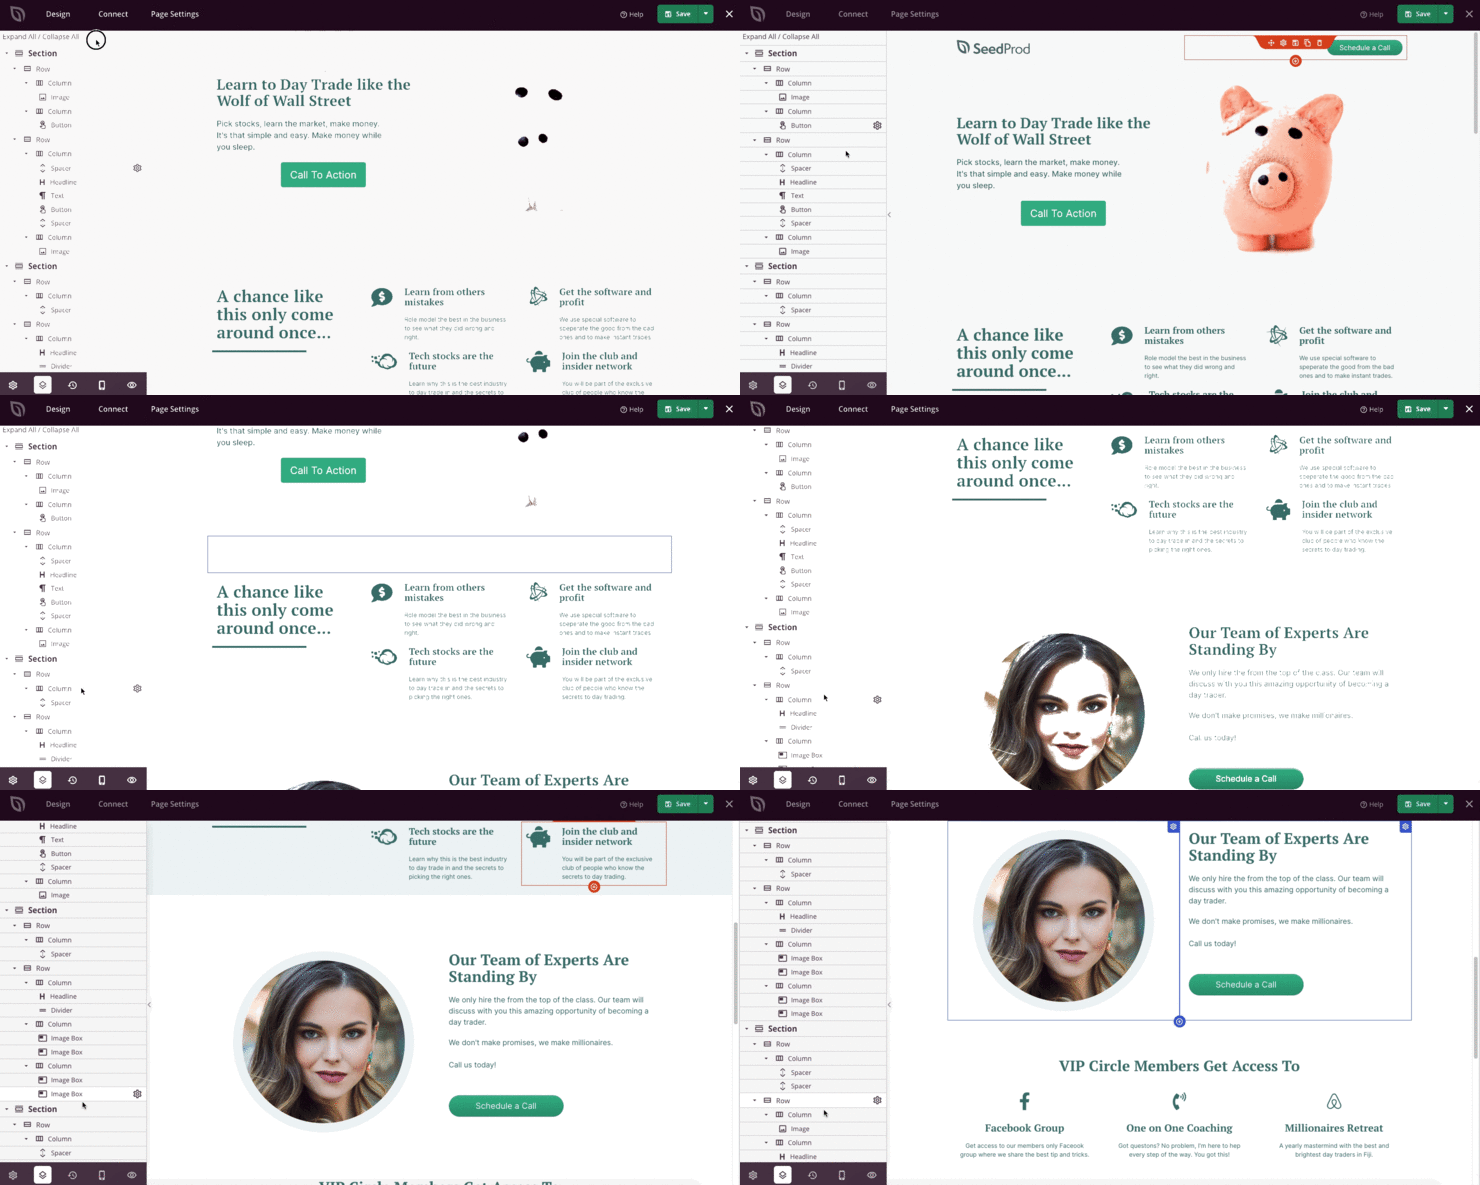
If you have a lot of content on your landing page, you can also view it in sections by clicking the Layout Navigation icon next to Settings:
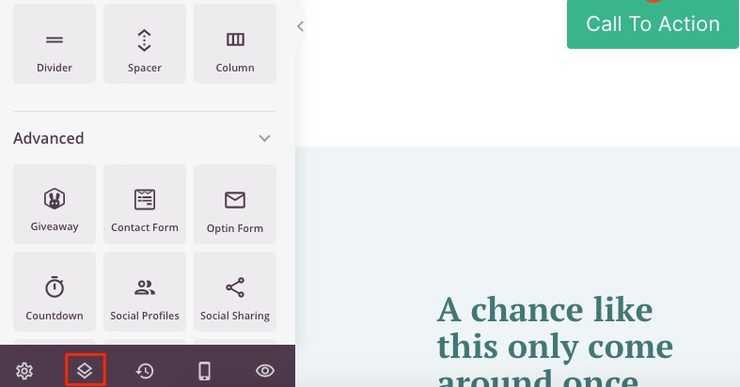
This makes it easier to jump to a specific section and review only what you need to, which speeds up the editing process so you can publish your campaign faster.
Step 4: Publish Your Landing Page
Once you’re done adding content to your landing page, it’s time to go live.
Before publishing, make sure your landing page includes the most common components:
- Headline
- Hero image
- CTA
- Lead capture form
- Social proof
- Compelling copy
Without these elements, you won’t be able to convince your audience that your offer is worth their time. It’s essential to dig deep into the reasons why they need your offer and how it’s valuable to them so they’re encouraged to take action.
From the SeedProd builder, click the arrow next to Save and click Publish:
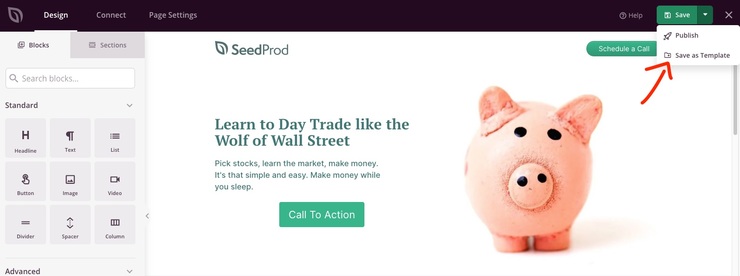
Your landing page is now live and ready to bring in conversions.
And there you have it! You’ve just created your very own optimized landing page with SeedProd’s landing page builder.
Method 2: Building a Squeeze Page (Short Landing Pages)
Step 1: Signing up for OptinMonster
The first step to getting started is to signup for an OptinMonter account. OptinMonster is a powerful opt-in form builder plugin that helps you convert and monetize your website traffic easily. It can be a great choice if you want to build a squeeze page, which is a small landing page built with the single objective to grow your email list.
The best thing about using this plugin is that the page designed with it is hosted on the OptinMonster server. So even if you have a traffic spike your server bandwidth will remain unaffected. This means that your website will continue to offer great performance irrespective of the high traffic.
OptinMonster is one of the best tools for creating landing pages, especially if you’re new to web design. To learn more about OptinMonster, read this detailed review.
Step 2: Creating Your Squeeze Page with OptinMonster
The next step is to create your landing page with OptinMonster. If you’re not logged in to your OptinMonster account, log in. Now click on the Create Campaign button on your dashboard.

Then select your campaign type. We’ll go with the Full Screen option.
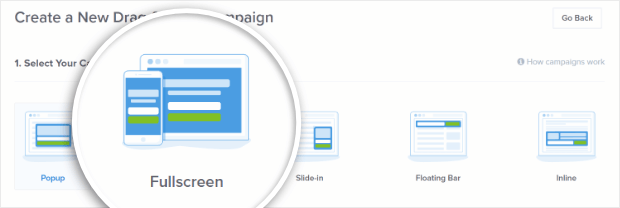
Now scroll down and select the template you want to use. OptinMonster offers several professionally designed and pre-built templates to choose from. You can select the one you like best. Let’s go for the Launch template.

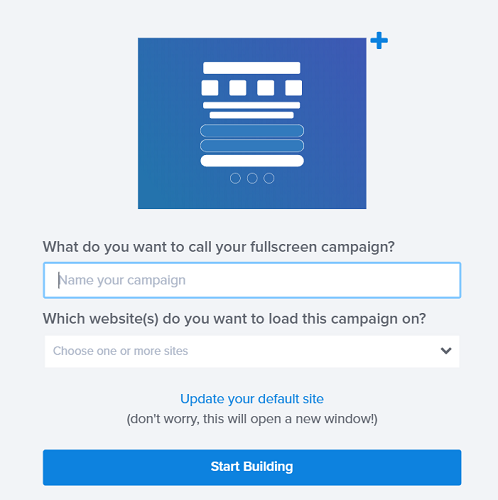
This will take you to a new screen where you can name your campaign and select the website for which you want to use it. Once you’ve added those details, click on the Start Building button.
Step 4: Designing Your Squeeze Page
The Start Building button will direct you to a new page where you’ll see the page editor on the right and the designing options on your left. To make changes to any section on the page, just click on it in the live editor. This will bring up the editing tools.
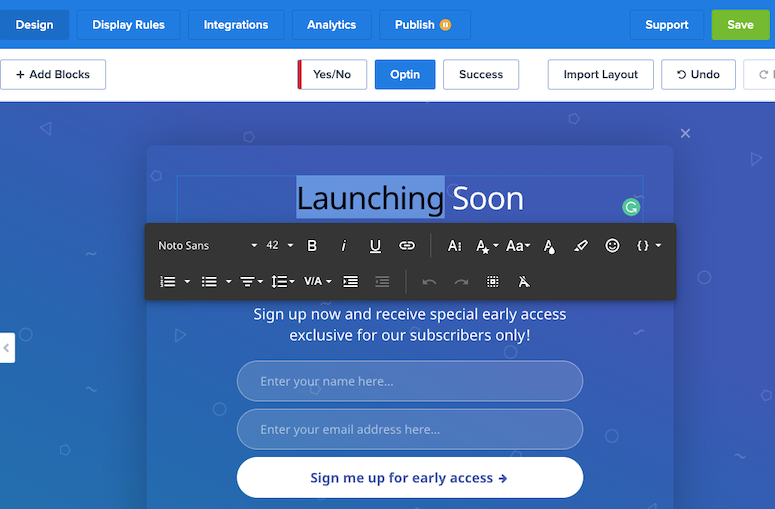
You can use the same process to change the landing page text. The options for changing the heading text, size, color, and other elements of your text will appear on your screen when you click on the text.
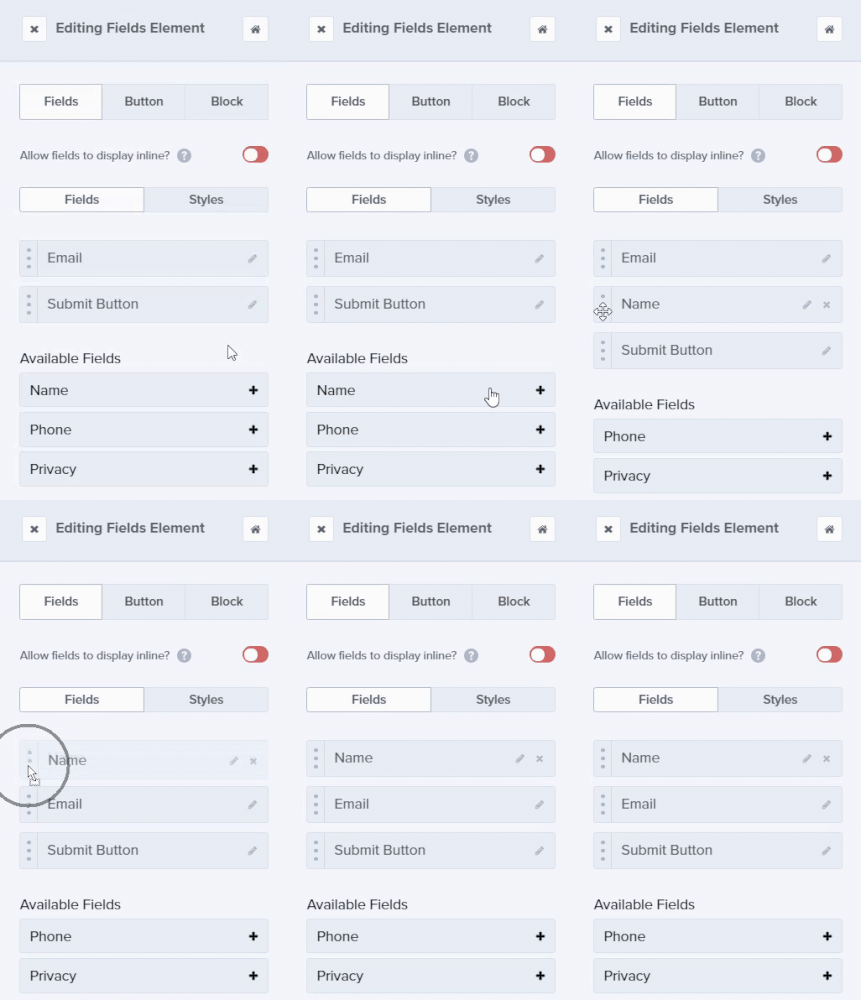
You can also change the field elements if you want. For that click on the optin field on the preview of your landing page. This will display the edit tools on your left.
You can also change the order of these fields. For example, to add the name field click on the Name field in the Available Fields section, then drag it so that it appears before the Email field in the Fields list.
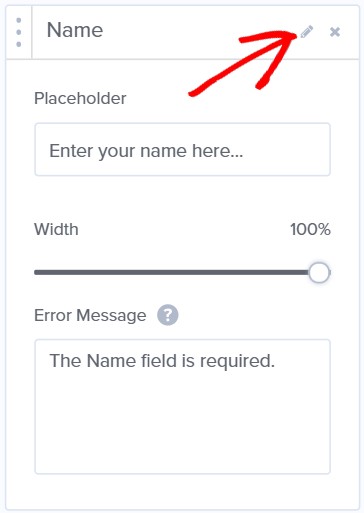
To make changes to the placeholder text use the pencil icon. This will expand and let you edit the place holder, change the width of the fields, add an error message, etc.
This template does not contain an image. So if you want to add one click on the Add Blocks on the top of your screen. Now scroll down to the elements section to find Image.
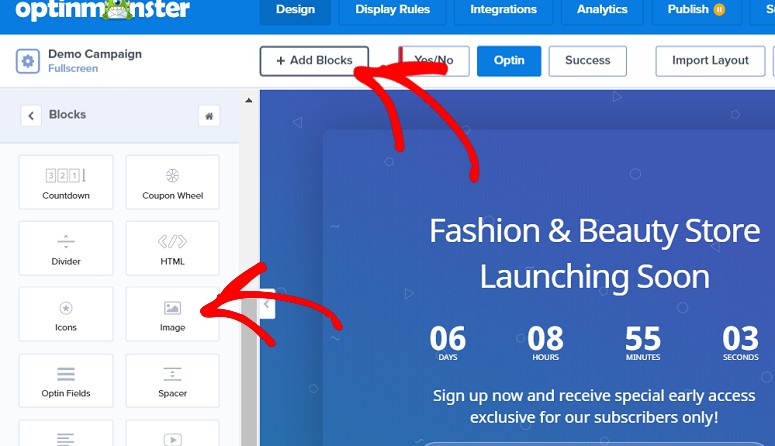
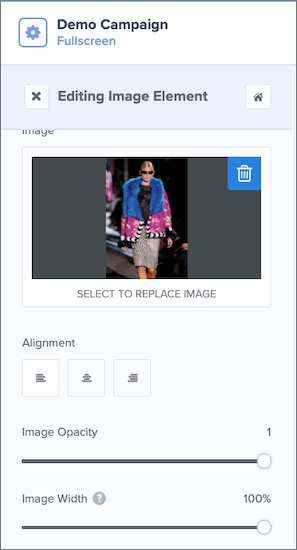
Now drag it in the editor section. A new window will appear on your screen. Use the Select from Computer button to upload images.

On your left, you’ll see options to align your image, change the background cover size, etc.
If you want to change your background, you can do that too. Just click on the background image and start customizing it using the options on your left.

The next option is to edit the button fields. For that just click on the button. On your left, you’ll see the Editing Fields Element section.

Using these options, you can change the text of your button, align it, add a background style and do more. Most of the options on the left are self-explanatory. You can work on them to customize your button as per your requirements.
Step 5: Displaying Your Squeeze Page for Better Conversions
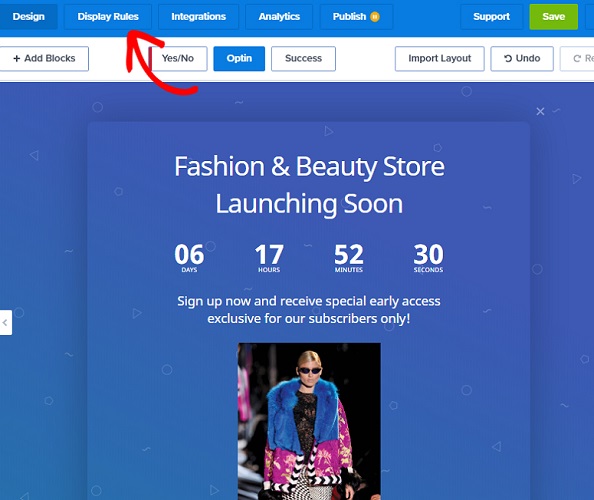
The next step is to set conditional logic to your landing page. This will help you apply rules about when to display your landing page. For that click on the Display Rules button on the top of your screen.
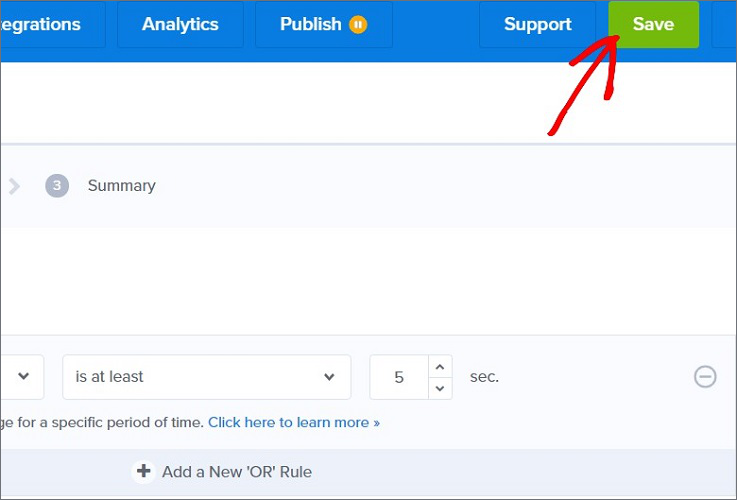
This will take you to a new page where you can set your conditions. The default rules are set to show the landing page after 5 seconds. But you can easily customize it by clicking on the dropdown button next to it.

To set up this ruleset we’re going to add a condition to show the landing page when a visitor clicked a certain link, known as MonsterLink™.

The green Copy MonsterLink™ Code button will give you the link to use in your content wherever you want your landing page to appear when a visitor clicks.
Once done hit the Save button on the top of your screen.
Step 6: Connecting to Your Email Service Provider
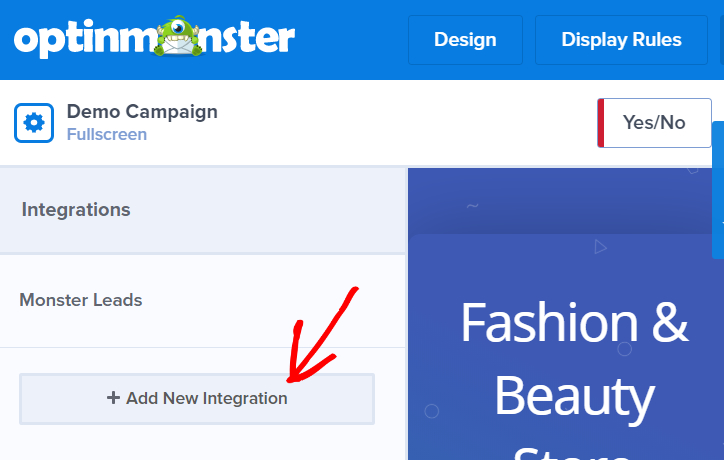
The next step is to collect emails from your visitors. Just connect your landing page to an email service provider and you’re done. For that, you need to click on the Integrations tab on the top of your screen.

Now click on Add New Integration on the left side ofyour screen.
This will ask you to select an email provider. Select your favorite email service provider from the drop-down arrow.
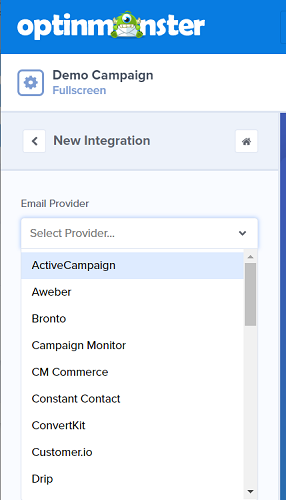
You can then select your email provider, email provider account and email provider list. Once done again select the Save button on the top right corner as shown above.
Step 5: Publishing Your Squeeze Page
To let your landing page go live, click on the Publish button just next to the Analytics button.
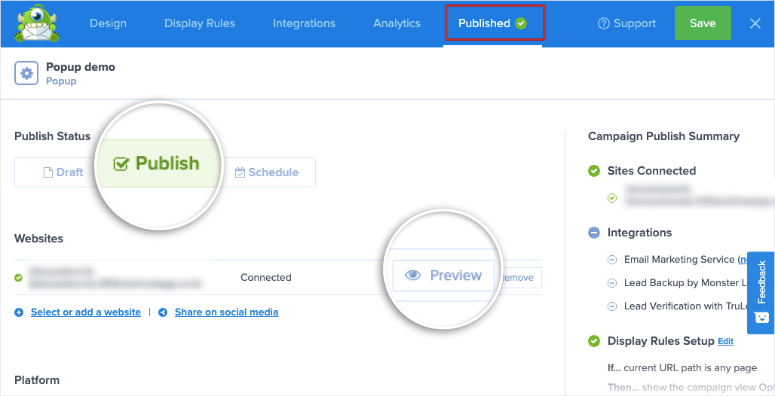
Now click on Publish and your page goes live. Below that you can select your website where you want to display this page by clicking on the drop-down arrow.
Note: Make sure you’ve copied the MonsterLink to the right location in your article (step 5). When someone clicks that link, they’ll be shown the squeeze page you’ve just created.
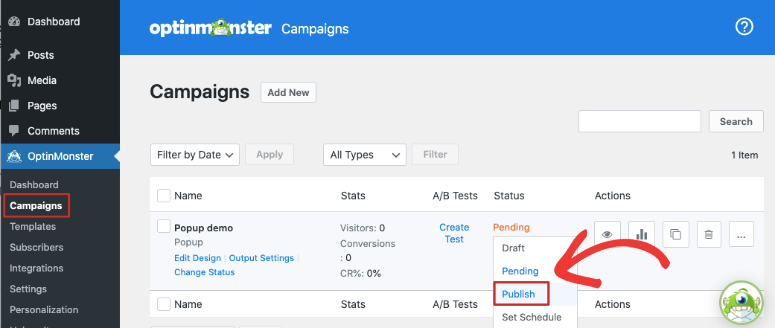
You’ll also want to head over to your WordPress dashboard. In the OptinMonster » Campaigns tab, make sure your campaign is set to Publish here too.
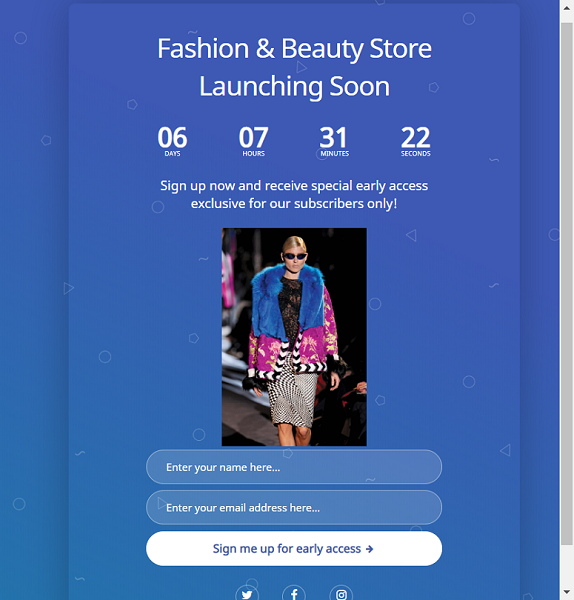
And that’s it. As soon as your visitor lands on your site, this landing page will appear depending on the rules you have set. Here’s a preview of the landing page that we’ve just designed.
We hope you found this article useful so it’s easy to download and install SeedProd for your landing page needs.
SeedProd lets you create any type of landing page for your needs. Whether it is a product landing page or an Instagram link on bio page to increase engagement, SeedProd is the best choice.
You can also use it to create a stunning app landing page to boost your app sales.
If you enjoyed this post, feel free to check out our guide on the best WordPress landing page plugins. It’s packed with tips to help you choose the best plugin to build landing pages for your website.

Comments Leave a Reply