Do you want to automatically share your WordPress blog posts on Facebook and Twitter?
Showcasing blog posts on social media helps increase pageviews and drive traffic to your site. At the same time, it gives you auto-generated social media content to improve engagement as well.
In this article, we’ll show you how to auto-share WordPress posts to Facebook and Twitter.
Setting Up An Automated Blog Post Feed for Social Media
There are quite a few automation plugins on the market today that will help you create automated workflows. This means you’ll be able to set up a trigger to create and send Facebook and Twitter updates as soon as you hit the ‘Publish’ button on your blog post.
Depending on the software you use, you may also be able to add time delays or schedule it to be posted on specific days according to when your social media audience is most active.
We’re going to show you how to use 2 automation tools:
Both tools have really cool features to create automated workflows. And the best part is you don’t need any coding knowledge or experience to use these tools.
Ready? Let’s get started.
Creating Automated Blog Post Tweets Using Uncanny Automator
Uncanny Automator is hands down the best automation plugin for WordPress. It not only helps you publish blog posts on social media but lets you put your entire website on autopilot.

With Uncanny Automator, you can choose triggers from 50+ plugins and thousands of apps. Then you can select what action needs to be performed on your site or on other apps.
After that, Uncanny Automator will do all the work. It’s the simplest automation software but comes with incredibly powerful features.
Uncanny Automator seamlessly integrates with Twitter (but not with Facebook, yet). If you want to connect to Facebook, you’ll want to use the Zapier integration. We’ll talk more about Zapier later in this post.
First, we want to show you how easy it is to set up automated social media feeds in WordPress using Uncanny Automator.
There’s a free version of the plugin that lets you set up an automated Twitter feed. So you can get started by installing and activating the Uncanny Automator plugin from the WordPress repository.
For more help, follow this guide on how to install a WordPress plugin.
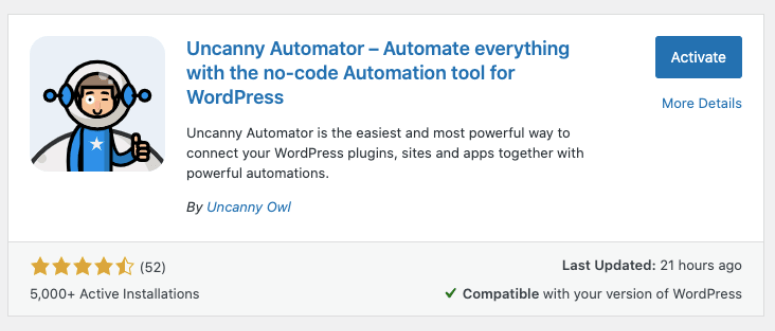
If you want access to advanced features, you’ll want to sign up for a premium account with Uncanny Automator.
Once you’ve done that, you can get started with creating your first automation.
Step 1: Connecting your Twitter Account
Uncanny Automator lets you create custom integrations to set up automated workflows between different apps. In your WordPress dashboard, you can open the Automator » Settings page from the left-hand side menu. You’ll see a Twitter tab with an option to Connect Your Account.
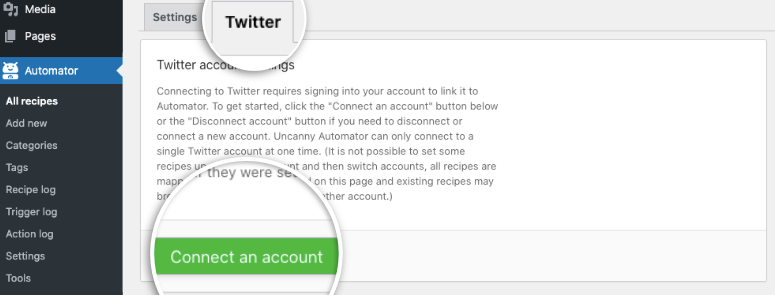
When you click on this button, a popup will appear where you can sign in to your Twitter account, then click on the Authorize app button.
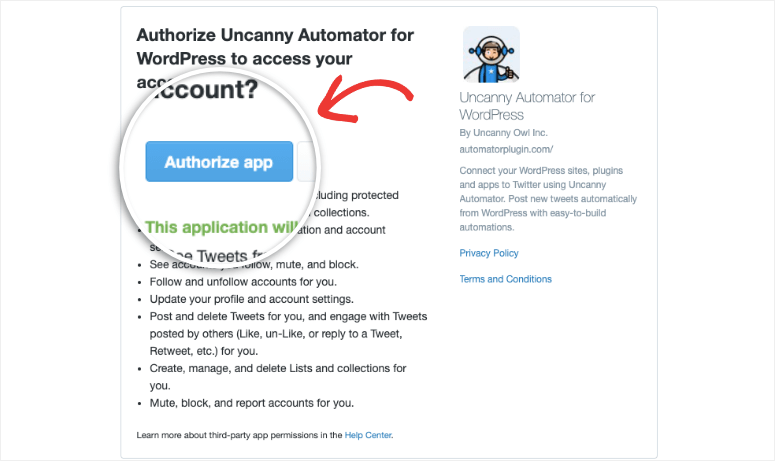
With that, your Twitter account is successfully connected to Automator.
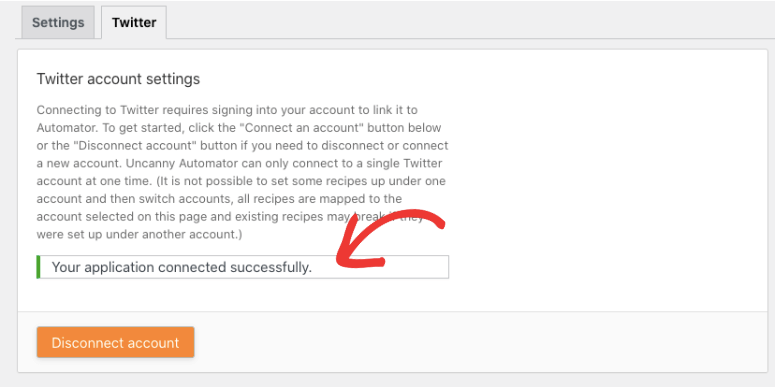
Now you can create an automated workflow to send blog posts to Twitter.
Step 2: Creating a Trigger
To send blog posts to Twitter, you’ll first want to create a “trigger” to tell Uncanny Automator when to share content on Twitter. For instance, you can share all new blog posts or only posts in a certain category.
First, open the Automator » Add New tab. You can add a name for this automation and then select WordPress from the list of apps available.
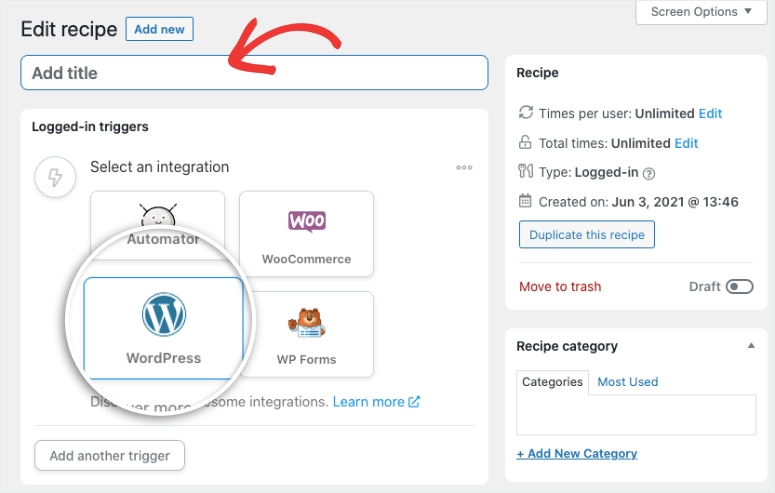
Now you can select a trigger that starts the automated workflow. To create automated posts, you’ll want to select this option: A user publishes a type of post with a taxonomy term in a taxonomy.
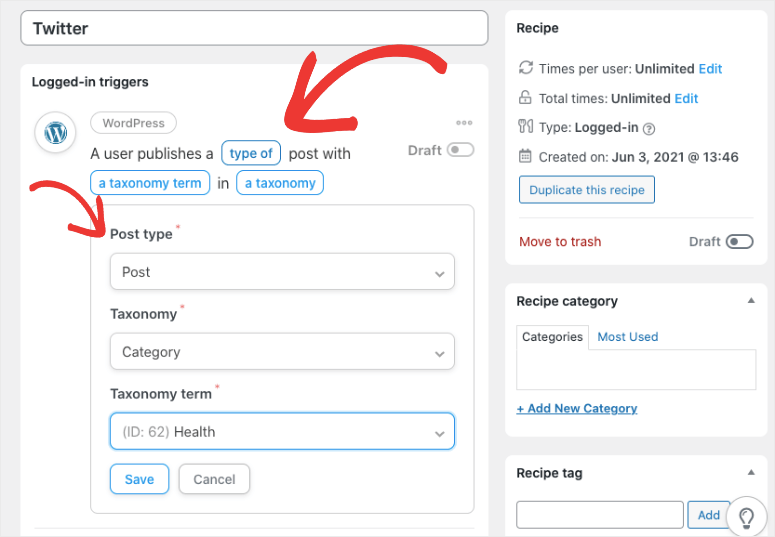
The highlighted blue words let you filter your posts. By clicking any blue word, you’ll open a menu with three options to change:
- Post type: Choose all posts, pages, blog posts, media, template, product, video, and more.
- Taxonomy: Choose category, tags, format, and more.
- Taxonomy Term: Displays options available inside the taxonomy you selected.
After you set your trigger, click on the Save button to store your changes.
Step 3: Creating an Action
In the next section of the page, you can create Actions which tell Uncanny Automator what to do next.
So, in this case, you’ll need to tell Uncanny Automater to create a tweet (action) when a new blog post is published (trigger).
First, from the available apps, select Twitter.

Then select ‘Post a status to Twitter’ as the action. You’ll see a field to enter a status message to be tweeted along with the blog post.
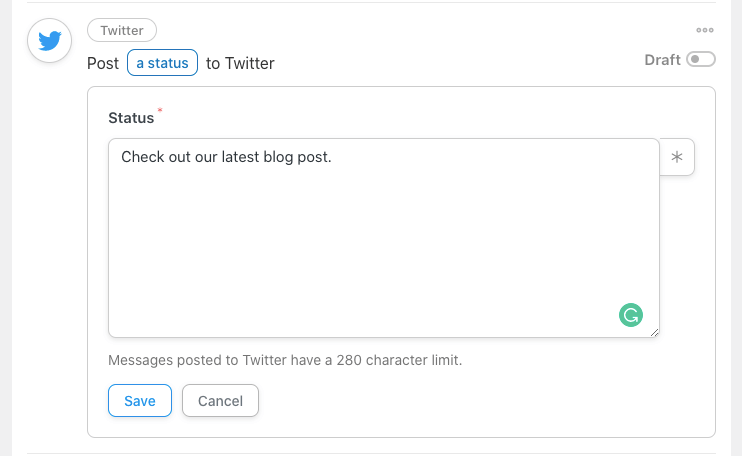
Uncanny Automator makes it even easier to automatically add details of the blog post inside the tweet. For instance, it can auto-fetch blog post details like:
- Post title
- Post ID
- Post URL
- Post content
- Author name
- Published date
To do this, Automator uses tokens that you can access by clicking on the asterisk icon. Then search for ‘post,’ and you’ll see all the available post details. Simply select the ones you want to add to your tweet.
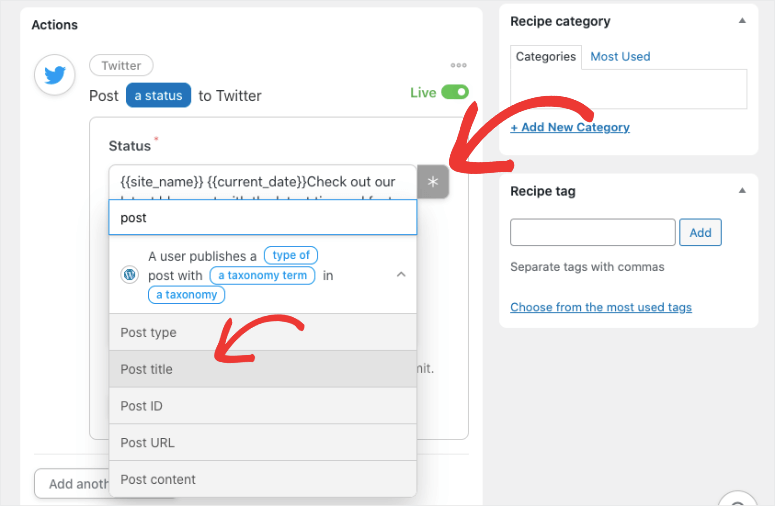
Once you do that, you’ll see lines of code like this that will fetch the post details:
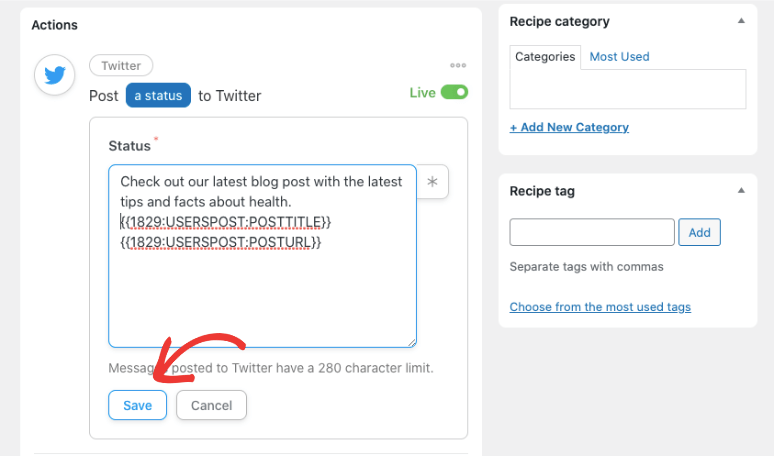
When you’ve done that, hit the Save button to store your changes.
Step 3: Publishing the Automation
Now all that’s left to do is publish the recipe you created. To do this, first, switch the toggle buttons from draft to live to activate the trigger and the action.
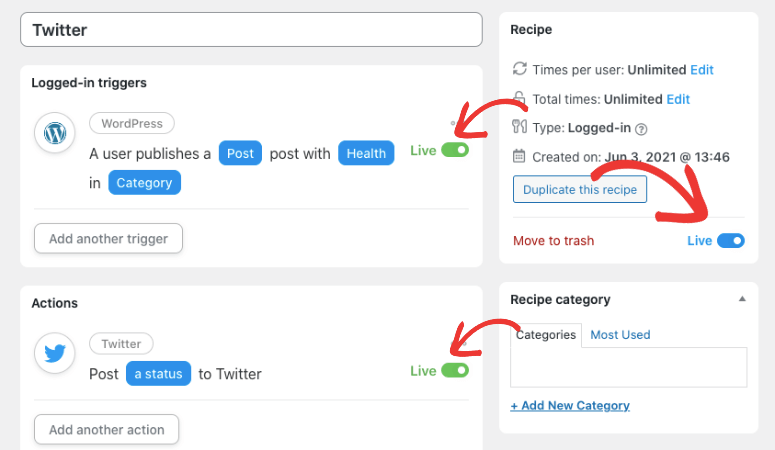
Then, under the Recipe section in the right taskbar, use the toggle button to make it live.
That’s it, your automation is now in action. When you publish a blog post, Automator will immediately create a tweet and post it on Twitter.
To create the same connection with Facebook, Uncanny Automator doesn’t have a direct integration. Instead, you can use the Zapier integration that lets you connect to over 2000 apps.
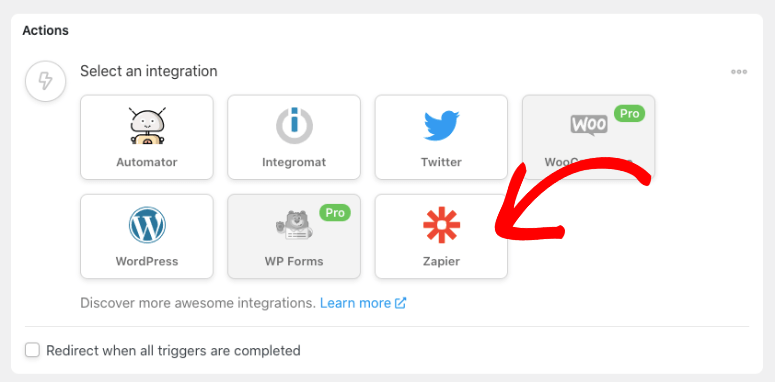
Up next, we’ll show you how to connect WordPress posts to social media in Zapier.
Creating Automated Social Media Posts Using Zapier
Zapier lets you create automated workflows to move information and tasks between web apps. Similar to Uncanny Automator, Zapier lets you create automations called ‘Zaps’ using triggers and actions.
So when an event happens in one app, Zapier will tell another app what action to perform.
Below, we’ll show you how to create a zap that automatically creates both Facebook and Twitter updates when you publish a blog post.
Step 1: Signing up for Zapier
The first thing you’ll want to do is install and activate the Zapier plugin on your WordPress site. This will allow Zapier to connect to your WordPress site when we create an automated workflow.
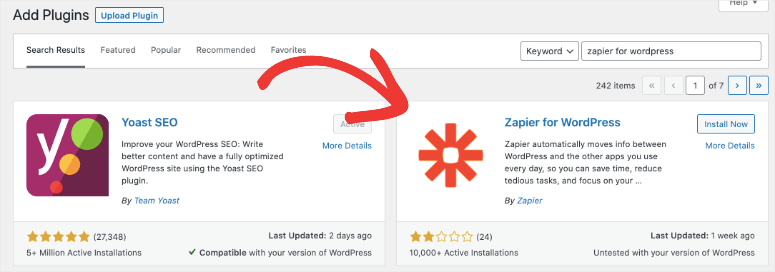
Then you can sign up for an account on the Zapier website. You can get started for free with 14-day trial. This will give you access to all of Zapier’s features. After the trial, you’ll need to upgrade to a premium plan to continue using it.
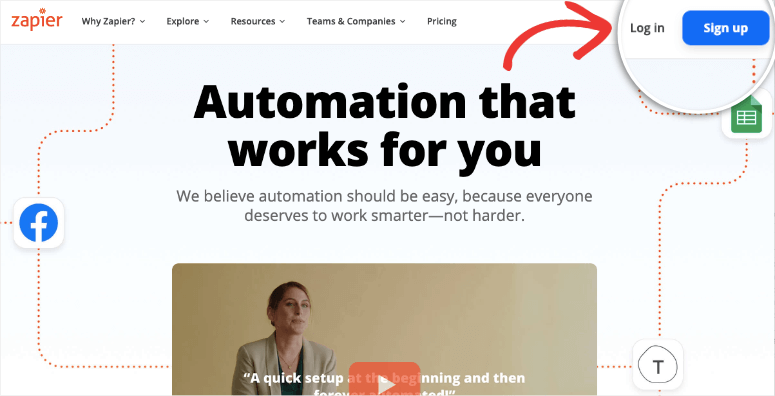
Once you’ve signed up, you can access the Zapier dashboard to create your first Zap.
Step 2: Creating Automated Blog Post Trigger
In the Zapier dashboard, click on the Make a Zap button in the left-hand side menu.
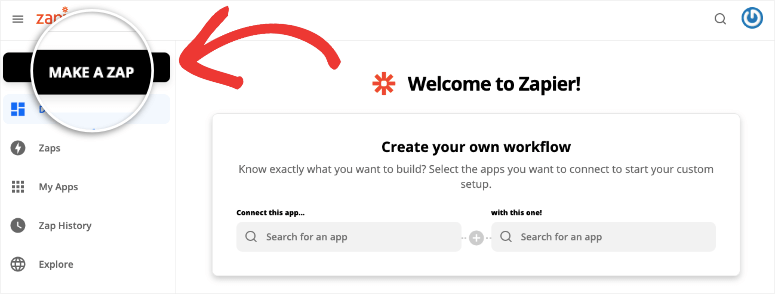
This will open up a page where you can set triggers and actions for your zap. Give your zap a name so you can easily recognize it in the list of zaps you create. Then under the Trigger menu, search for ‘WordPress’ and select it.
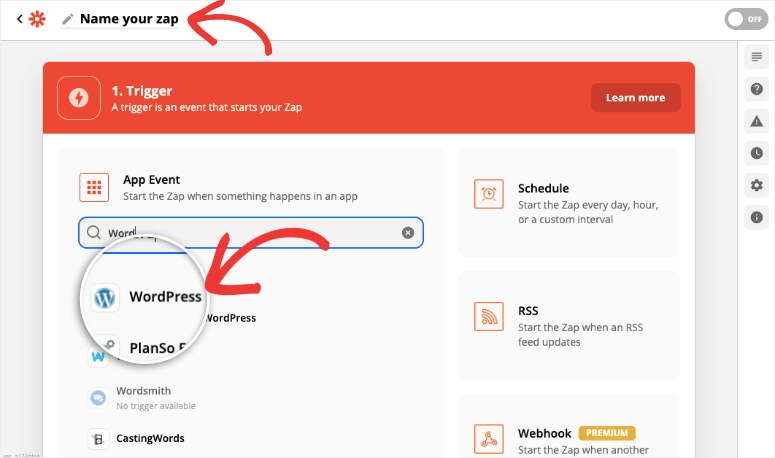
Now you’ll see a new field to select an event. Open the drop-down menu and select ‘New Post’. This means when a new post is published on your WordPress site, Zapier will begin the automated workflow.
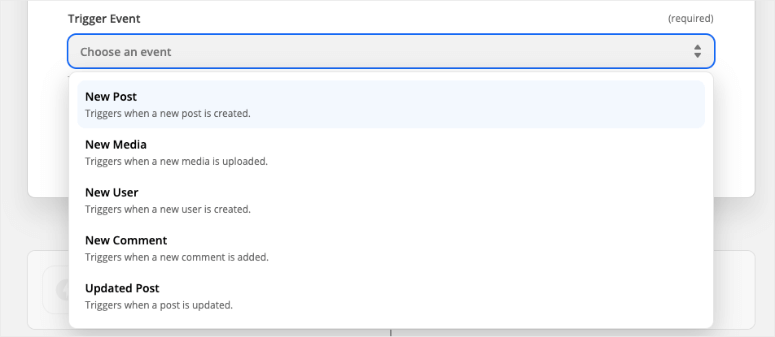
Next, click on the ‘Continue’ button, and you’ll see an option to sign in to your WordPress site.
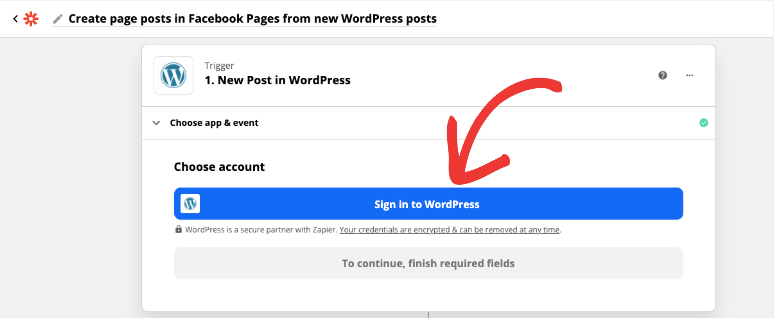
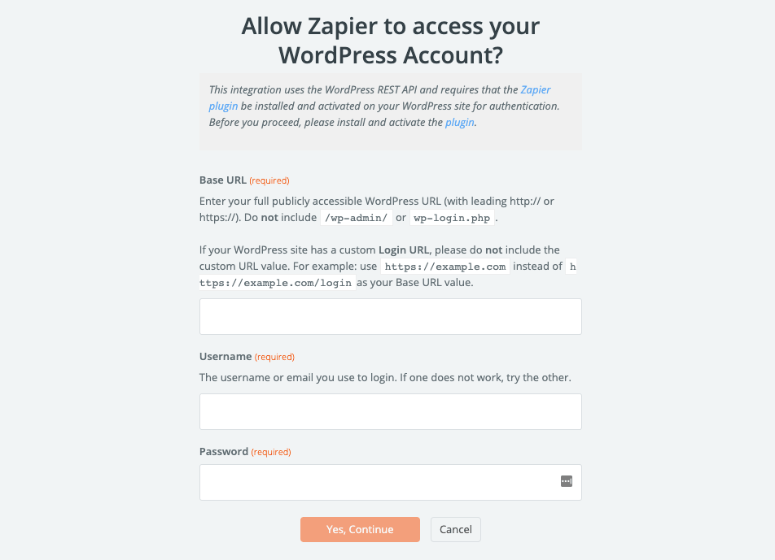
Clicking this button will open a popup where you can enter your WordPress site URL and wp-admin credentials to grant Zapier access to your site.
When you’ve done that, your WordPress site will be connected to Zapier. You’ll see new fields appear to filter the post status and type. We recommend choosing ‘Published’ under the Post Status menu and ‘Posts’ under the Post Type menu.
This means only published posts from your blog will be shared on social media. If you happen to publish a new page on your website, Zapier will exclude it from the automation.
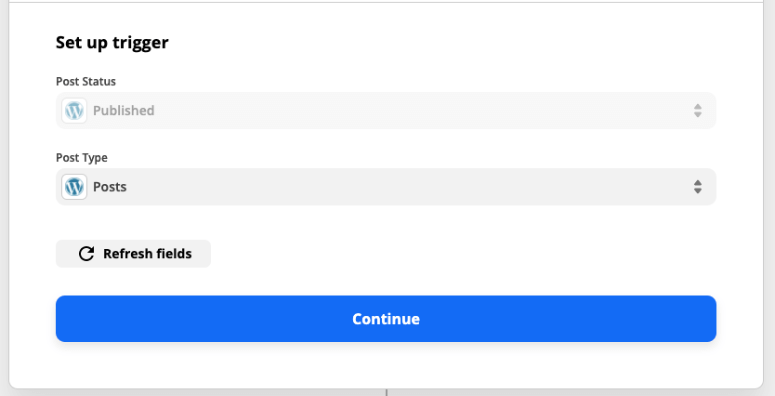
When you click on the Continue button, Zapier will let you test the trigger.
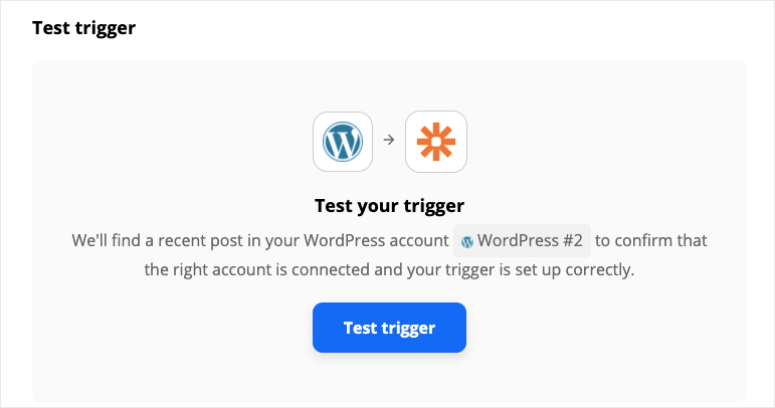
Zapier will check if it can fetch a published post from your WordPress site. Once successful, you can click on the Continue button to create an action.
Step 2: Creating Automated Facebook Page Action
In the Action menu, you can select Facebook Pages from the apps available.
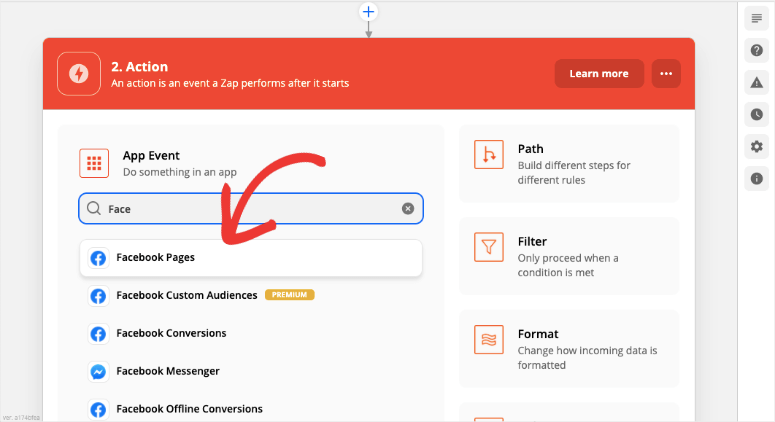
Then under the Action Event menu, select Create a Page Post.

Click on the Continue button to get an option to sign in to your Facebook account.
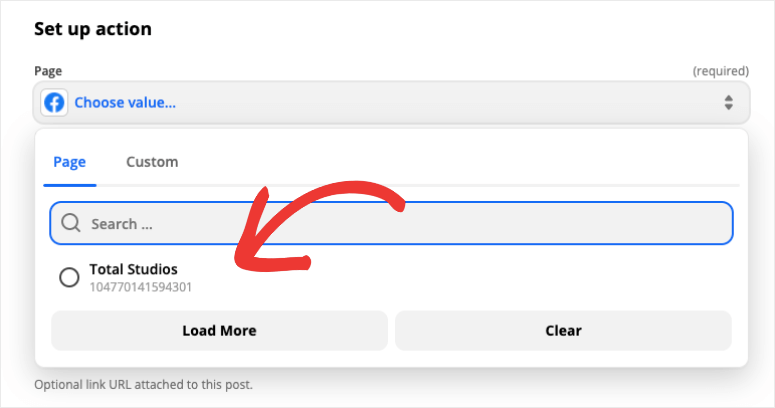
When you do that, you’ll see a new menu option to select a page from the list of Facebook pages associated with your account.
Then you can enter a message to be added to your Facebook post. As you enter your message, you’ll see a drop-down menu appear to insert data of the blog post.
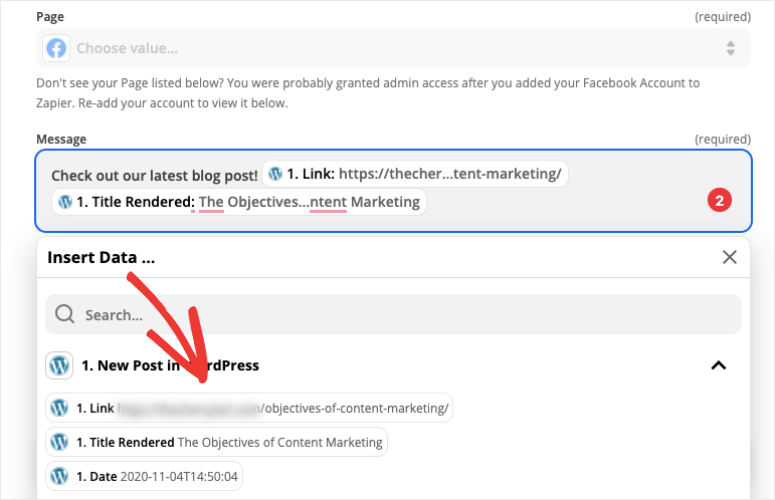
This lets you add the blog post link, title, date, and more. With that, Zapier will automatically fetch the blog post details and insert them into the Facebook page post.
When you click on the Continue button, Zapier will ask you to test the connection. It will run a sample zap so you can see if the post appears on your Facebook page.
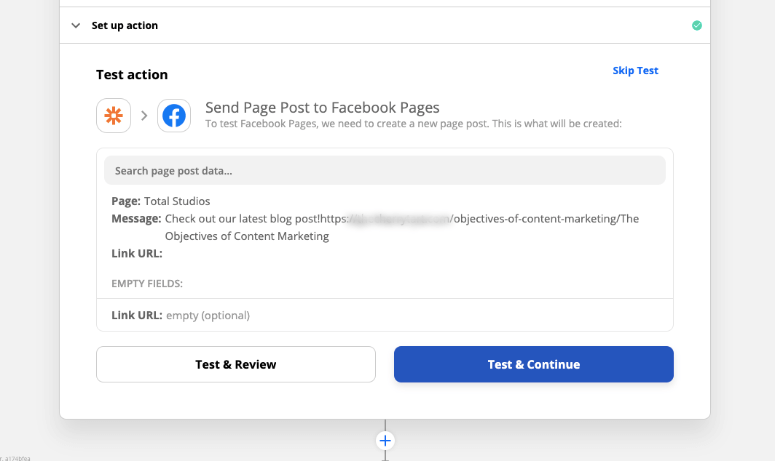
Now your Facebook page is connected to the workflow, let’s connect Twitter too.
Step 3: Creating an Automated Twitter Action
Zapier lets you add multiple actions to a single trigger. This is extremely helpful if you want different tasks to happen simultaneously. For instance, when someone signs up as a member on your site, you would want WordPress to create a user role for them, make all member benefits instantly available, and send an email to welcome them.
To set up the Twitter post, select the + icon below the Facebook zap to create a new action.
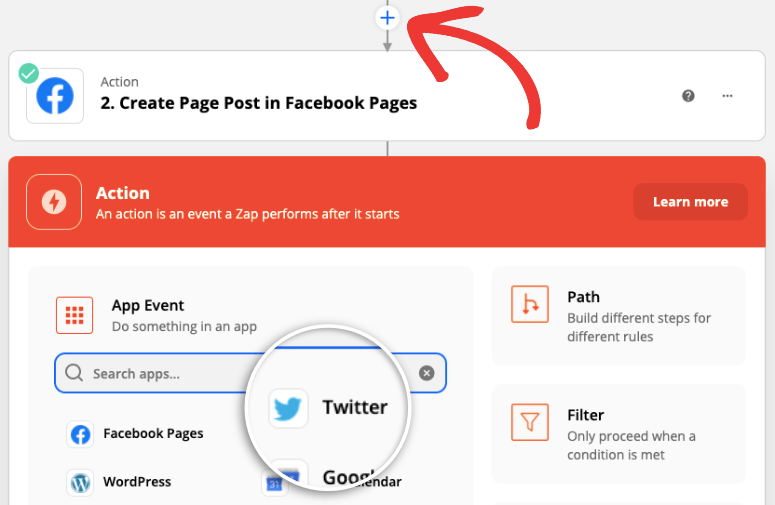
Then select the Twitter app and a new Action Event field will appear where you can select ‘Create Tweet’.
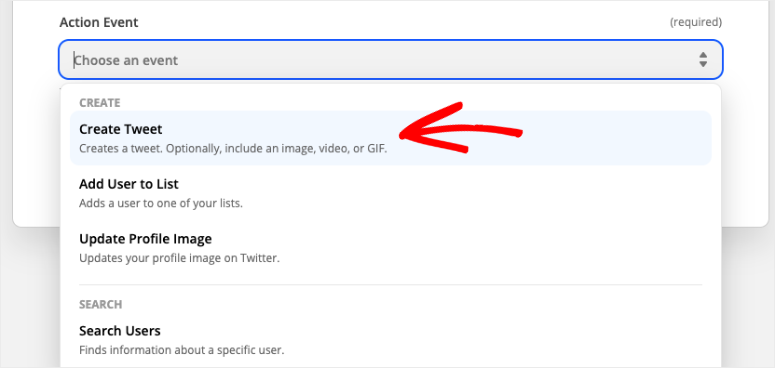
Click on the Continue button to move to the next step. Here, Zapier will ask you to sign in to your Twitter account.
Once you do that, you’ll get options to add a message and media to be displayed in the Tweet. Here, too, you can tell Zapier to auto-fetch details of the post such as the blog title and URL.
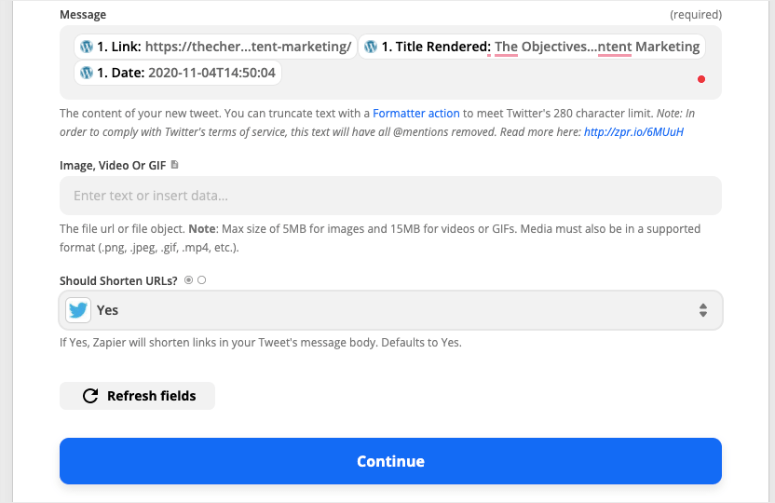
After this, click the Continue button, and Zapier will ask you to test the connection.
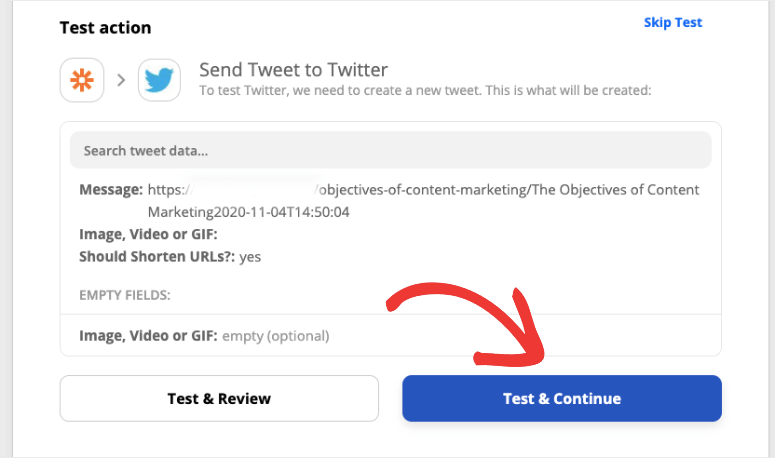
Now all that’s left to do is activate the automated workflow by clicking on the Turn on Zap button.

That’s it! You’ve successfully created a zap that automatically sends published blog posts from your WordPress site to your Facebook and Twitter pages.
Now you know how to use 2 incredible automation tools to set up automated workflows between your WordPress site and social media channels.
Next, you can also reverse this action and showcase your social media content on your WordPress site.
This gives you more website content to keep visitors engaged for longer. Plus, you can drive your website traffic to your social media pages to grow your following.
Setting Up an Automated Social Media Feed in WordPress
The best way to add an automated social media feed to WordPress is by using Smash Balloon.

Smash Balloon is the most powerful social media feeds plugin for WordPress. It lets you showcase your social media content in neat layouts on your site.
Smash Balloon is a combination of different social media feeds plugins:
You can use these as standalone plugins or purchase the all-access bundle for your WordPress site.
Once you do that, you can connect your social media accounts and set up your social media feed in a few clicks.
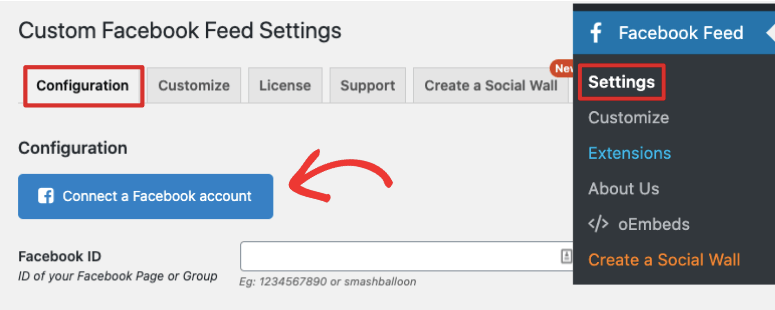
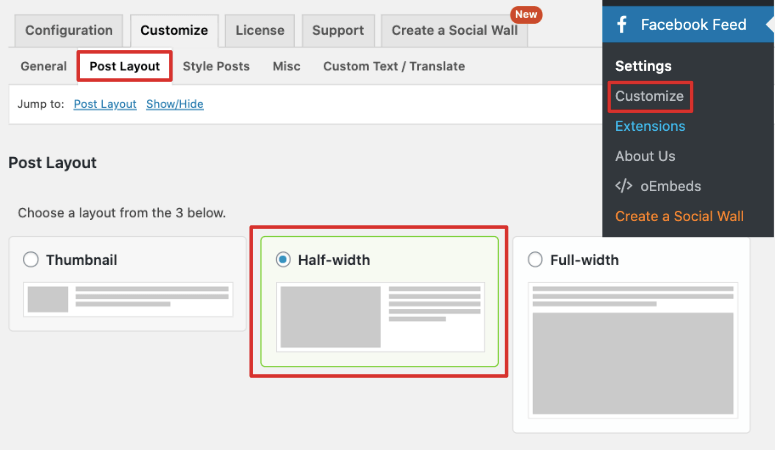
And by default, Smash Balloon’s social media feeds looking stunning. However, Smash Balloon lets you control every aspect of your feed including the design and layout, post details, update frequency, and more.
Plus, all the plugins have ready-made widgets inside WordPress to easily add the feed to posts, pages, and sidebars.
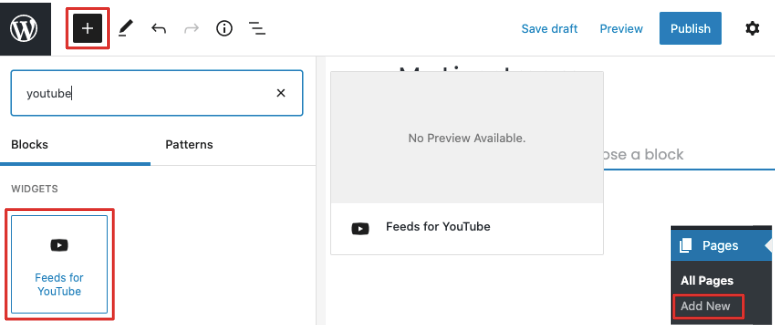
Smash Balloon is super simple to set up and requires zero design and technical knowledge.
For more details, we covered everything Smash Balloon has to offer in this guide: Smash Balloon Review – Is It the #1 Social Media Feed Plugin?.
Want to create your own automated social media feed? Sign up for your 100% risk-free Smash Balloon account.
That’s all we have for you today. We hope you found this tutorial helpful for auto-sharing WordPress posts to Facebook and Twitter.
If you’re looking for more ways to automate, check out our post on 7 Incredible Social Media Automation Tools To Instantly Reduce Your Workload.
And for your next steps, you may want to check these resources:
Social media contests can help you explode your following, subscribers, and engagement fast and in a short span of time. And with custom landing pages for Facebook and Twitter, you can provide a better user experience to customers and boost your conversions.

If all you want is to publish your post to Facebook and Twitter, why not use Jetpack’s Publicize function?