
Do you want to go paperless and sign documents electronically?
Getting your documents signed over emails seems like a tedious process — your users have to print the document, sign and scan it and then they email it back to you.
Luckily with WordPress, you can skip all those steps and let your users sign the documents with an e-signature right away. In this article, we’ll tell you how to get your documents signed on your WordPress website without going through all those lengthy processes.
But before that, let’s see why digital signatures are important and how can it be helpful to your business.
Why Sign Documents Electronically
No matter what business you’re running online, there are a lot of benefits to getting your documents signed electronically.
First, e-signatures or digitally getting documents signed makes it easier for your client to sign the documents. Your clients can sign the papers simply with the help of a mouse or a touch screen and send it back to you right away.
Second, you can skip all the steps of sending the email back and forth, and get things done faster. This means you can quickly close the deals and don’t have to wait until your papers get signed.
Step 0: Create Your Service Agreement Document
Before creating a service agreement copy, you need to know the exact points to include in it so you can have the correct details before getting it signed. A typical agreement copy will usually consist of the following:
- Terms of Service and Payment
- Address and Contact Number of Your Client
- Signature Field
If you’re not sure how to create an agreement copy, this sample might help you get started. Once your agreement is ready, you can add the digital signature field on your copy. Here’s how you can do it.
Step 1: Install the WPForms Plugin for Adding the Digital Signature Field
The first step is to install and activate the WPForms plugin on your site. WPForms is one of the best and most popular WordPress contact form plugins that lets you create any type of form, including a digital signature form with its robust drag and drop form builder. It needs absolutely no coding and requires less than 5 minutes to create your first form.
Step 2: Install the WPForms Signature Addon
In the second step, you need to install the WPForms Signature addon. For that, go to your WordPress dashboard and click on WPForms » Addons. Now use the search field to find the WPForms Signature Addon.
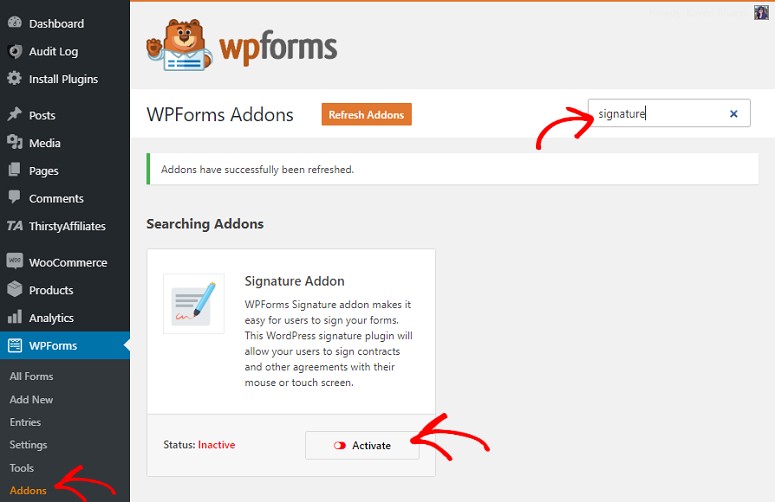
Once found, hit the Activate button for the addon to start working.
Step 3: Create Your First E-Signature Enabled Form
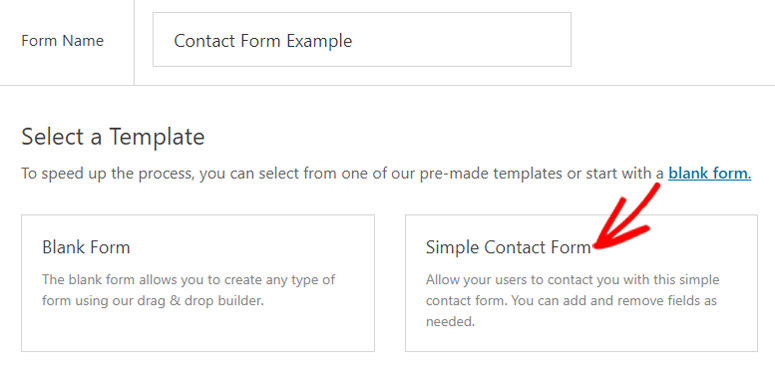
Now that you’ve installed and activated the addon, it’s time to create your first E-Signature enabled form. For that go to your dashboard and click on WPForms » Add New.
Now select a form template. There are several options to choose from. But for the sake of this tutorial, we’ll select the Simple Contact Form option.
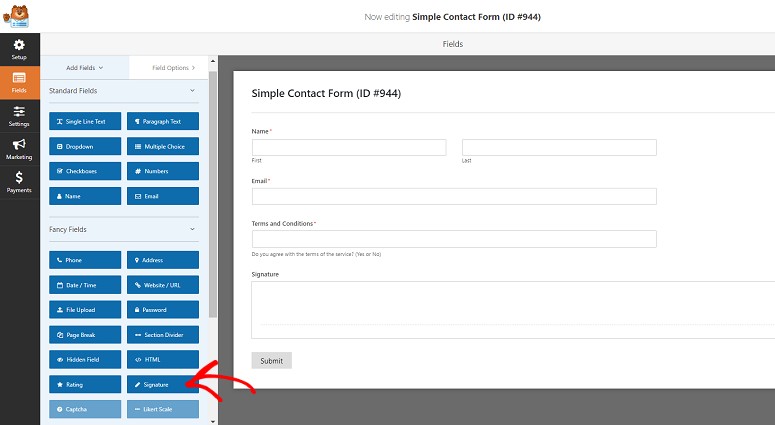
You should now be on your form builder page where you’ll see all the elements on the left and the visual builder on the right. Since this is a drag and drop builder, you can easily drag the options from the left and drop it in the form on your right.
You can also rearrange the order of your fields by dragging and dropping them in the desired location. Once you add all the required fields and included the copy you’ve written for the agreement, add the Signature option from the Fancy Fields section. Just drag that option and drop it in your form.
Don’t forget to hit the Save button on the top right corner of your field.
Step 4: Embedding Your Signature Form on Your Website
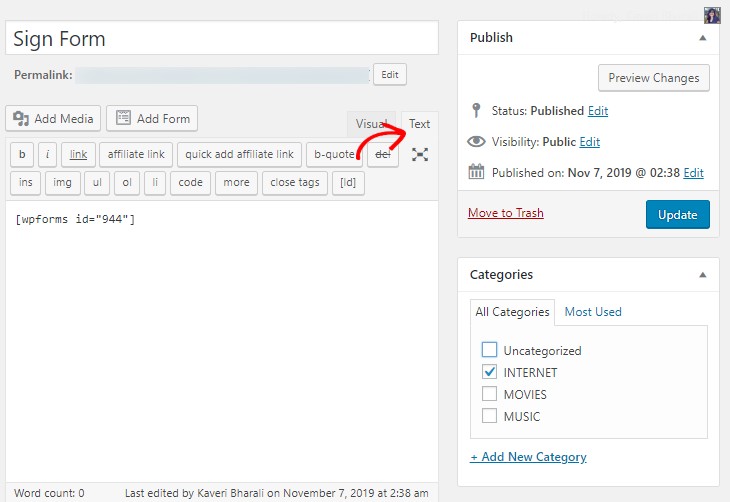
Your form is now all set and ready to go live. All you need is to embed your form on your site so it’s visible to your users. Create a new post / page (or edit an existing one), and simply click on the Add Form button above your toolbar.

A popup menu will appear. Select the contact form you created from the dropdown menu. Then, click Add Form.
Hit Publish (or Update, if you’re editing a pre-existing post / page), and your form will appear live on your site, ready to rock and roll.
That’s it! Your users can now easily use the field to sign the form and submit it without going through any complicated process. Depending on your requirements, you can add or remove any field from your form.
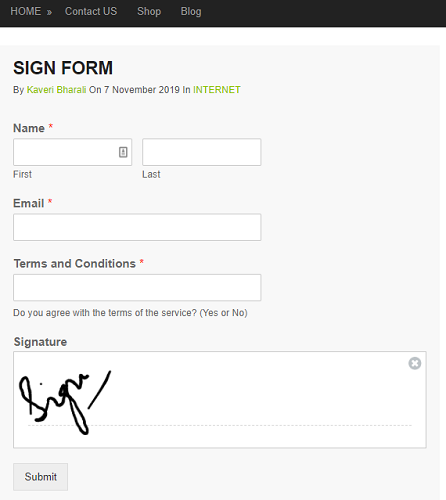
With WPForms, you can have many other such advanced features that will make things a lot easier for you. To know about those features, read our detailed review on WPForms.
If you liked this article, you might also want to check out how to create a custom login page in WordPress.


Comments Leave a Reply