Do you want to A/B split test your WordPress forms? A/B split testing helps you compare two versions of your WordPress forms and determine which one performs better.
There are many tools that allow you to A/B test your web forms. We use and recommend Google Optimize, the free a/b testing and personalization tool by Google.
In this article, we’ll show you how to A/B split test your WordPress forms to boost your conversions.
Why Should You A/B Split Test WordPress Forms?
Your web form is the first point where an actual interaction with your customer begins. Not to mention, it should be impactful so as to encourage more people to fill in the details.
A/B split testing allows you to create one or more variants of any web form.
For example, in your variant, you can add an additional form field, change the placeholder, change the copy of the button or anything else that you can think of that would bring in more engagement. Once you created a variant, by default, half of your traffic is shown the original version of the page and half are shown the modified version.
After the test, you’ll get to know which form is driving more conversions, so you can stick to the one that resonates best with your audience.
Choosing the Right A/B Testing Tool for WordPress – Google Optimize
We use and recommend Google Optimize to set up a/b tests. Google Optimize is a free A/B testing and personalization solution by Google. Best of all, it’s natively integrated with Google Analytics so you can use your Analytics data to create experiments quickly and easily.
MonsterInsights is the best plugin that lets you easily connect Google Analytics and Google Optimize on your WordPress website. With MonsterInsights, you don’t have to touch a single line of code to set up Google Optimize. All you have to do is to install the Google Optimize addon and you’ll be ready to start experiments.
Step 1: Get Started With Google Optimize
The first thing you’ll need to do is to install and activate the MonsterInsights plugin. For more details, check out our guide on how to connect Google Analytics with MonsterInsights.
Once you completed the set up process, you need to visit Insights » Addons and install the Google Optimize Addon.

After that, you need to create an account on Google Optimize.
Once logged in, hit the Get Started button.

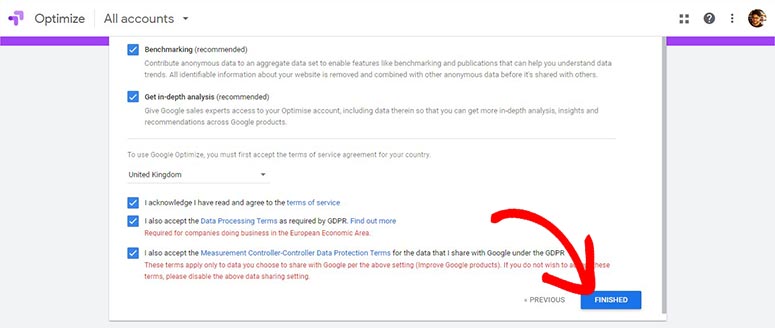
Next, you’ll be asked to agree to the terms and conditions. Finally, click on the Finished button, and you’ll be directed to the main page.
Now, you’ll see a container information section on the right-hand side of the screen.
Google automatically creates an Account ID and Container ID for you. However, you have the option to change them if you want by clicking on Edit Container Details.
The account section allows you to run your A/B testing experiments and the container is where your Optimize configurations for your A/B testing experiments are saved. You can click on the three vertical dots to edit container details and manage notifications.
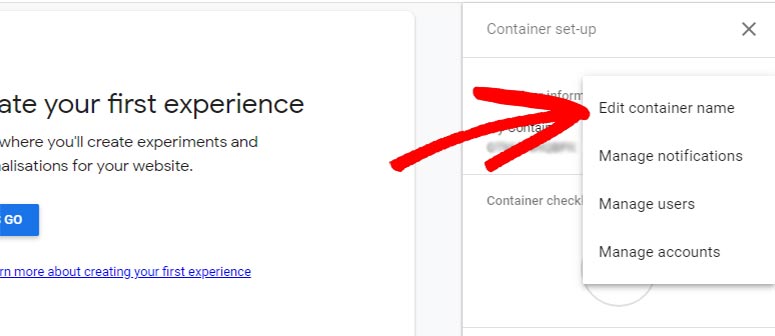
The container information is created by Google automatically. However, you can change the container name, account ID, and container ID in this section.
Step 2: Link Google Optimize to Your Google Analytics Account
In order to start collecting your A/B testing data on Google Analytics, you’ll need to link your Google Optimize to Google Analytics.
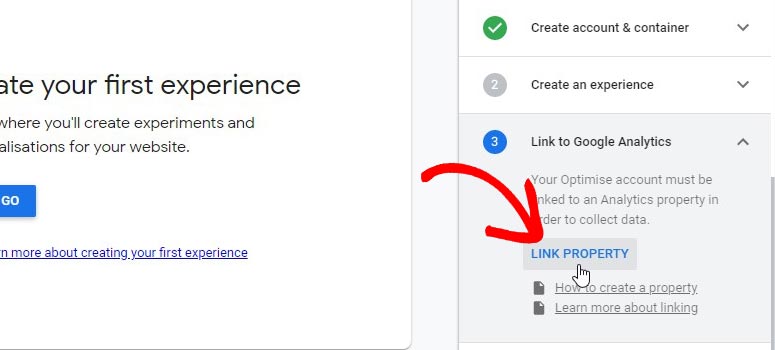
To link the accounts, On the right-hand side of your screen, you need to expand the Link to Google Analytics section and click on the Link Property button.
Now click on the dropdown to select a property that you want to link with Google Optimize. If you don’t find the property that you want to link, then follow this guide to create a property in Google Analytics.
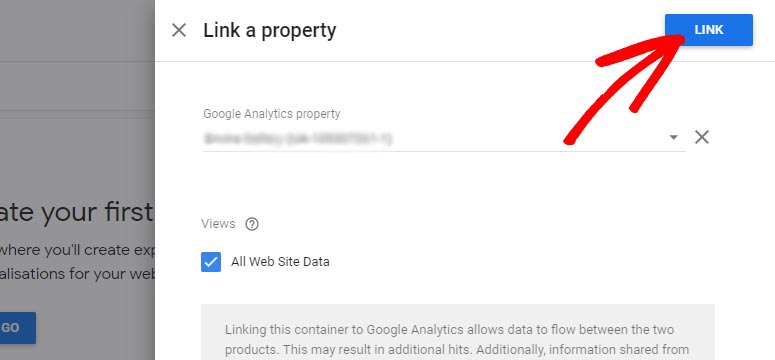
Data can now flow between both your Google Optimize and Analytics accounts.
Step 3: Add Google Optimize to WordPress
MonsterInsights makes it easy for you to add Google Optimize to your website using the Optimize addon that you’ve installed previously.
To do this, you’ll need the container ID which is available in the container information section. Copy the container ID from there.

Now head over to your WordPress admin area and visit Insights » Settings » Tracking » Google Optimize to paste the Google Optimize Container ID.
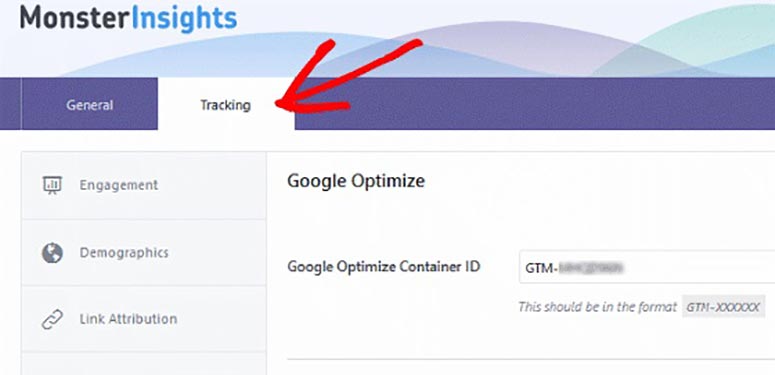
Click on the Save Changes button. You have successfully added Google Optimize to your website.
Step 4: Start the A/B Test Experiment
Now you can start A/B split testing for your WordPress forms. For the sake of this tutorial, we’ll take a signup form as an example to run the test.
You need to visit your Google Optimize account and click on the Let’s Go button to create an experiment.
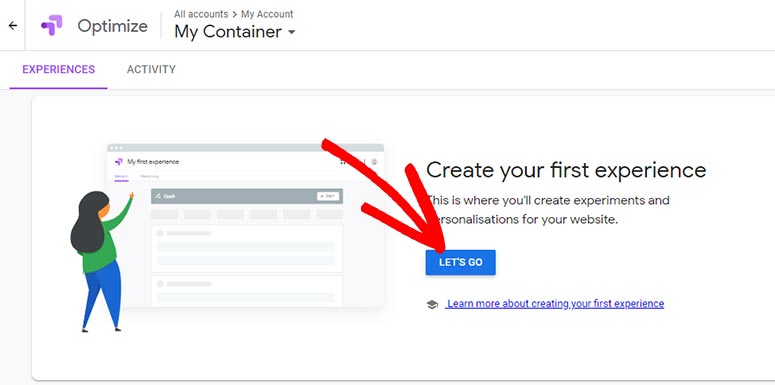
A sidebar popup will appear where you’ll be asked to enter the name of your experiment and URL of the signup form page.
After specifying the details, you’ll need to select the type of experiment/test you want to perform on your specified URL.
Click on the A/B Test option which allows you to test two or more variants of a page.
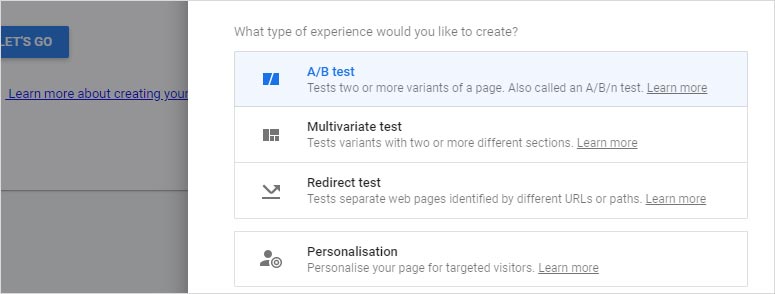
Once selected, click on the Create button.
Now you’ll notice that your test is still in the Draft mode. To start the experiment, you’ll need to take a few more steps. Start by adding a variant to your original signup form. To do that, click on the Add Variant button and type a name for the variant you want to create.
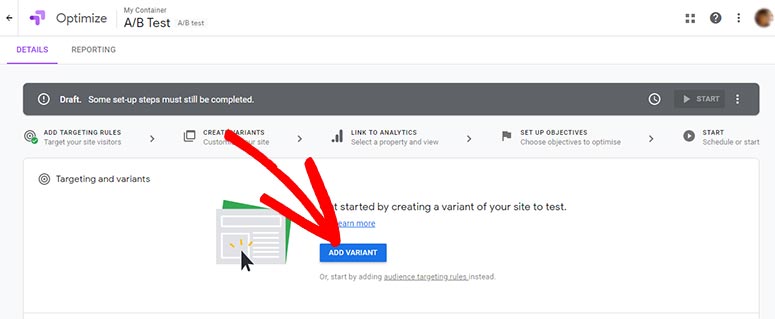
Now click on the Edit button to make changes in the new variant of your signup form.

This will take you to the Optimize Visual Editor where you can customize the size of the fields, change labels, edit button text, and more.
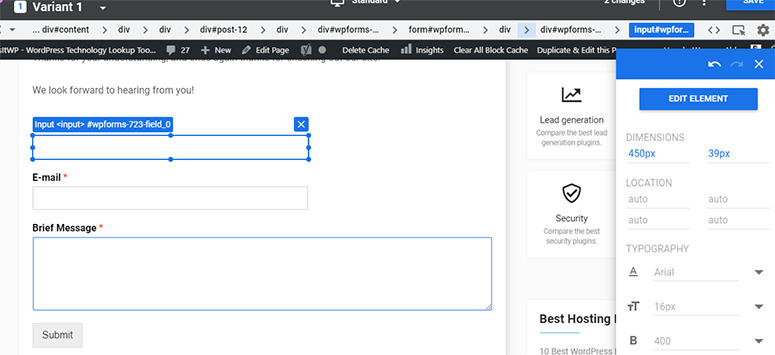
Once you make all the changes, click on the Save and Finished buttons.
After that, you need to define the objectives for your A/B test. These objectives will help you decide which signup form variant the winner is.
Click on the Add Experiment Objective link. There are many pre-defined objectives, including pageviews, bounces, and session durations. You can also set a custom objective for the experiment.

For this experiment, we’ll be choosing Bounces as our objective to find out which signup form has the lowest bounce rate.
You can also custom objectives that are not mentioned in the account.
Finally, you’ll need to define a percentage for how many people should see the original sign up form and its variant.
By default, if you only have one variant, the traffic will be split equally between the original page and its variant.
You can click on the weight to customize it, but make sure the balance weight is 100%.
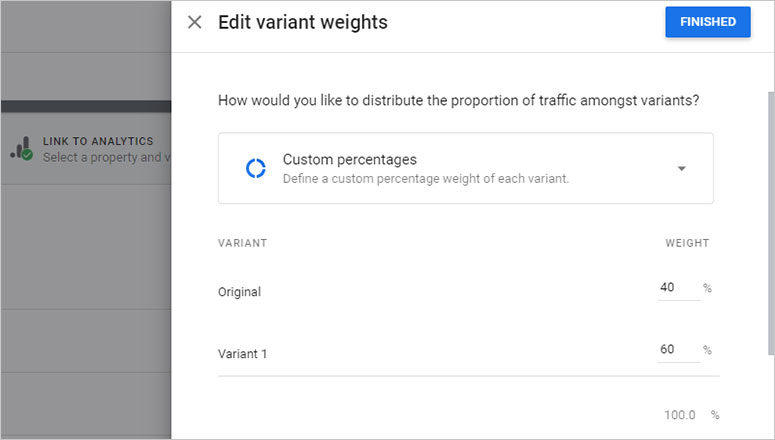
Then, click on the Finished button.
That’s all. You can click on the Start button to start your experiment.
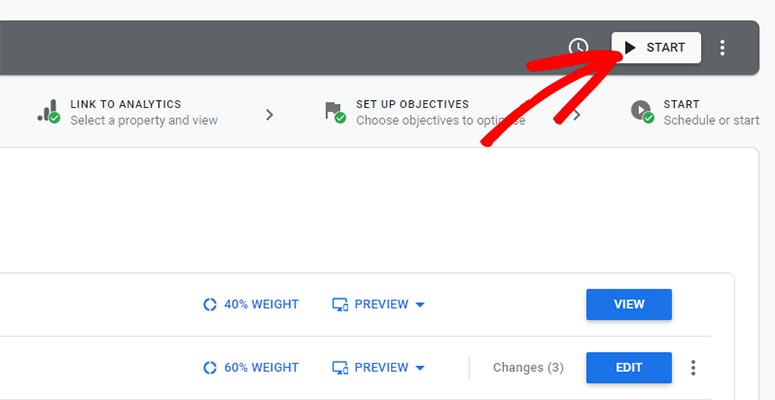
It’s advised to at least run the A/B test experiment for two weeks or more to make sure you’ve gathered enough data. Once enough data has been collected, Google will declare a winner.
We hope this guide helped you learn how to A/B test WordPress forms. You may also want to check out the best WordPress analytics plugins.

Comments Leave a Reply