Do you want to create a social networking website like Facebook with WordPress?
WordPress is so flexible that it allows you to build any kind of website, including a niche social network, like Facebook. In this article, we’ll show you how to make a niche social networking site like Facebook with WordPress.
Why Build a Niche Social Network?
There are many social networks like Facebook, Twitter, Instagram, etc. But, these platforms are for everyone, and you couldn’t control your audience on them. You may create private groups on Facebook that aren’t publicly accessible, but since you don’t own the group, Facebook can delete it anytime without your consent.
A niche social network will give you complete control over the users, user activities, and the network itself. You can build a website like Facebook for your users to let them connect with each other.
Making Your Social Networking Site Like Facebook Using BuddyPress
BuddyPress is a popular WordPress plugin that can transform any WordPress website into a social network. It’s available for free from the WordPress.org repository.
It comes with similar features as Facebook like user registration, profile management, user groups, and more. The users can also send friend requests to each other and communicate on private messages. As an administrator, you can control the activity and no one can delete your niche social network.
Step 1: Purchase a Domain Name and Web Hosting
The first thing you need to do is to purchase a domain name and web hosting.
We recommend using Bluehost. It’s one of the most popular web hosting providers and an official WordPress hosting partner.
For IsItWP users, they’re also offering a free domain name, free SSL certificate, and a great discount on web hosting.
Click Here to Claim This Exclusive Bluehost Offer »
You might also want to check out this complete Bluehost review!
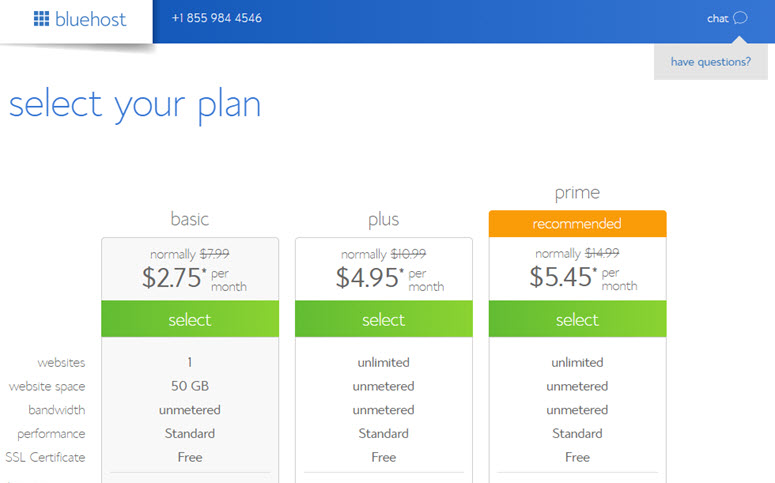
Visit Bluehost website and click on the Get started button. Next, you’ll be asked to choose a hosting plan. For a Facebook like social network, let’s select the basic plan as you’re just getting started (it includes a free domain name and free SSL certificate). You can always upgrade later as your site grows.
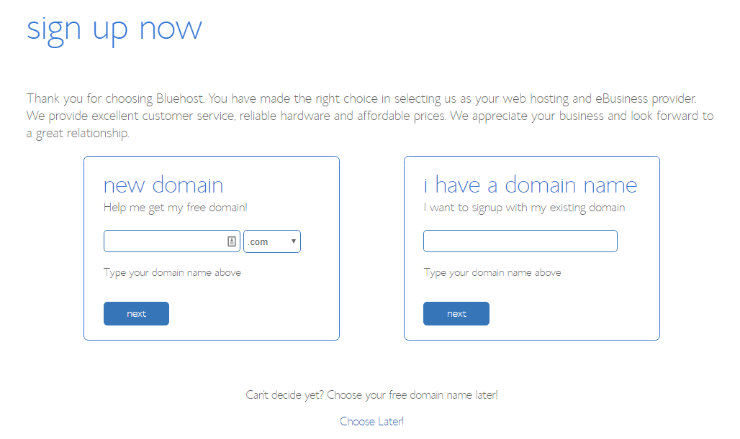
Now you need to enter the domain information. You can either proceed with an existing domain that you own or purchase a new one for free. Select the best option that suits your situation.
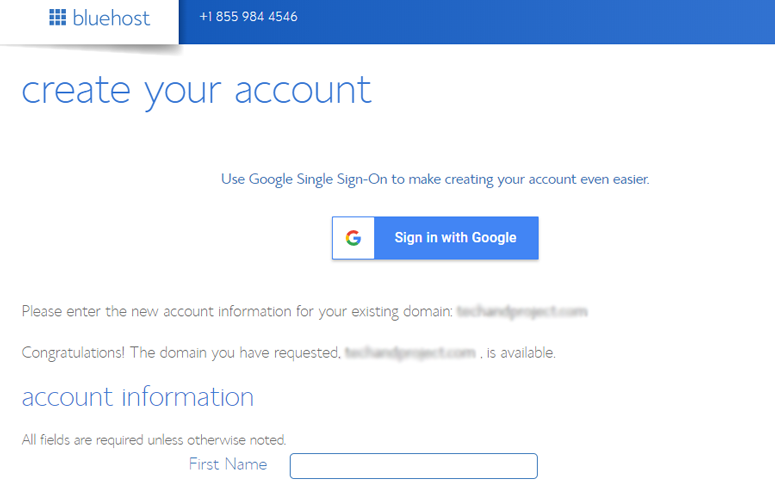
After choosing a domain name, you need to enter your account information. For easy registration, you can sign in with Google and complete the setup in a few clicks.
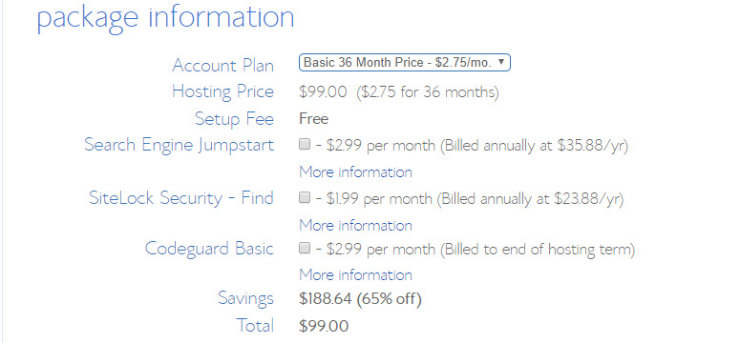
Next, scroll down until you find the package information box. You can choose the basic plan for 12 months, 24 months, or 36 months. It also shows that a few addons are preselected, adding up the total price. We recommend unchecking the addons because you don’t need these right away. You can always purchase them later whenever you want.
Choosing the 36-month plan will get you the best value for your money.
Lastly, you need to scroll down to the page further and enter your payment details. You have to agree to their Terms of Service and then, click on the Submit button.
That’s it!
You’ve successfully subscribed to a hosting plan. Go ahead and create a password for your account.
After that, you’ll receive an email with details on how to log in to your web hosting control panel (cPanel), where you can manage everything, including web files, emails, and support.
Step 2: Set Up WordPress for Your Social Networking Site
It’s easy to set up a website like Facebook with WordPress.
Bluehost offers 1-click WordPress installation on their dashboard. You need to visit your Bluehost account and enter your website details. It will install WordPress in a few minutes.
With Bluehost, you don’t have to go through a manual WordPress installation process. This saves you time and effort. Add your website name and tagline, select a theme, and you’ll be ready to get started with WordPress instantly.
You can change all settings later from your WordPress admin dashboard.
Step 3: Select the Right WordPress Theme for Your Social Network
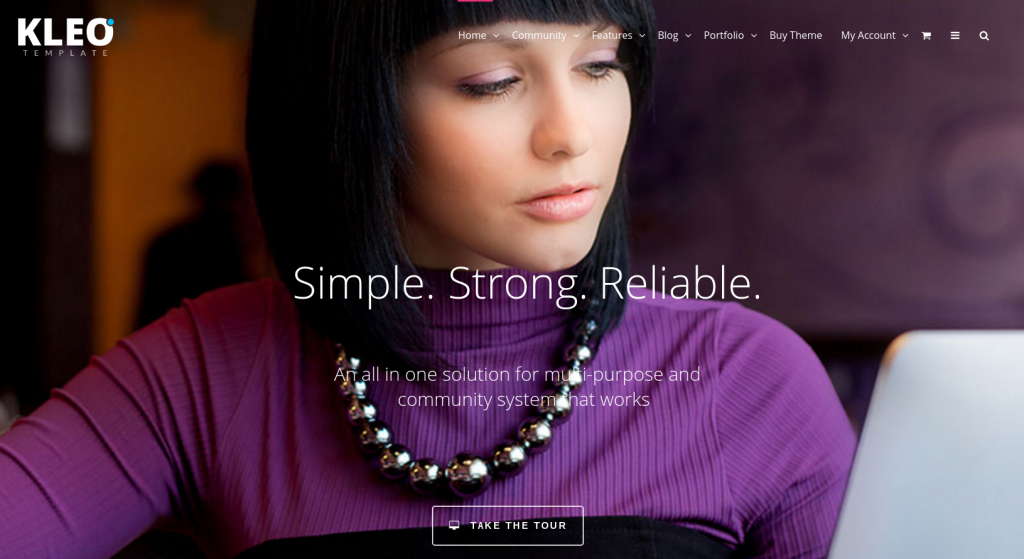
While you can find a lot of different WordPress themes for your BuddyPress site, we recommend Kleo. This theme transforms your website into a community-powered site. Aside from BuddyPress, this theme supports bbPress as well.
Go ahead and install and activate the Kleo theme. For more details, you should check out our guide on how to install a WordPress theme.
Step 4: Install BuddyPress for Creating a Facebook-like Website
Next, install and activate the BuddyPress plugin. For more details, you can see our guide on how to install a WordPress plugin.
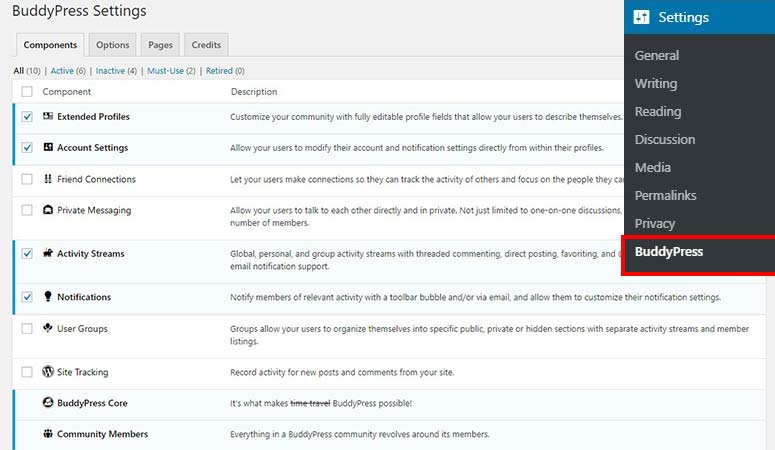
After activation, you need to go to Settings » BuddyPress to take a look at the default plugin settings.
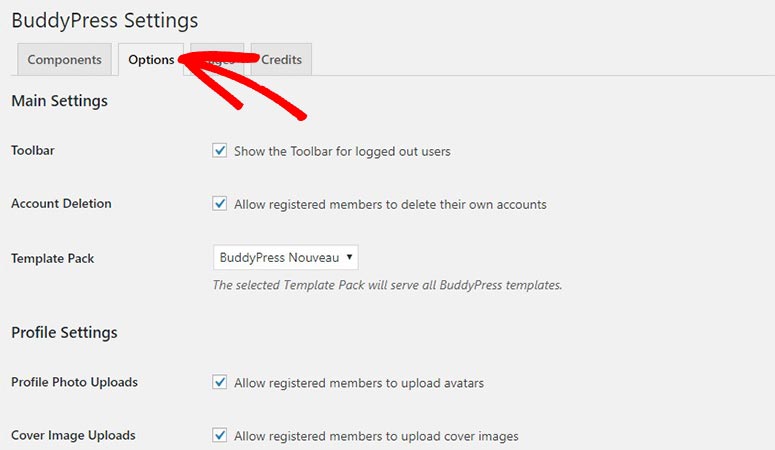
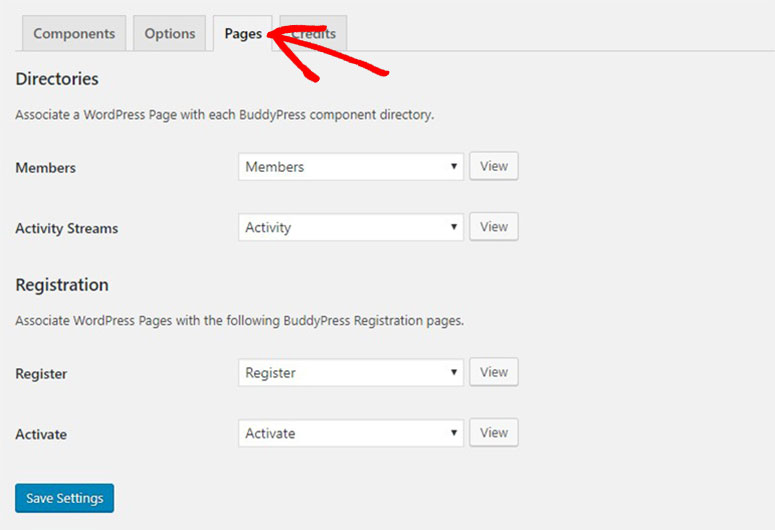
The settings page has multiple tabs, including components, options, pages, and credits.
In the Components tab, you can checkmark any option to activate or deactivate the settings. After making the changes, you need to click on the Save Settings button at the bottom of the page.
In the Options tab, you can manage general, profile, and activity settings. By default, these settings work with any social network.
If you intend to change an option, then checkmark on it and go to the bottom of the page to click on the Save Settings button.
In the Pages tab, you can manage the directories and registration pages. When you install BuddyPress, it creates the required pages automatically which means the default settings can work for your social network.
If you change any page settings, then click on the Save Settings button.
The Credits tab will display the team behind the BuddyPress plugin.
Step 5: Creating the Navigation Menu for Your Niche Social Network
After the general settings, you need to create a navigation menu for your social network. It will help users navigate to other pages easily.
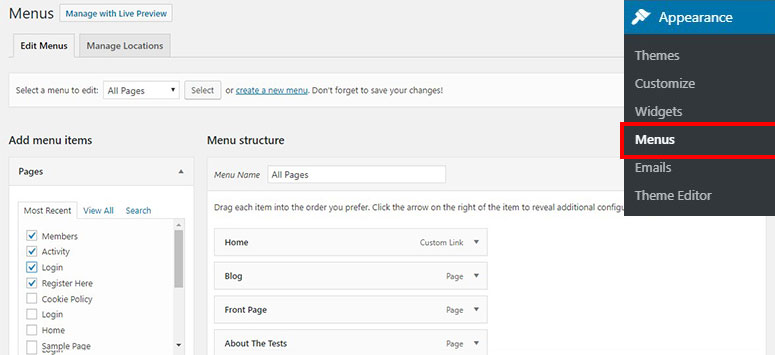
For this, you need to visit Appearance » Menus page in the WordPress admin area. And, add all the BuddyPress pages to your navigation menu.
Click on the Save Menu button to continue.
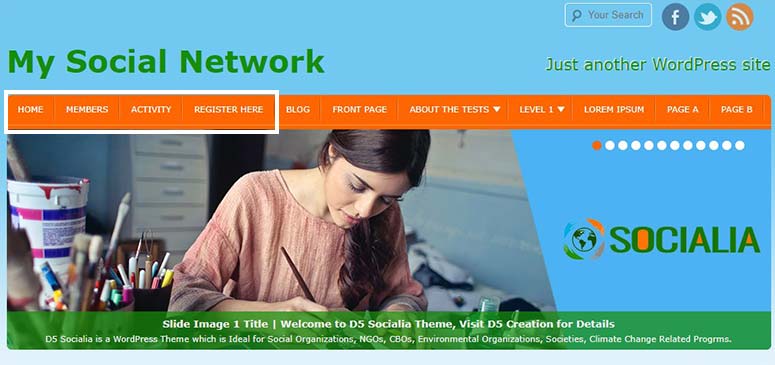
Next, you can visit your niche social network website to check out the pages.
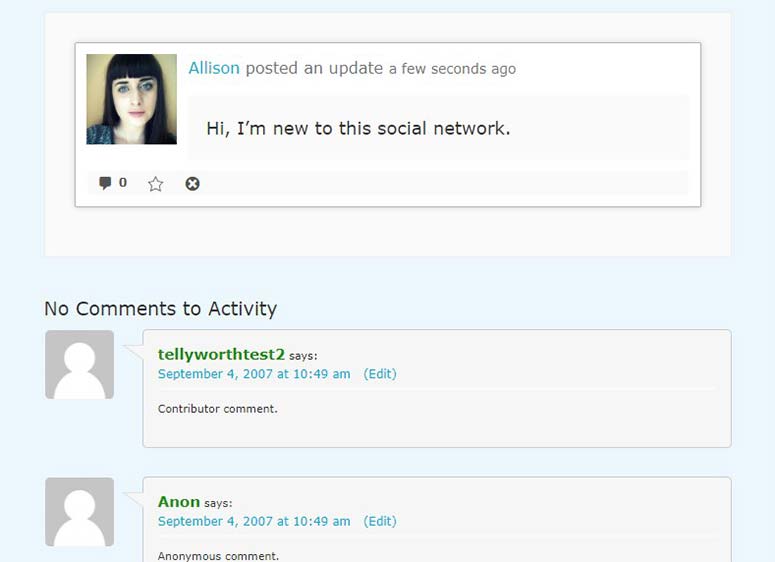
You can click on any BuddyPress page like the Activity page. This will show you the user activity and also allows you to post a status update just like Facebook.
The BuddyPress plugin is compatible with the popular WordPress themes. You can also find several BuddyPress-specific templates on the internet. So, the navigation menu will look great on your niche social network site.
Step 6: Running Your Social Network With BuddyPress
Now that you set up a social networking site, it’s important to keep it running and make users engaged. It also means avoid spam and moderate content submitted by your users.
Luckily, BuddyPress comes with several ready-made tools to help manage and run your social networking site smoothly.
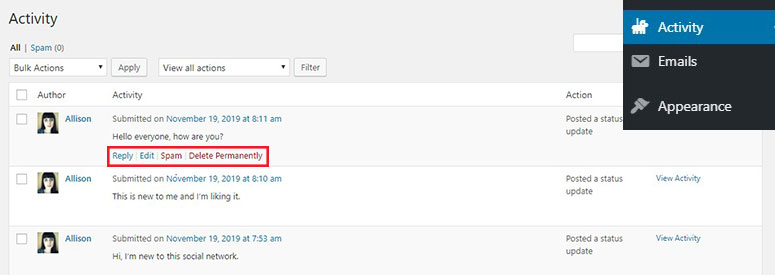
First, you need to visit the Activity page from the WordPress admin menu. From there, you can manage recent user activity. It lets you filter the activity by members, profiles, and activity streams.
You can take bulk actions to mark as spam, delete permanently, and mark no spam on the activities.
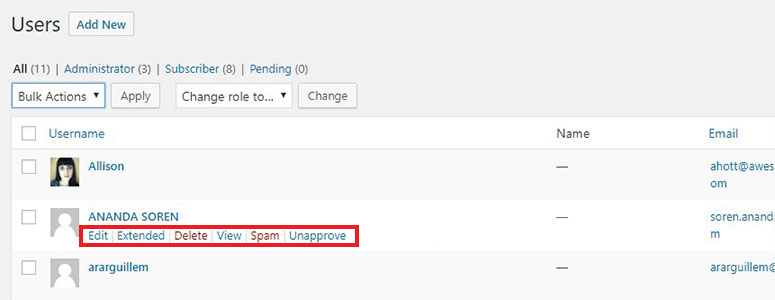
Next, you should visit the Users page. From there, you can take bulk actions to delete users, edit profiles, mark spam users, etc. You can also change user roles to control their access to your social network.
You can also visit the Manage Signups page to check out new user signups. From there, you can approve a user and delete the spam users.
Step 7: Adding Groups to Your Social Network
User groups are a common feature on Facebook. You can also allow your social network users to create groups. These groups work as social communities where the users can add other members, invite users, post status updates, etc.
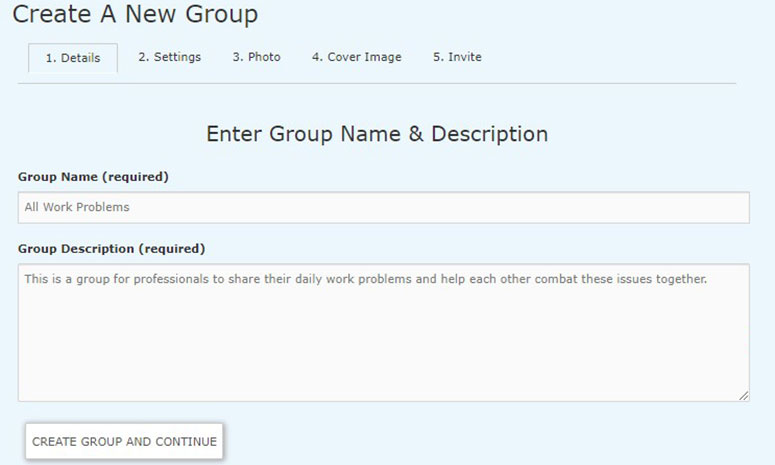
You can visit the Groups page in your WordPress admin area to create your first user group. Click on the Add New button to start creating the group.
Start by adding the group name and description. Next, you need to click on the Create Group and Continue button.
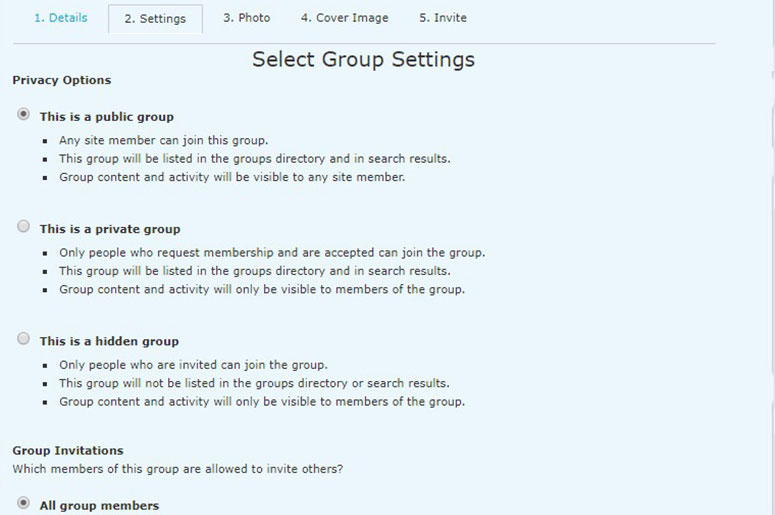
After that, it will show you the privacy options. You can create public, private, or hidden groups. With each privacy option, you can find the terms and conditions that help decide how you want to run your group.
You can also select the group invitations settings below. Click on the Next Step button to continue.
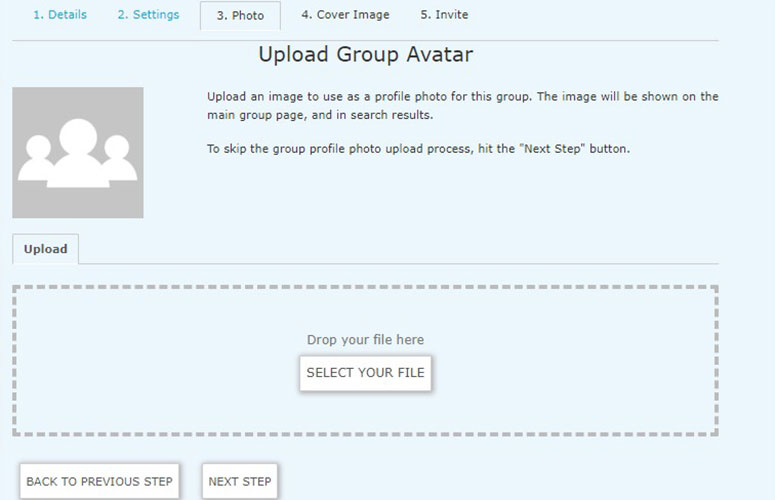
Now you need to add a group profile photo and click on the Next Step button.
In the next option, you should add the cover photo for your group. Click on the Next Step button.
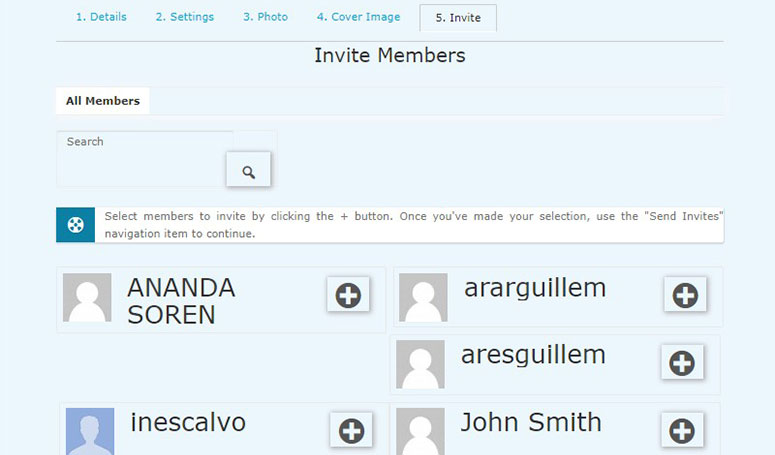
After that, you can invite users to join your group. The members can also search for your group and send the request to join it.
Click on the Finish button and the group is ready.
Your users can visit the Groups page from the navigation menu to check out all the groups on your social networks.
Step 8: Set Up Email Notifications
To send alerts to users about the recent activity on their timeline, you can set up email notifications and customize the messages for users.
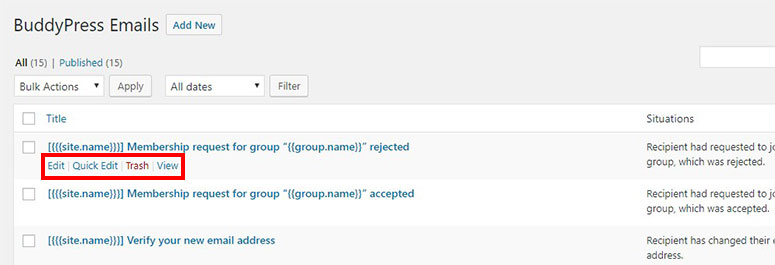
Visit the Emails page in the WordPress admin area. If you want to create a new email notification, then click on the Add New button.
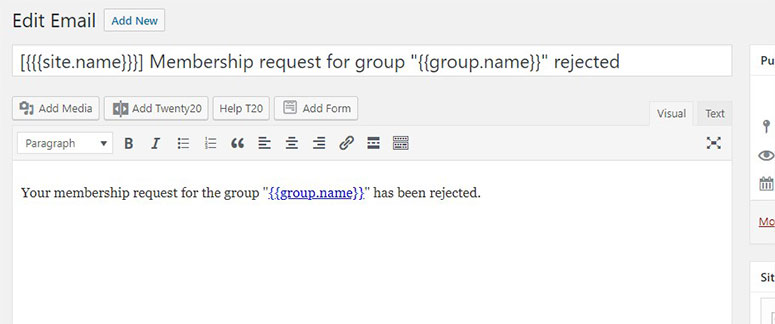
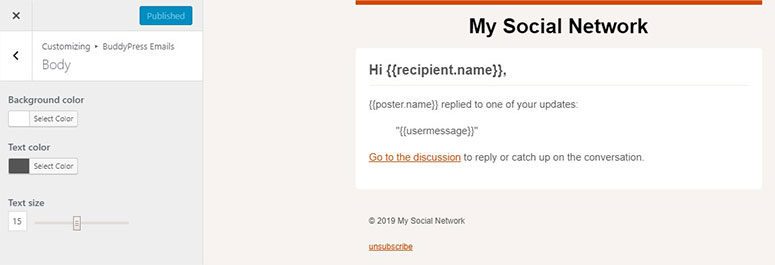
There are multiple pre-built email templates that you can edit and change according to your niche social network.
With the customize option, you can change the background color, text color, and text size for your notification emails.
Click on the Publish button to store these settings.
We hope this article helped you learn how to create a social networking site like Facebook on WordPress. You may also want to check out our guide on how to create a website like Reddit with WordPress.




Can I monetize it through ads?