Do you want to move from the GoDaddy website builder to WordPress? If you’ve built a website on GoDaddy website builder and you now want to switch to WordPress, it can seem like a daunting task, especially for beginners. While it can be time-consuming, it’s definitely worth it. So, how do you move from GoDaddy website builder to WordPress?
Unfortunately, there’s no direct way to move, probably because GoDaddy doesn’t want you to leave. But you can do it manually and we can show you how.
In this article, we’ll show you how to migrate the GoDaddy website builder site to WordPress, step by step.
Here’s a quick table of contents to guide you through the steps in this article:
- Choose Website Hosting
- Back up Your GoDaddy Website Builder Content
- Back up our Link Structure
- Point Your Domain to WordPress Hosting
- Install WordPress
- Import Your GoDaddy Website Content in WordPress
- Setup Redirects
Now let’s get started on how to migrate the GoDaddy website to WordPress.
Benefits of Moving from GoDaddy to WordPress
WordPress is the most popular content management system (CMS) in the world and it powers over 43% of websites.
A site built on WordPress comes with a number of benefits including:
- No Limitations – With WordPress, you can build, customize, and grow your website any way you like without limitations.
- Easy Customization – WordPress offers a ton of free themes that allow you to create a great-looking website in an instant.
- Added Power – You get access to thousands of free WordPress plugins to make your website even more powerful.
With all of these benefits, you can be sure that your choice to move your site from GoDaddy to WordPress is a good one.
It’s important to note that there are 2 different WordPress platforms, WordPress.org and WordPress.com. We recommend you move your GoDaddy website builder site to WordPress.org. Check out our other post for a detailed explanation of the differences between WordPress.com and WordPress.org.
If you’re not sure whether you should make the switch or not, you may be interested in reading our GoDaddy Website Builder Review.
1. GoDaddy to WordPress: Choose WordPress Hosting
In order to make a website on WordPress, you need WordPress hosting. Website hosting is where your site is hosted and your files are stored.
If you already have hosting with GoDaddy’s hosting service, then you’re good to go! Simply install WordPress on GoDaddy to use it for your new website.
But if you need to switch web host to another or choose a new hosting service for your WordPress site, we recommend choosing Bluehost.

Bluehost is one of the most popular hosting companies in the world and it’s an officially recommended hosting provider by WordPress.org. Plus, IsItWP readers get an awesome deal when they sign up with Bluehost.
They’re offering our users a free domain name, free SSL, and 65% off on WordPress hosting.
Click Here to Claim This Exclusive Bluehost Offer »
With Bluehost, you’ll only be paying as low as $2.75 per month to start your WordPress website.
If you later decide you want to switch your WordPress site to another web host, check out our post on how to move from one web host to another without any downtime.
Related: In-depth Bluehost Review.
2. Back up Your GoDaddy Website Builder Content
Before you start to move GoDaddy website builder site to WordPress, you need to back up your website content. If you have just a couple pages of content and images, then you can back up by simply copying the text into text files on your computer and saving the images to your computer as well.

To better organize your backup content, you can save all of your homepage text in a text editor file called “Homepage” and all of your homepage images in a folder called “Homepage” and so on. Do this for each page of your website.
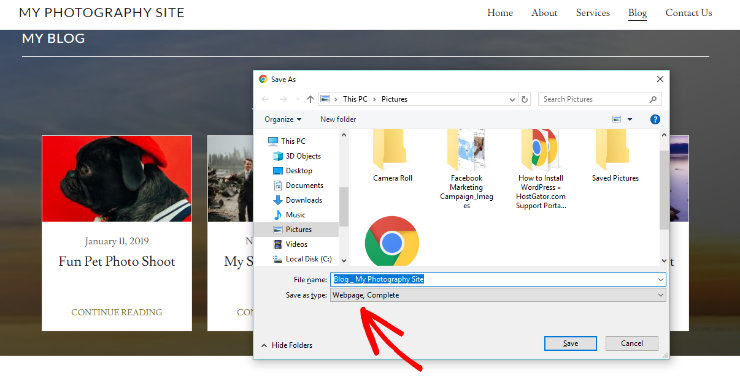
Another quick option to back up your website content is to visit each of your website pages on your browser. On your keyboard, press CTRL+S (Command+S for Mac), this will bring up the save dialog box. Make sure to choose “Webpage, Complete” in the “format” or “save as type” field. Save each of your website pages this way.
You can also use a free tool like HTTrack which allows you to save any web page to your PC. Just download HTTrack and enter the URL of your website. The tool will then make a copy of your website on your computer.
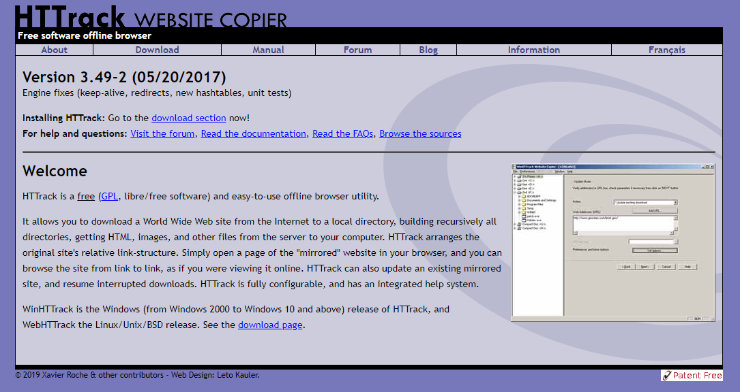
HTTrack is certainly a faster way to backup all of your website files. The only downside is that since the GoDaddy website builder and its themes store their files on different CDN servers, which makes it difficult to download all of your images. So, if your website is mostly text and you don’t mind losing your images, HTTrack is a fine option.
Before moving on to the next step of migrating from GoDaddy to WordPress, double-check that you’ve got all of your website files downloaded. Once you’ve disabled the website builder, you won’t be able to get your website back. So, disconnect the internet on your computer and check to see that you’ve got all of your website data.
3. Backup Your Link Structure
Next, you’ll need to back up your link structure. If someone clicks on a URL to your old site, they won’t be able to find your website. So, you need to redirect all of the users visiting the old URLs of your website to the new URLs on your WordPress site.
To back up your link structure, you need a full list of all of the URLs on your website. If you don’t have many, simply copy and paste the URLs to a text file on your computer.
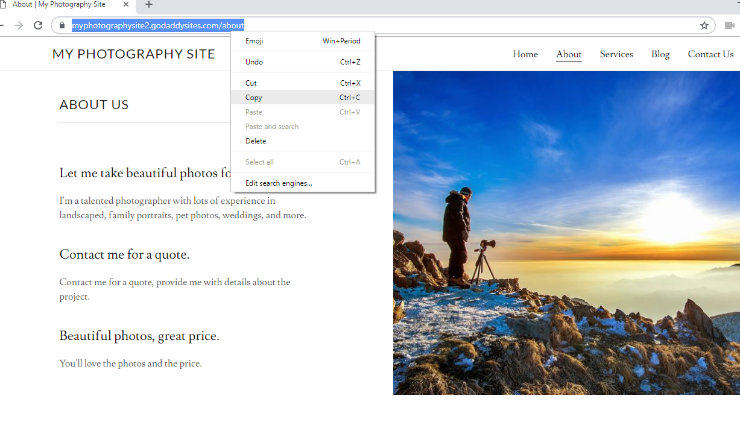
Alternatively, you can use an online tool like Klipper to extract URLs from your site and save them to a text file.
4. Point Your Domain to WordPress Hosting
This step is for users who have a domain name registered with GoDaddy and want to use it with another WordPress hosting service like Bluehost or SiteGround. If you don’t have a domain name registered with GoDaddy, you can skip this step.
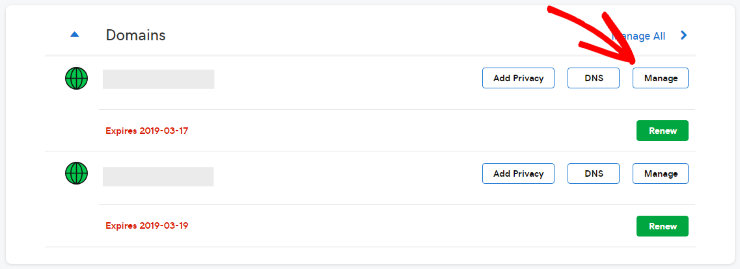
To point your domain to other WordPress hosting services, go to your GoDaddy account and navigate to the Domains section. Click on the Manage button next to the domain you want to change.
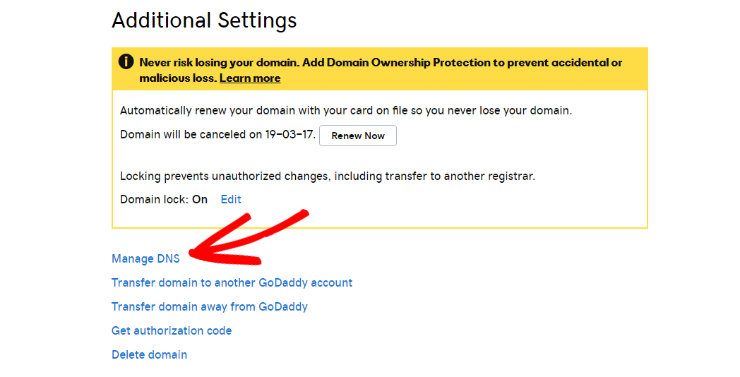
Next, click on Additional Settings and then click on Manage DNS.
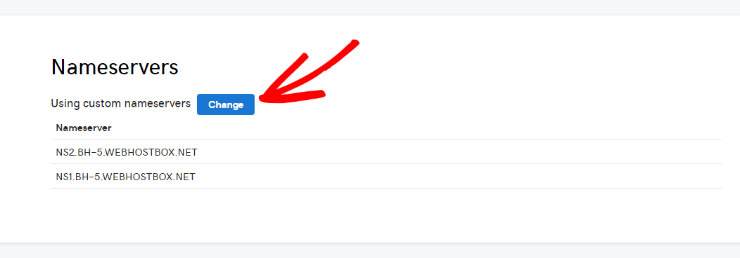
Now scroll down to the Nameservers section and select the Change button.
Next, click the dropdown to switch the nameserver type to Custom. Now you can enter your new WordPress hosts nameservers here. If your WordPress hosting service has more than 2 nameservers, click Add Nameserver to add another line.
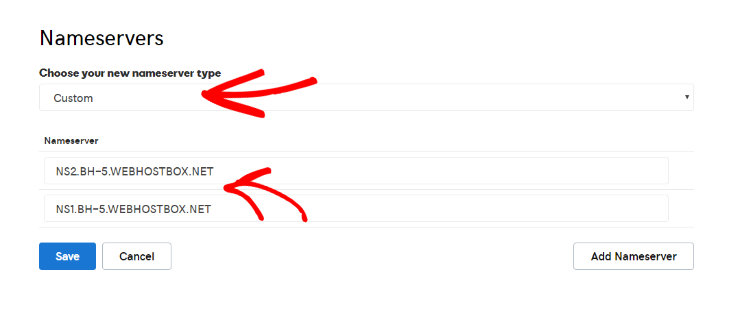
After you’ve entered in your nameservers, click the OK button and then the Save button to save your settings. It’s important to note that DNS changes may take up to 24 hours to take effect, but it typically takes only a few hours.
When your domain starts pointing to your new WordPress host, you can move on to the next step.
5. Install WordPress
Now you need to install WordPress. WordPress is famous for its 5-minute installation, so this should take no time at all.
Many web hosting companies offer 1-click WordPress installation as well. So, when you sign up for a WordPress hosting service and choose your plan, you can install WordPress right from your hosting service dashboard. Below is what that process looks like when you sign up with Bluehost, but it will be similar for other WordPress hosting services as well.
First, you’ll be prompted to choose a WordPress theme. You can choose any WordPress multi-purpose theme and change it easily at any time you want as well.

Next, you’ll be asked to name your WordPress website and choose a tagline for your site.
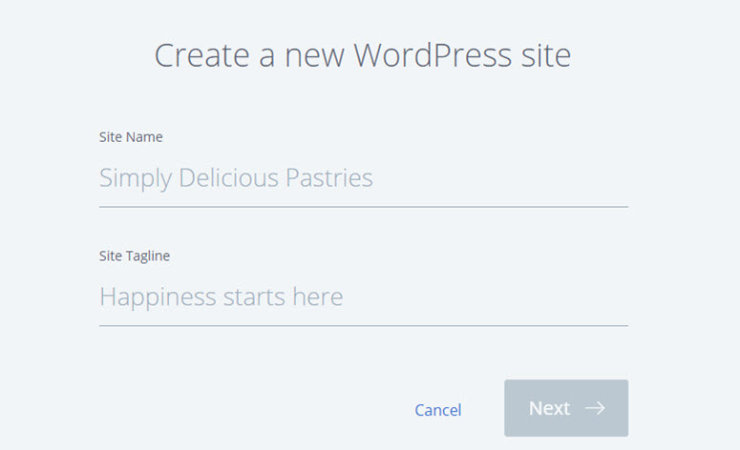
After typing in your details, click Next. Now Bluehost will automatically install WordPress for you. When the installation is finished, you’ll see a WordPress installed successfully screen.
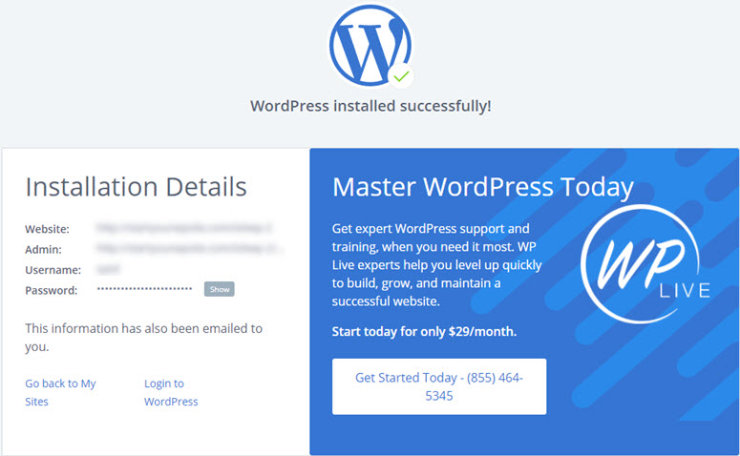
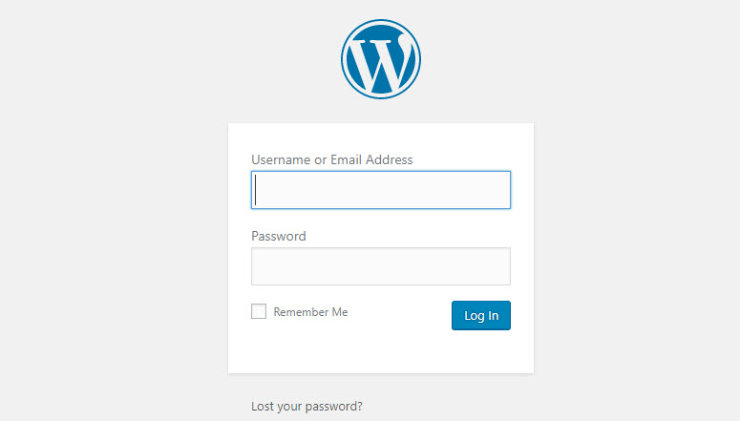
Now you can log in to your site to start building it and transferring your content to it. An easy way to log in to your WordPress site is by adding wp-admin to the end of your URL.
For example, http://mysite.com/wp-admin.
A screen will then appear where you can log in to your WordPress site with the login information that was sent to your email.
6. Import Your GoDaddy Website Content in WordPress
Now it’s time to import your content from your GoDaddy website builder site to your new WordPress website. As we mentioned earlier, there is no way to automatically import that content to WordPress so you’ll have to do it manually.
WordPress comes with 2 different built-in content types: pages and posts. You need to create pages for your website, for example, an “About Us” page, a “Services” page, a “Contact” page, and so on. You’ll need to create posts if you start a blog.
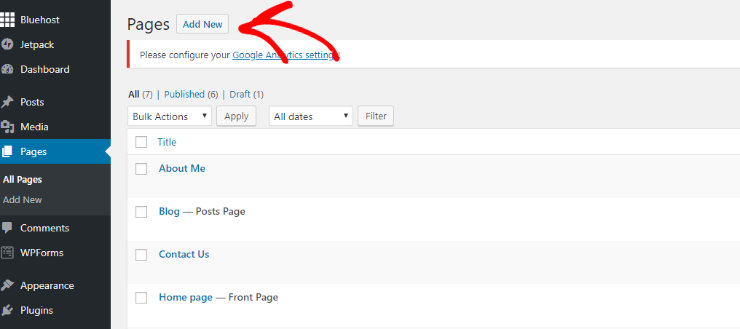
Create your pages in WordPress by clicking the Pages button in your WordPress dashboard and then clicking Add New. To create blog posts, follow the same instructions but choose the Posts button instead.
Now copy the content from your old GoDaddy website builder site that you previously saved and paste it into the WordPress editor.
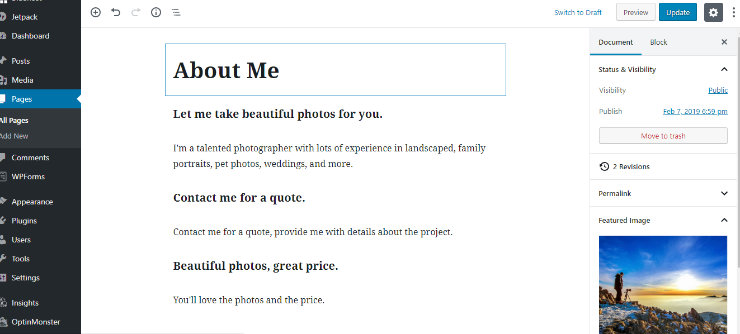
When you’re finished importing the content, click the Publish button to make your page live on your website. Repeat this step until all of your GoDaddy website builder content has been imported to WordPress.
7. Setup Redirects
If you saved a list of links from your old GoDaddy website builder site, you can set up redirects. Redirects tell the search engines that the requested URL has been moved to a new URL.
You can easily set up redirects using a free WordPress plugin like Simple 301 Redirects. Navigate to the Plugins section on your WordPress dashboard, search for “Simple 301 Redirects”, and click Install Now.
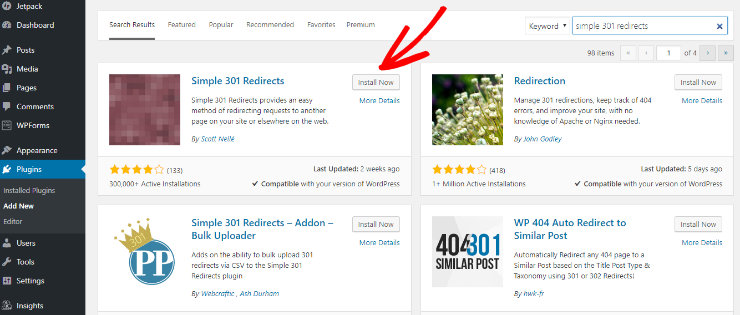
Once the plugin is installed and activated, go to Settings >> 301 Redirects. In the “Request” field, type in your old URL, and in the “Destination” field, type in your new URL for WordPress.

Click the Save Changes button to save the redirect and repeat the process for all of your other URLs.
After a Successful Migration, What’s Next?
Now that your GoDaddy website builder site has been moved from GoDaddy to WordPress, what’s next? After migrating from GoDaddy to WordPress, there are a number of WordPress features you should take advantage of including:
- Find the Perfect WordPress Theme – There are many WordPress multipurpose themes specifically made for every industry and website type, so find one that fits your goals perfectly.
- Improve Your SEO – Improve the SEO of your new site with some powerful WordPress plugins like YoastSEO and MonsterInsights.
- Add a Contact Form – Add a contact form to your website so your visitors can easily contact you with a plugin like WPForms.
- Boost Security – Beef up the security of your WordPress site using some of the best WordPress security plugins.
- Run a giveaway: Promote your new WordPress site to engage more users by creating a giveaway with a plugin like RafflePress.
- Promote your website: You can use the best content marketing tools and plugins to promote your website to a larger audience.
We hope you enjoyed this article on how to migrate the GoDaddy website builder site to WordPress. Now that you’ve successfully moved from GoDaddy to WordPress, you might want to check out our article on the 25 Must-Have WordPress Plugins for Business Websites.

Usually the SSL certificate is bound to the domain name and can be reused when you switch web hosts. Are you migrating to another web host or do you plan on using GoDaddy to host your WordPress website? It would be best to confirm with the GoDaddy support team.
Wondering does my SSL certificate that i purchased with the GoDaddy website builder convey over when i switch to wordpress, or do i have to buy it again?
Usually the SSL certificate is bound to the domain name and can be reused when you switch web hosts. Are you migrating to another web host or do you plan on using GoDaddy to host your WordPress website? It would be best to confirm with the GoDaddy support team.
We can keep same Old URL also, right? Isn’t possible?
Understand everything. Apart from the redirects – wouldn’t you want to keep the same URLs in order to not lose rankings, etc
Hello, I see that this article was last updated on August 20th, so I’m hoping my question gets seen.
After step 4, can I unsubscribe to GoDaddy? Is GoDaddy doing anything after I change the name servers and the time passes for the change to take place?
Hey Jeffrey,
Thanks for stopping by.
Yes! After the nameserver changes and migrating your site to WordPress, you can unsubscribe from GoDaddy.
thanks for giving this wonderful information and it is very helpful for me