Are you looking for a fast and effective way to clean up a hacked website?
When your site is hacked, the consequences can be devastating. Hackers can redirect your traffic, defraud visitors, steal confidential data, and the list goes on.
What’s really worrying is that once hackers break in, they use all sorts of tactics to make sure they can access your site even after you clean it up.
In this tutorial, we’re going to show you the most effective way to repair a hacked WordPress site so you’ll have it back to normal in no time. Plus, we’ll show you how to close all entry points so you can rest assured that your site is protected in the future.
We know that you may be in a hurry to head straight to the solution, so here’s a table of contents that you can use to skip ahead to the section that interests you the most:
- Making Sure Your Site is Hacked
- How to Effectively Repair a Hacked Website
- Steps to Take After Recovering from a WordPress Hack
- Prevent WordPress Hacks on Your Site
Making Sure Your Site is Hacked
Before you dive into cleaning up your site, it’s best to be sure your website is actually hacked. Sometimes, you may see your website slowing down and jump straight to the conclusion that it’s hacked when it may be another problem.
So first, you can look out for these common signs and symptoms of an attack on your site:
- You are unable to login to the admin panel or it says that your username does not exist
- Your site is displaying ads or popups for illegal and fake products
- You are ranking for random keywords that look like spam
- There’s a sudden decline in traffic as hackers are redirecting traffic, although this could also mean you’ve been penalized by a Google algorithm update
- Your website has suddenly slowed down in terms of performance
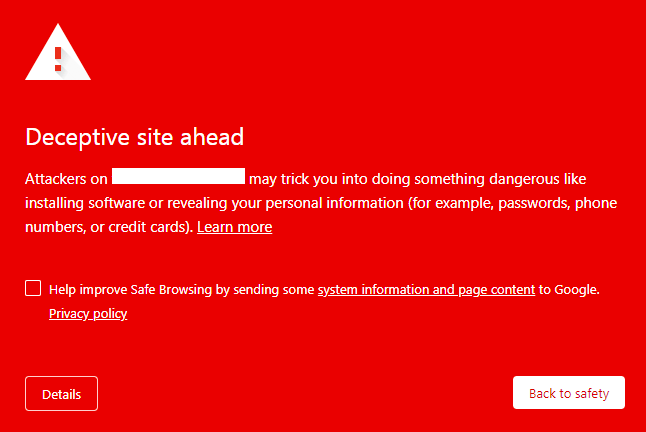
- Google is warning visitors that your site is deceptive or malicious
- Your web host has suspended your account as they have detected malware
As you can see, there are plenty of signs that your site is hacked and you can find out for sure by using a security scanner.
You can run a malware check right now using our Free Malware Scanner powered by Sucuri.
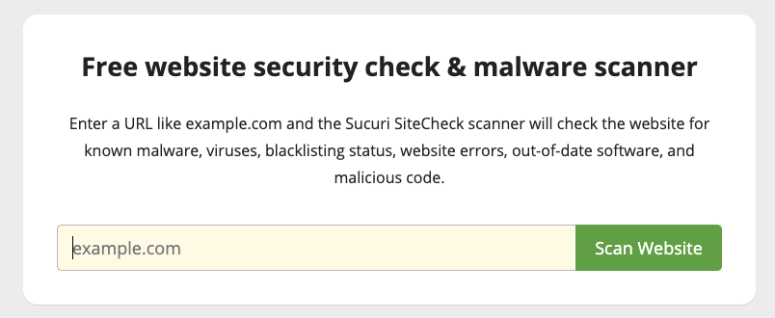
All you need to do is enter your website’s URL and the scanner will run through your site. If it detects any malware, it will give you a report like this:
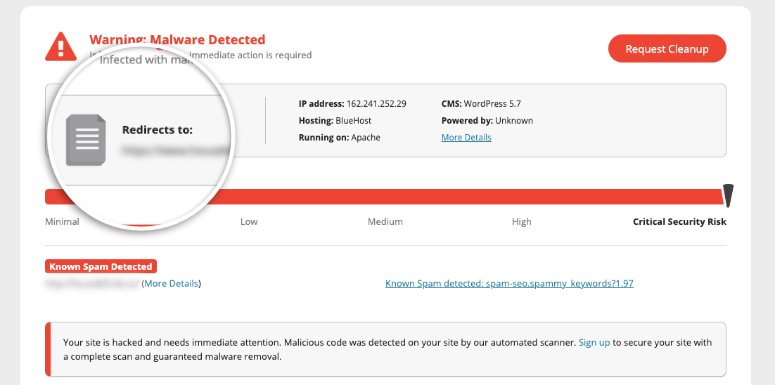
If you get a clean report and you still suspect your site is hacked, we recommend using a server-side scanner.
Web scanners are quite good at quickly detecting malware but they are limited since they don’t have complete access to your site. They can only tell you what’s happening from the outside. This means they could show your site is clean when the infection is hidden deep inside a folder on your site.
With a server-side scanner, you’ll need to install it on your site and it will scan your WordPress website files, folders, and database from the inside.
If there’s any suspicious activity or malware, the scanner will alert you immediately.
Next, we’ll show you how to install a security solution that comes with a server-side scanner and malware cleanups to fix your hacked site.
How to Effectively Repair a Hacked Website
To properly scan and clean a hacked website, we recommend Sucuri.
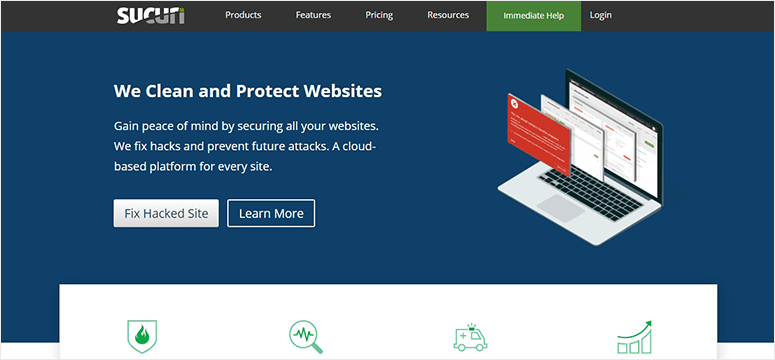
Sucuri is the best security solution for WordPress websites. It comes with a server-side scanner that automatically scans and monitors your website at regular intervals.
If it detects anything suspicious, it will send you an instant notification. Apart from that, here’s why we recommend Sucuri so strongly:
- Regularly monitors for spam and malicious code
- Checks for blacklists with search engines and other authorities
- Monitors website uptime
- Detect changes made to DNS (domain name system) and SSL
- Instant alerts via email, SMS, Slack, and RSS
- Checks for any hidden backdoors created by hackers that will allow them access even after your clean up the malware infection
Sucuri’s server-side scanner is available in the pro version which starts at $199.99 per year. This gives you access to a comprehensive security setup for your site. You’ll get access to unlimited malware removal in case your site is hacked and a rock-solid firewall to prevent any future attacks.
If you want to explore alternatives, see our list of the 9 Best WordPress Security Plugins Compared.
Now we’ll show you how to use Sucuri to scan, clean, and protect your site.
Step 1: Run a complete website scan
The first thing you’ll need to do is sign up for a plan with Sucuri.
Then log in to your account and add your website to the dashboard.

Now you’ll need to enter your FTP credentials to grant Sucuri access to your website. If you don’t know your FTP credentials, you can connect with your web host support and simply ask them for it.
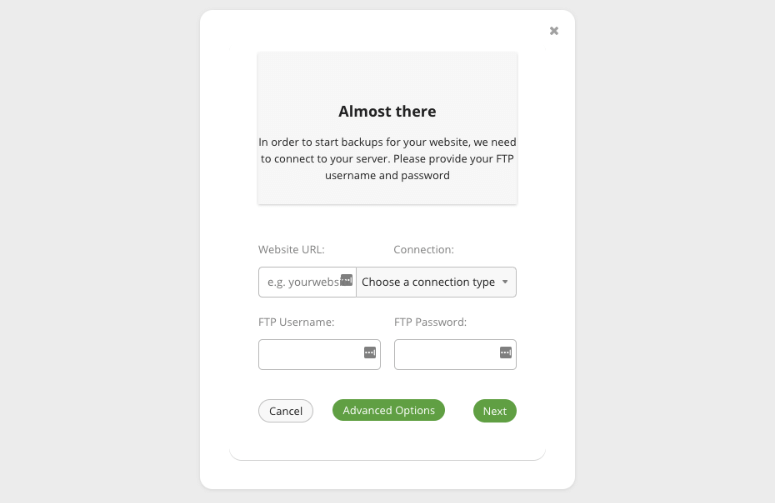
Once you successfully add your site to the dashboard, Sucuri will automatically run the scanner. It will comb through all your WordPress files and database to check for malware or hacker activity.
When the scan is complete, it will create a report that shows you if your site is hacked or clean.
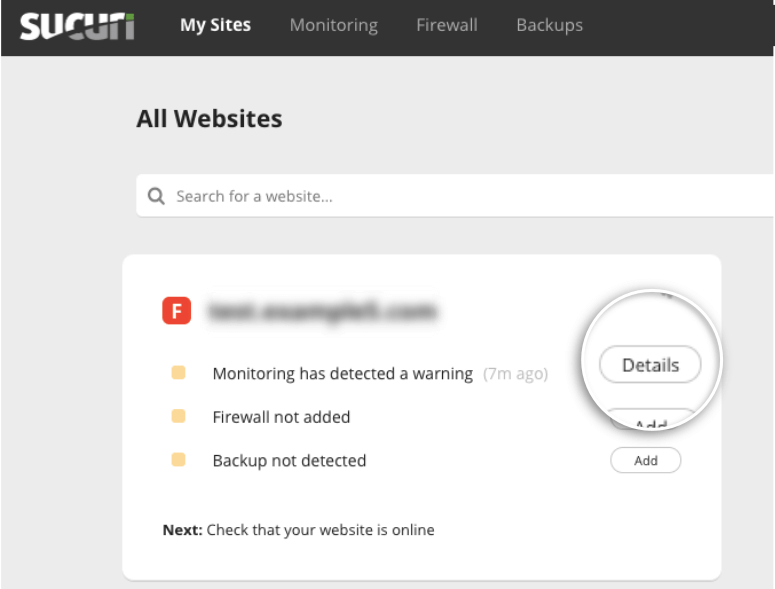
Next to the warning message, you can click on the Details button.
This will open up a page where you can read the full report.
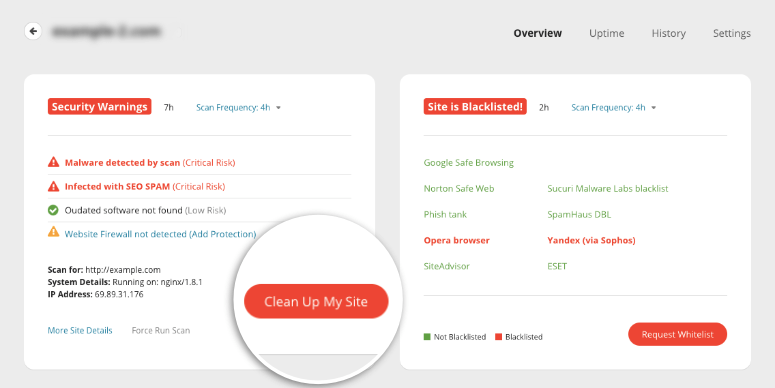
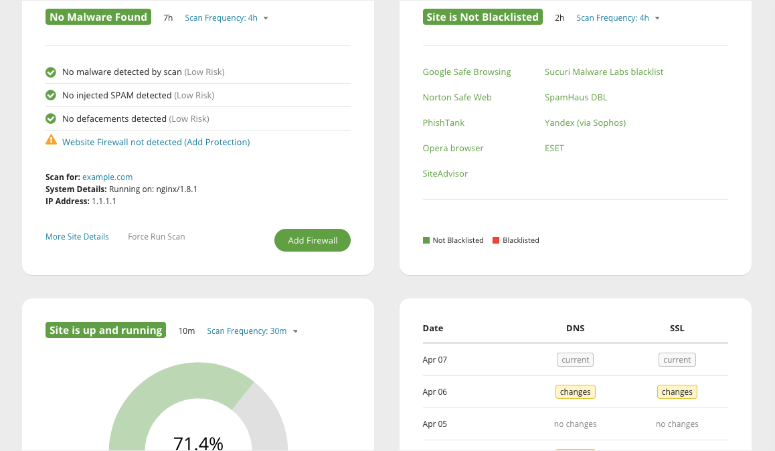
You’ll see the following details:
- Security warnings with risk level
- Search engine blacklists
- Uptime monitoring
- Recent changes to DNS and SSL
Now that you’re sure you have a hacked WordPress site, we’ll show you how easy it is to clean it up with Sucuri.
Step 2: Request a Malware Cleanup
To remove malware from your site, on the same report page inside the Sucuri dashboard, you’ll see an option to ‘Clean up my site’.

This will take you to a new page where you can request a malware cleanup.
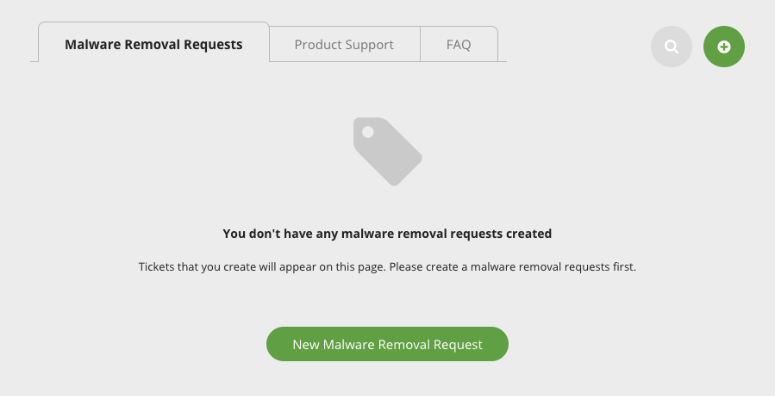
When you click on this button, Sucuri will give you a form where you can enter your website details.
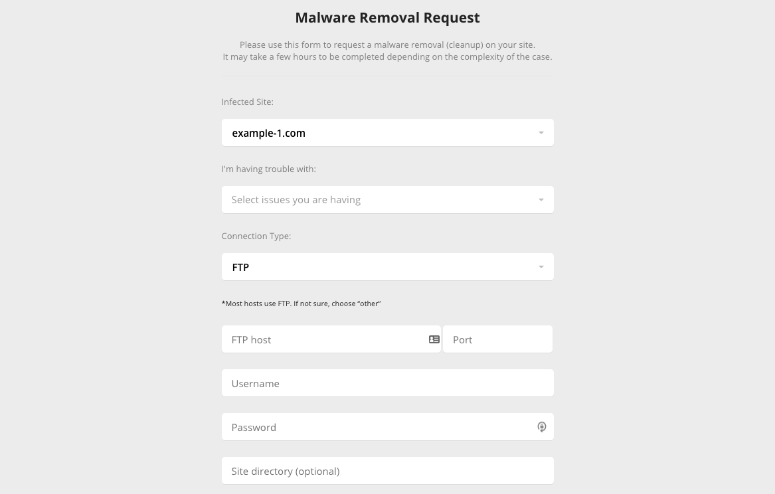
In case you don’t know these details, ask your web host and they’ll provide it.
Once you submit this form, Sucuri will handle the rest. A security personnel will be assigned to your site and they’ll clean up all infected files and databases. They’ll make sure your website is completely free of malware and backdoors.
If you bought the Business plan, Sucuri will have your site back to normal in 6 hours. For other plans, it greatly depends on how complex your site’s infection is and the volume of requests they have in queue.
Step 3: Remove Website Blacklists on Search Engines
Once your website is clean, you’ll need to tell search engines so that they can review it and remove your site from blacklists.
This will remove warnings on your site as well so visitors won’t be alarmed that your site is infected anymore.
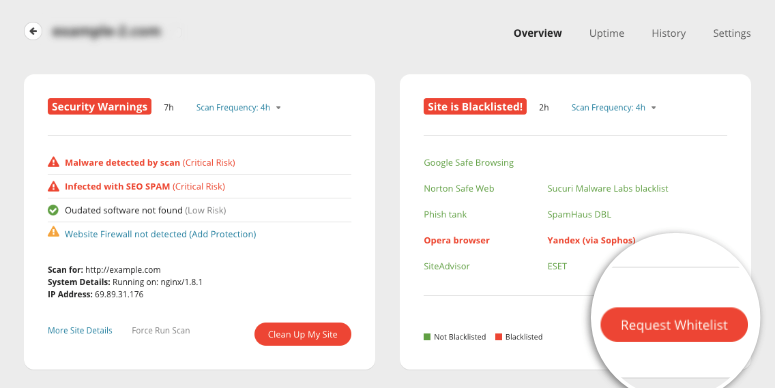
Sucuri lets you start the whitelist process from its dashboard. You can request reviews on all search engines.
Having said that, we’ll also show you how to request a blacklist removal on Google. You’ll need to have a Google Search Console account already set up.
If you don’t, you can sign up now on Google Search Central. For more help on this, use our guide to Submit Your Website to Search Engines.
Once you’ve logged into your Google Search Console dashboard, go to Security Issues tab from the left menu.
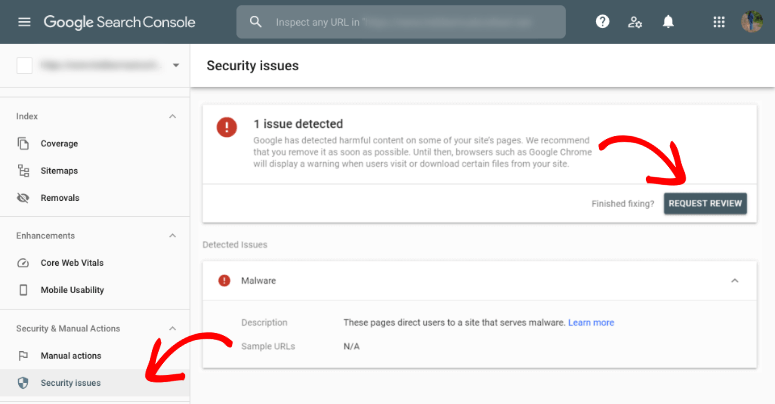
You’ll see a ‘Request Review’ button. When you click on it, Google will ask you for details of your site and what measures you’ve taken to clean your site.
You can tell them that you used Sucuri to scan and clean your site. You can run a new scan and take a screenshot from the Sucuri dashboard to show them your site is clean.
We suggest giving Google as much detail as you can to show them that you’ve secured your site and taken measures to prevent future hacks.
If Google finds that your security measures aren’t enough, it can become even more difficult to get your site whitelisted.
After you submit your request, it can take a few days for them to verify your site is clean and get you back up on search results pages.
Now you’ve learned how to scan and clean your site and remove blacklists. Next, there are a few measures you need to take immediately after a hack.
Steps to Take After Recovering from a WordPress Hack
Right after a hack, you’ll want to make sure that any data stolen by the hacker such as your WordPress username and password cannot be used again. Below are the measures you need to take as soon as you clean up your WordPress website:
- Reset your credentials: Change your username and password for your wp-admin and make sure you use strong passwords that are difficult to crack. Also, make sure all user accounts that have access to your site reset their credentials. You can force a reset using a plugin like Expire User Passwords.
- Change your Salts and Secret Keys: These keys are encrypted code that secure your login information. If hackers have stolen this info, they can break into your website again. You can use the Salt Shaker plugin to get a fresh set of keys inside your wp-config file. Or you can follow this guide from WPBeginner to change your security keys.
- Update Your Site: When you see updates available for your WordPress installation, plugins, and themes, run the update as soon as possible. If it’s a security update, you’ll want to run it immediately because the latest version will carry a patch that will fix any security vulnerabilities.
- Protect your WordPress website forms: Many hackers try to inject malware through unsecured forms. We recommend using WPForms as it comes with built-in spam protection. This detects and blocks fraudulent and malicious entries.
Up next, we’ll show you how to make sure your site is protected in the future.
Prevent WordPress Hacks on Your Site
They say lightning never strikes the same place twice. But sadly, the same isn’t true for your website.
We mentioned earlier that when hackers break into your site, they create hidden backdoors so that they can easily re-enter your site. So it’s important to take security measures to make sure that this doesn’t happen again.
If your site is hacked multiple times, your web host can suspend your account permanently as it poses a threat to their servers and other customers.
Added to that, search engines like Google will think you don’t take security seriously and they won’t allow your site to be back up on their results page so easily.
When you sign up for Sucuri’s security solution, it will protect your site all-around with a scanner and firewall, and other important security measures.
Aside from this, there are a few measures that you can take on your own. These include:
- Get a reliable web host: If your web host doesn’t secure its servers, hackers can find a way in. It’s best to use a reliable host that takes security seriously. We recommend using a secure hosting provider like Bluehost.
- Use a WordPress security plugin: If Sucuri is out of your budget, you can rely on other security plugins. These plugins will scan and monitor your WordPress site. That way, you’ll be alerted of any suspicious activity immediately. Our top picks include:
- iThemes Security
- BulletProof Security
- SiteLock
- MalCare
- Activate a firewall: This will block hackers and any user with malicious intent from accessing your site so they won’t be able to even try to break into your site. Most security plugins come with built-in firewalls so you won’t have to install a separate one.
- Add 2-Factor Authentication: Add an extra layer of protection by using a one-time passcode that is sent to your mobile phone or email. This means a user will have to enter their password and verify themselves in real-time making it extremely hard for hackers to gain access. You can enable this feature using security plugins like Sucuri and MalCare.
- Backup your website: Backups are your safety net. In case something goes wrong, you can use the WordPress backup copy to restore your site. You can use UpdraftPlus or BlogVault backup plugins to schedule automatic backups.
- Install an SSL certificate: SSL makes sure any data transferred from and to your website is encrypted. So even if hackers steal it while it’s in transit, they won’t be able to read it since it’s encoded. You can get an SSL certificate with your web hosting company or by using a plugin like Really Simple SSL.
Even though following the guidelines above and using a security plugin like Sucuri is easy, you will still need to update the plugin, monitor the scanning results, and so on.
WPBeginner Pro offers another solution.
Their team of experts acts as your security shield, proactively safeguarding your site from vulnerabilities and malware. They go beyond reacting to threats. They help with regular security audits, malware scans, and patching to keep your site secure. In case you have already faced a threat, they also do hacked site repairs.
This allows you to focus on running your business while WPBeginner Pro ensures your website stays healthy and avoids potential damage and downtime caused by a hack.
With these measures, your website will have a robust security system to make sure hackers find it incredibly hard to break in. If you want to leave no stone unturned, read our Complete WordPress Security Guide (Beginner Friendly).
We hope you found this guide helpful and if you’re looking for more ways to secure your website, here are some helpful resources:
- How to Perform a WordPress Security Audit (Step by Step)
- How to Choose a Secure Password for WP Admin [4 EASY Ways]
- The Best Dedicated Hosting Companies (Pros & Cons)
A dedicated server will ensure that your site is never affected by someone else’s hacked website on a shared server. Aside from that, you can run a security audit and create secure passwords to better protect your site.

Comments Leave a Reply