
Do you want to add a date picker to your contact form? A date picker is required when you want your users to select a date and time in the form.
In this article, we’ll share how to create a WordPress form with a date picker.
When and Why You Should Add a Date Picker in WordPress Forms?
Many contact forms have simple fields like name, email, phone, and message. This information is enough to get connected with your users. However, if you want to schedule an appointment with your users, then you’ll need to add a date picker on your form.
If you’re running an eCommerce store and you want clients to add their availability date for delivery, then you can add a date and time field on the contact or order form.
There are many other reasons why you’d need to ask your users to submit dates and times with their basic information. Let’s take a look at how to easily create a WordPress form with a date picker.
Creating a WordPress Form with a Date Picker
The first thing you’ll need to do is to install and activate the WPForms plugin. For more details, see our step-by-step guide on how to install a WordPress plugin.
Upon activation, you’ll need to go to the WPForms » Add New page to create a form in WordPress. It’ll launch the WPForms setup screen where you’ll find multiple pre-built templates to easily create a new form of your choice. You can also select a blank form to start from scratch.
To get started, we’re picking the Simple Contact Form template.
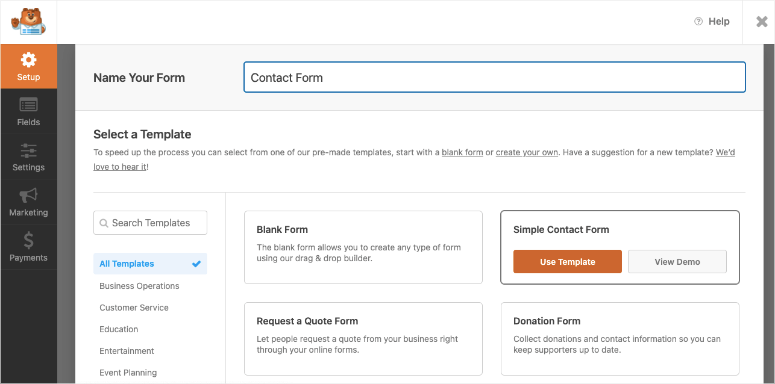
A simple contact form will load with the basic fields name, email, comment, etc. You can see more fields on the left-hand side and a preview of your new form on the right side of the screen. Simply drag and drop any field from the left side to your new form on the right side.
Since you want to add a date picker, you’ll need to drag and drop the Date / Time field from the left column onto your form. You can place the date picker above or below any field on the WordPress form.
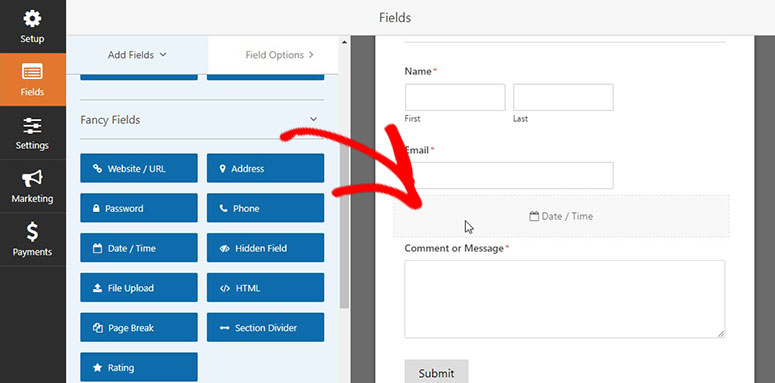
The form is fully flexible which means you can easily rearrange order of the fields or customize any field from the preview section of your form on right side.
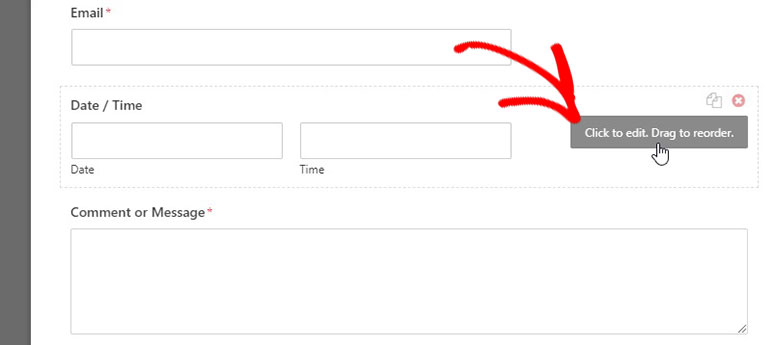
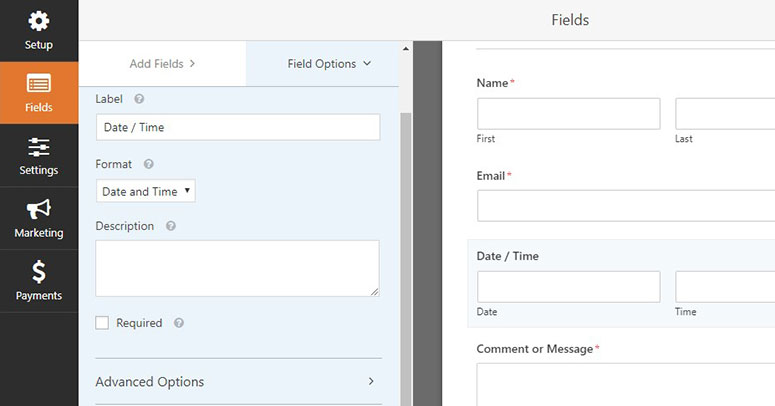
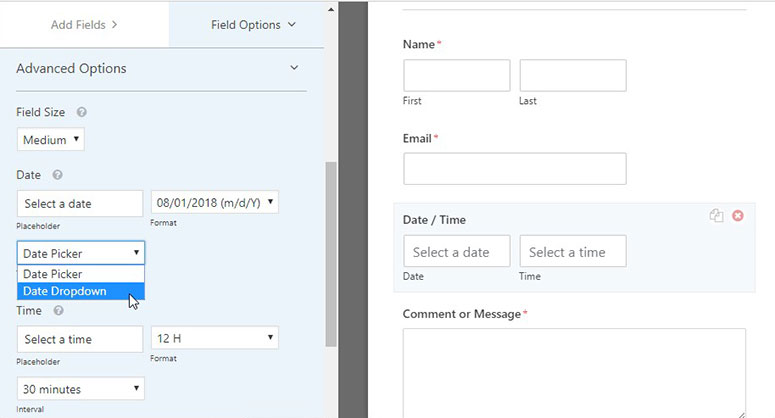
Once you click on any field in the form preview, it’ll display the settings on the left side for that specific field. For example, if you click on the Date / Time field that you just added to your form, then you’ll see these settings to customize:
- Label: It is the title of the Date / Time field in your form.
- Format: In this dropdown, you can select a format for date, time, or both.
- Description: It allows you to add instructions for users below the field.
- Required: If you check this option, then a user can’t submit the form without selecting a date / time in this field.
Other than these basic settings, there’re advanced options to customize the design and style of the date / time field.
A few of the advanced options include:
- Field Size: There’re different display sizes available for the date / time field.
- Date: It’s a placeholder. The text that you’ll add here will be displayed by default to the users. Next to it, you can also select the format for the date.
- Type: You can select a type for the date picker. There are 2 types: Date Picker and Date Dropdown
- Time: This is another placeholder for time. You can also need to choose a format from 12 hour or 24 hour.
There are many other custom settings like interval, hide labels, and more.
You should also check out this guide on how to add custom CSS to your form for more detailed instructions.
Make sure to click on the Save button to store your changes.
Confirmation and Notifications Settings
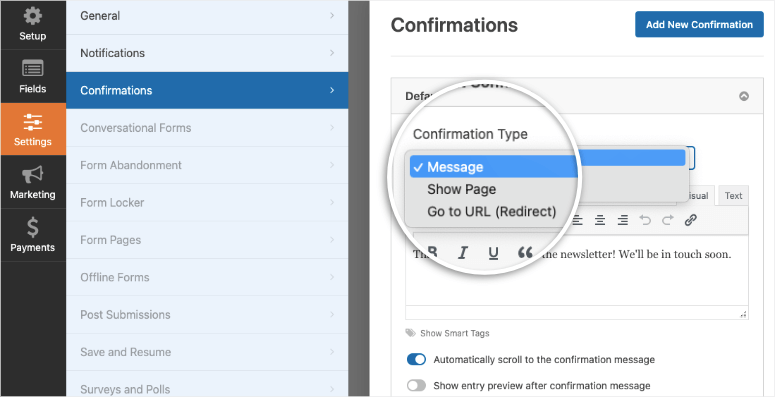
Once you are satisfied with the fields, you’ll need to manage the confirmation settings and email notifications for your form. Simply visit the Settings » Confirmation page in the WPForms builder. From there, you can add a custom message for your users that they’ll receive after submitting the form. You can also change the confirmation type to redirect users to a thank you page.
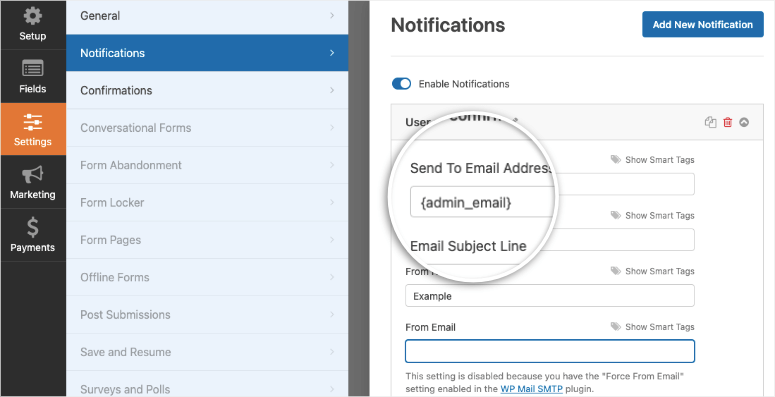
After that, you can go to the Settings » Notifications page to manage email notifications for form submissions. You can also send multiple notifications to different email addresses.
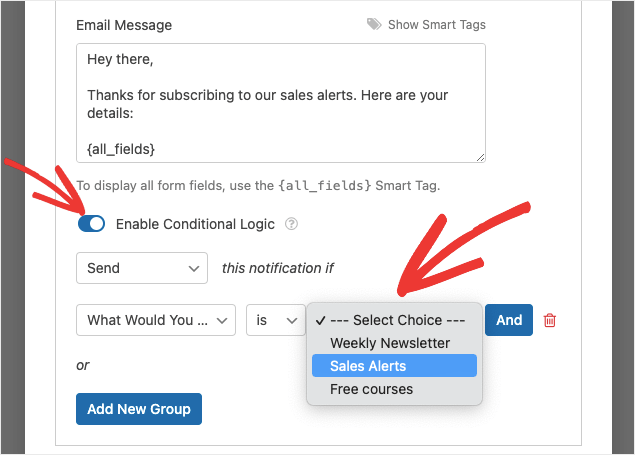
For advanced settings, you can add conditional logic in your form to send specific notifications to users. This means, based on the options selected by the user, you can send them different automated email notifications.
Learn more here: How to Set Up the Right Form Notifications & Confirmations.
Last, you’ll need to click on the Save button to see your contact form in action.
Display the Form on Your WordPress Site
You can add the new form you just created with a date picker to WordPress really easily with WPForms. We’ll show you how to do it using the block editor and classic editor. We’ll also show you how to add it to a sidebar.
Add WordPress Form to WordPress Page or Post (Gutenberg)
To add the form on any WordPress page or post, you can search for the WPForms block and add it to the text editor.
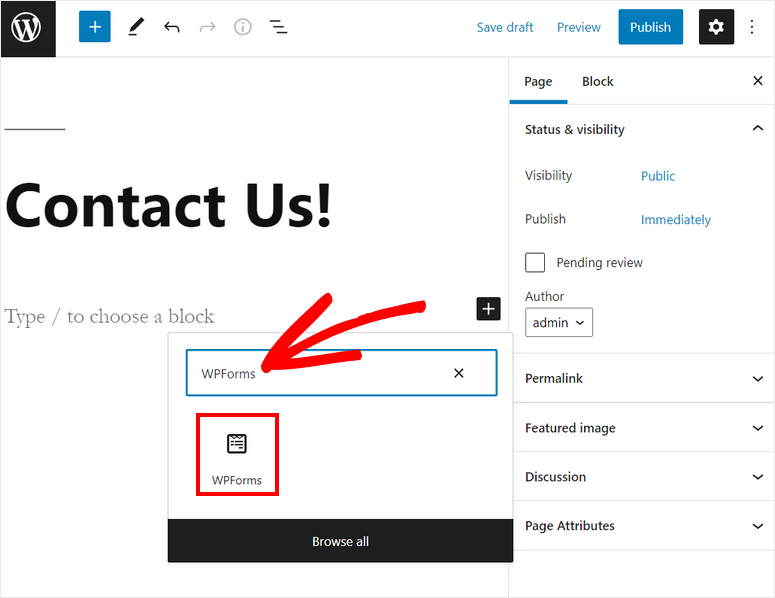
Then, you’ll see a dropdown menu where you can select the contact form you just created.
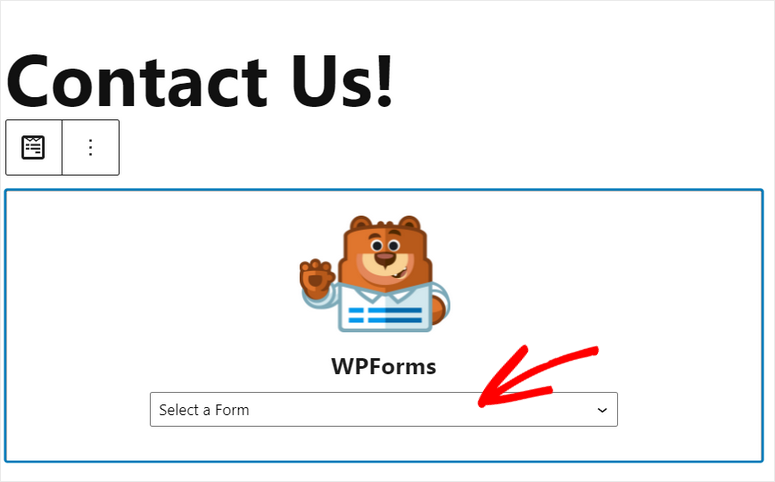
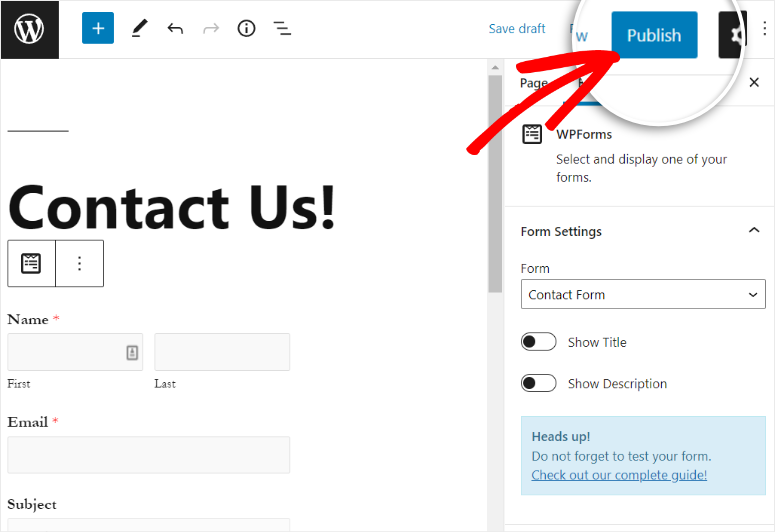
After you select the form, you’ll see the preview on the text editor. To add the contact form to your site, click on the Publish button in the top-right corner.
Add WordPress Form to WordPress Page or Post (Classic Editor)
If you use the WordPress classic editor, you can add the form using the Add Form button. Or, you can simply copy and paste the form shortcode to embed the form on your website.

Add WordPress Form in a Sidebar
You can also add the form to your sidebar widget. For that, go to the Appearance » Widget. Now, drag and drop the WPForms widget into the sidebar or footer menu on the right.
After that, select your form using the dropdown menu and save your changes.
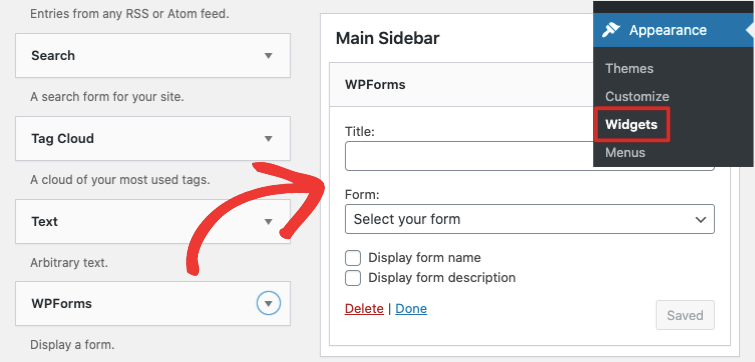
Once done, click on the Save button. Your form will now start displaying on the sidebar of your website.
That’s all. We hope this article helped you learn how to create a WordPress form with a date picker. You may also want to see our guide on how to create a file upload form in WordPress.

Comments Leave a Reply