
Are you seeing the error “This account has been suspended” on your website? Do you want the quickest solution to get your site back to normal?
This error is more worrying because you get locked out of your admin panel. The only option you have is to contact your web hosting provider for more information.
In this guide, we’ll explain what has possibly gone wrong with your site and give you solutions to fix it fast.
Why Is My Account Suspended?
If you’re seeing the error “This account has been suspended” on your site, it means that your web hosting company (like Bluehost or GoDaddy) has temporarily taken your website offline.

Web hosts usually suspended your hosting account for these reasons:
- Malware infection – Your web host runs security scans on their platform regularly. If they find malware on your site, they’ll flag it and suspend your account to prevent the infection from affecting other websites. This can include spam links, deceptive content, phishing pages, and more.
- Excessive use of server resources – If your website is given limited resource, like in a shared hosting plan, then exceeding those limits could affect other sites on the same server. There are certain plugins and themes that could cause heavy server and CPU usage. This can also happen if your site is hacked as most malicious activities can overload your server.
- Policy violations – This can include copyright breaches, spam generation, unsolicited emails, improper admin use, and storing illegal material on the server.
- Failure to renew or pay for services – Payment issues include payment failures or missing the renewal deadline to pay for your domain, hosting plan, and other services.
It goes without saying that when your account has been suspended, there’s a lot at risk. Firstly, for every minute your website is down, you stand to lose traffic and SEO rankings. This can be hard to recover from later.
Then, if your website is hacked, the hackers could be defrauding your users, misusing your website, and destroying your site’s reputation.
And finally, the biggest risk of all is that if you don’t fix the error, your website could be deleted forever.
So without wasting any time, let’s fix your suspended WordPress website as soon as possible.
Fixing “This account has been suspended” Error
Your web host may send you an email explaining why they have suspended your account along with instructions on what you need to do to remove the suspension.
This will make it easier to know why they suspended your account and how to fix it.
If they haven’t sent an email, the best thing to do is to contact your host’s customer support. They’ll let you know why they suspended your account and the steps you can take to fix it.
So for instance, if you haven’t paid your dues, all you have to do is make the payment and they’ll remove the suspension. Then your website will be back online in no time.
Now in most cases, the suspension occurs because of a malware infection. This means your website has been hacked and it’s by far, the most common reason.
You’ll need to find the infection and clean it before you can submit your website for review.
One thing you need to keep in mind is that hackers can also load your server even if they haven’t broken into your site yet. In a brute force attack, hacker bots try thousands of username-password combinations to guess your credentials. This process can put a heavy load on your server and you can get suspended for exceeding resource limits.
Hackers can also launch a DDoS (Distributed Denial of Service) attack where they send excessive traffic to your server to overload it.
So we’ll show you the best to find and fix any malware infections and external hacker attacks, then secure your site from future attacks.
We’ll be using Sucuri to scan and clean up your hacked site. Sucuri gives you a robust security setup including a firewall, malware scanner, and malware cleaner.

While it offers a free web scanner, we recommend using the premium server-side scanner. This will scan your site internally to find malware.
Added to that, here are a few of its highlights:
- Monitors for spam and malicious scripts
- Checks for hidden backdoors created by hackers
- Detect changes made to DNS (domain name system) and SSL
- Checks for blacklists with search engines and other authorities
- Monitors website uptime
- Instant alerts via email, SMS, Slack, and RSS
If you want more details, read our Sucuri Review.
All of this is awesome but Sucuri comes at a high price of $199.99 per year. If that’s out of your budget, you can try other security plugins. See our list: 9 Best WordPress Security Plugins Compared.
While selecting a security plugin, make sure it gives you all the cyber security features you need to find and fix malware infections and protect your website. If you fail to properly clean up the hack, your web host won’t lift the suspension.
Step 1: Scanning Your Website
To get started, you’ll need to sign up for a plan with Sucuri. Then, log in to the Sucuri dashboard where you can add your site.

Here, you’ll need to connect your website by entering your FTP credentials. If you don’t know your FTP credentials, contact your web host to get them.

Once your site is connected, Sucuri will automatically scan it thoroughly. After this, it will display a detailed report under the ‘My Sites’ tab.

When you click on the ‘Details’ button next to the warning message, the Monitoring page will open where you can view the details of the hack or infection.
Step 2: Requesting a Malware Cleanup
On the Monitoring page, Sucuri will give you details about what kind of malware has infected your site. It also rates the risk level to alert you if it is low, high, or critical. Added to that, it will also show you if your site has been blacklisted by any search engines.

Now that you know your site is infected, you can click on the ‘Clean Up My Site’ button. On the next page, you’ll need to create a malware removal request.

When you click on the New Malware Removal Request button, you’ll see a form where you can enter your site’s details.

Simply fill out the form and submit it and Sucuri’s security experts will clean up your site for you. In case you don’t know these details, you can ask your web host for them.
The clean-up time depends on your subscription plan.
Customers on the Business plan get preference and Sucuri will have your site back to normal in 6 hours. For other plans, it could take longer as it depends on how complex your site’s infection is and the volume of requests they have in queue.
Step 3: Enabling the Firewall
A firewall will scan your site’s traffic to identify and block bad bots before they reach your site. Sucuri has one of the best firewalls for any website. It’s loaded with built-in features to block brute force attacks, DDoS attacks, and any hacker trying to access your site.
To enable the Sucuri firewall, navigate to the Firewall tab on your Sucuri dashboard.
Select your site, and it will show you the setup instructions. Sucuri gives you 2 options to set up the firewall:
1. Automatic Integration: You can use cPanel or Plesk to enter your hosting credentials. With this method, you’ll give Sucuri access to automatically set up the firewall on your site.

2. Manual Integration: Sucuri displays onscreen instructions that will let you set up the firewall on your own. To begin, click on the internal domain link and make sure that it loads.

Next, you can configure your DNS to point your web traffic at the Sucuri firewall. For this, you’ll need to access the DNS records in your hosting account. Here, you can change the ‘A’ record of your site and enter the IP addresses that Sucuri provides.

If all of this is too complex to follow, you can ask your web host for help and they will guide you through the process. You can also raise a support ticket with Sucuri and their support team will help you change the DNS records.
To open a ticket, you’ll find a link inside the manual instructions on the same page.

After you set up the firewall, it can take up to 48 hours for the changes to reflect but usually happen in a few hours.
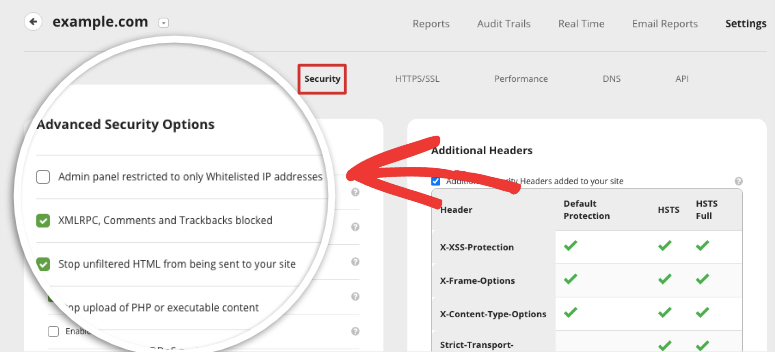
The firewall also lets you add extra security protection with simple mouse clicks. You’ll find these settings under the Settings » Security tab.
So for instance, you can enable DDoS protection and geoblocking to make it harder for hackers to attack your site.

To enable a security feature here, all you have to do is check the box and save your settings. When you need to disable it, you simply have to uncheck the box.
Next, we’ll give you recommended security measures you can add to your site before you submit it to your host for review.
Step 4: Adding Recommended Security Measures
Your website’s login page is targeted by hackers using a method called brute force attacks. They use bots to guess your credentials and simply log in.
To make sure this area is secure, you’ll protect your website from hackers and prevent your server from being overloaded. Here are the steps you can take:
1. Use Strong Login Credentials
You want to make sure you use a unique admin name and strong password. Combine letters, numbers, and symbols as this will make it incredibly hard to guess.

When you’re creating a password on WordPress, it will show you a warning for weak passwords. This makes it easy to know the strength level so you can be sure your password is strong.
2. Limit Login Attempts
By limiting the number of chances a user gets to enter the correct credentials, hackers won’t be able to make thousands of attempts.

Sucuri’s firewall does this automatically for you, or you can find a plugin in WordPress to add this feature to your site.
3. Use 2-Factor Authentication
A 2-step verification process gives every user a one-time passcode (OTP) in an SMS, email, or authenticator app.

The user has to enter this OTP along with their regular login credentials to access your admin panel. This is one of the best ways to prevent hackers from breaking in through your login page.
Sucuri lets you enable 2FA inside the dashboard using the Protected Pages feature.
4. Restrict Access to Login Page
You can allow only trusted users to access your login page, while everyone else will automatically be blocked from viewing it.
Inside Sucuri’s dashboard, under the Access Control tab, you can add whitelisted IP addresses.
By checking this box, Sucuri will automatically allow only your trusted users to access the login page.
That’s it! Your site should be clean and protected now. We recommend taking a screenshot of the clean scan from Sucuri and submitting it to your web host.

Update your host on the security measures you’ve taken. They’ll review your site and remove the suspension.
Prevent Hacks and Account Suspensions in the Future
To avoid being suspended again, make sure you always have a security plugin protecting your site. If you’re using Sucuri, the plugin will:
- Regularly scan and monitor for spam and malicious code
- Block bad bots and hackers
- Check for blacklists with search engines and other authorities
- Monitor website uptime
- Detect changes made to DNS (domain name system) and SSL
- Send you instant security alerts via email, SMS, Slack, and RSS
We also recommend setting up automatic payments for renewals so that your account is never suspended for payment issues.
And one more thing. We strongly suggest you use secure forms on your site as many hackers use them as an entry point. We recommend using WPForms as it comes with built-in spam protection. This detects and blocks fraudulent and malicious entries.
That’s all we have for you today. We hope this post has given you everything you need to secure your website.
For more on website security, see our resources on:
- The Complete WordPress Security Guide (Beginner Friendly)
- 5 Best WordPress Vulnerability Scanners To Find Threats
- 9 Best Activity Log Plugins to Track and Audit Your WordPress Site
These posts will give you more ways to seal vulnerabilities and protect your website so you can run your site with peace of mind.

Comments Leave a Reply