
Are you interested in learning how to create a guest post submission form? That’s a great idea!
If you own a blog but don’t have the time to update it consistently, then it’s time to open your virtual doors to guest posters. You’ll get the content you need, the exposure you desire, and it’s really easy to get started.
In this article, we’ll show you how to create a guest post submission form for your website, step-by-step.
Choosing a Plugin for Creating a Guest Post Submission Form
Once you get your writing submission page written up, all that’s left to do is give guest writers a way to submit their work. However, simply writing out your email address on your website is never a good idea. And a basic contact form won’t give you the features you need to succeed.
That’s why we recommend WPForms, the best WordPress form plugin.

With WPForms, you’ll not only have the best form-building tool on the market, you’ll also have access to the special Post Submissions addon. This addon was built specifically for guest post submissions.
Rather than a simple contact form that would potentially leave you sifting through junk mail in your inbox, the Post Submissions addon allows you to create a guest post submissions form with several fields designed to vet writers from the get-go.
Writers can upload their drafts, which will then be saved directly on your WordPress dashboard. No more inbox clutter! You can choose whether or not to publish their pieces right from the comfort of your website.
Best of all? IsItWP readers can get 10 percent off their purchase of WPForms by using the coupon code SAVE10.
Once you have your plugin installed and activated, follow the steps below to get started!
Step 1: Activate the Post Submissions Addon
After you’ve successfully activated WPForms, it’s time to activate the Post Submissions addon!
Start by going to WPForms » Addons on your WordPress dashboard. Once on the Addons page, scroll down until you see the Post Submissions addon.
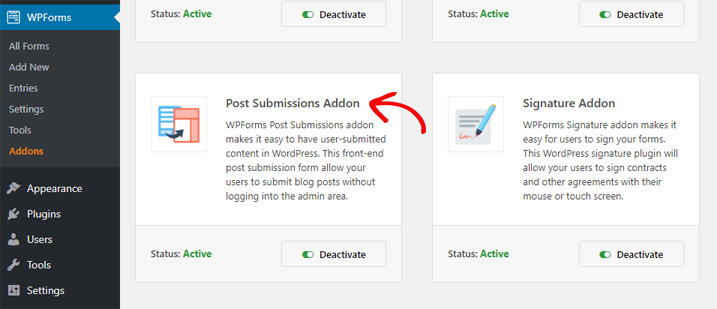
Click Install on the addon. Once it’s installed, click the Activate toggle. You’ll see a green “Active” status on the addon (shown in the pic above) when you’ve succeeded.
Step 2: Create a Guest Post Submission Form
Head on over to WPForms » Add New on your WordPress dashboard. Name your new form whatever you’d like, and then scroll down through the templates and choose Blog Post Submission Form.
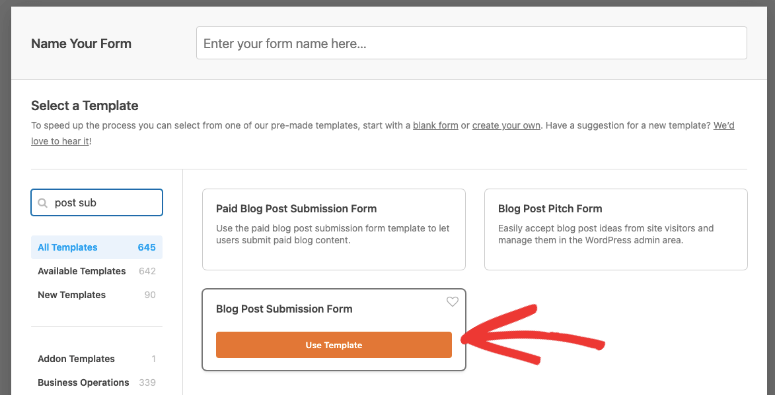
Now, a form template will appear for a basic guest post submission form.
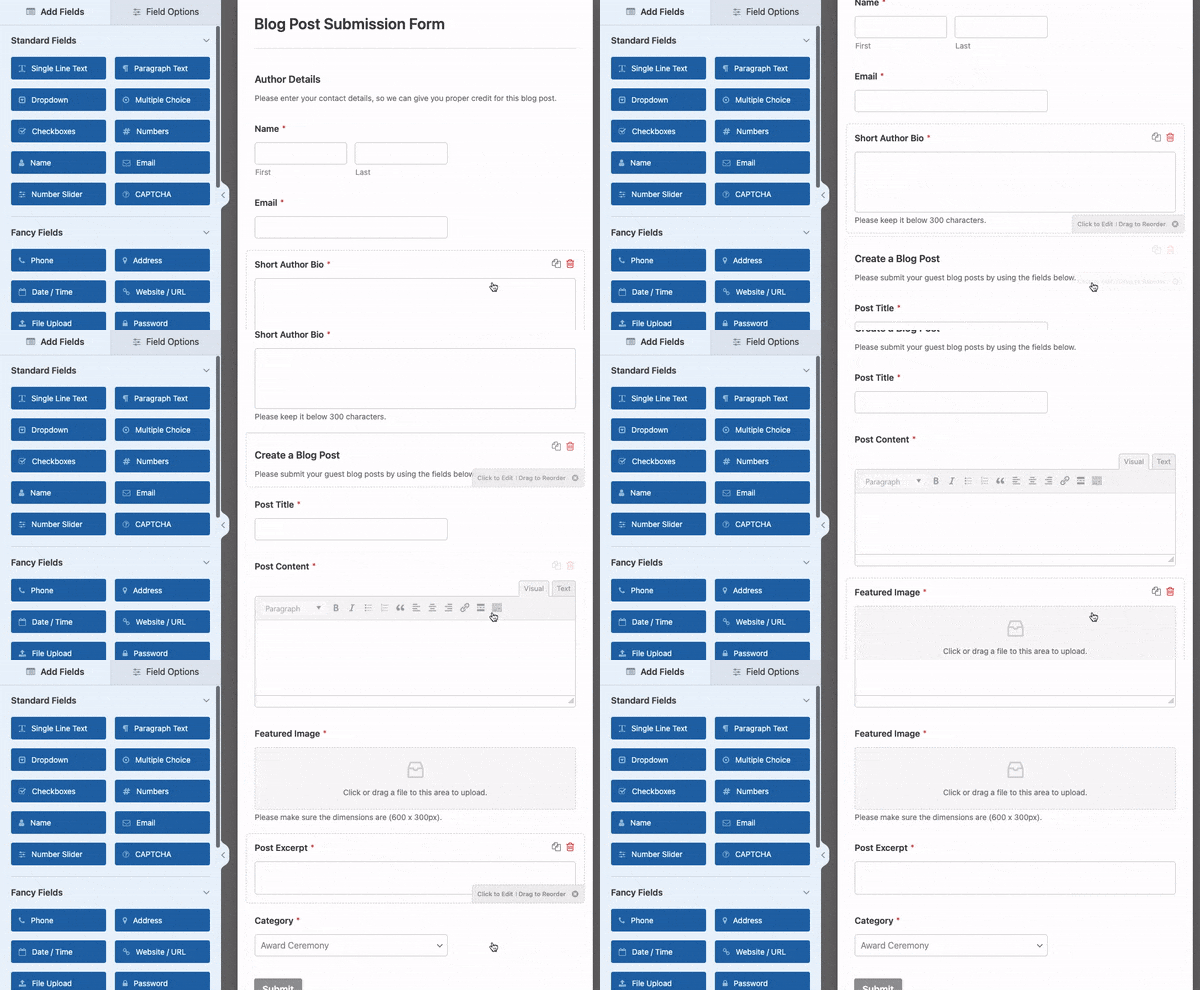
This form includes 2 sections: Author Details and Create a Blog Post.
Author Details includes:
- Name
- Email Address
- Author Bio
And Create a Blog Post includes:
- Post Title
- Post Content
- Featured Image (with a file upload option)
- Post Excerpt
- Category
If you like the form “as is,” then feel free to click Save and move onto the next step. Or, if you want to add more fields, simply drag and drop them from the left-hand section onto your form.
Personally, we recommend adding a Captcha field when you create a guest post submission form because it will ensure that bots don’t send you any posts.
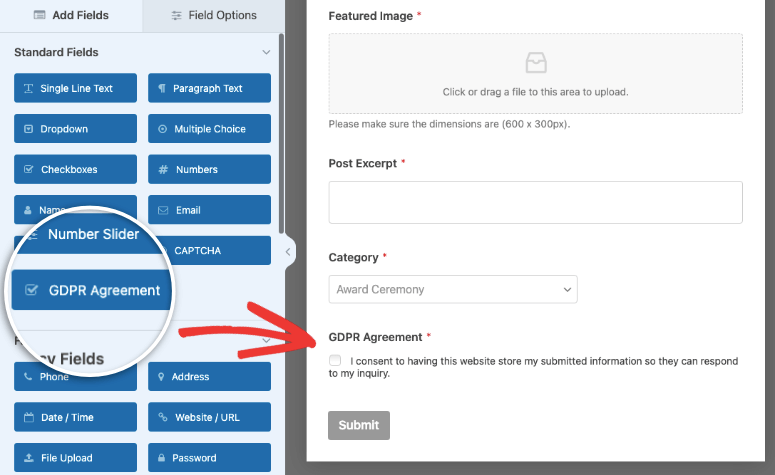
You can find the Captcha option in the Fancy Fields section on the left-hand side. You need to set up Captcha inside the WPForms settings page from your WordPress dashboard. Then you simply need to click on the Captcha button, and captcha will be enabled on your form.
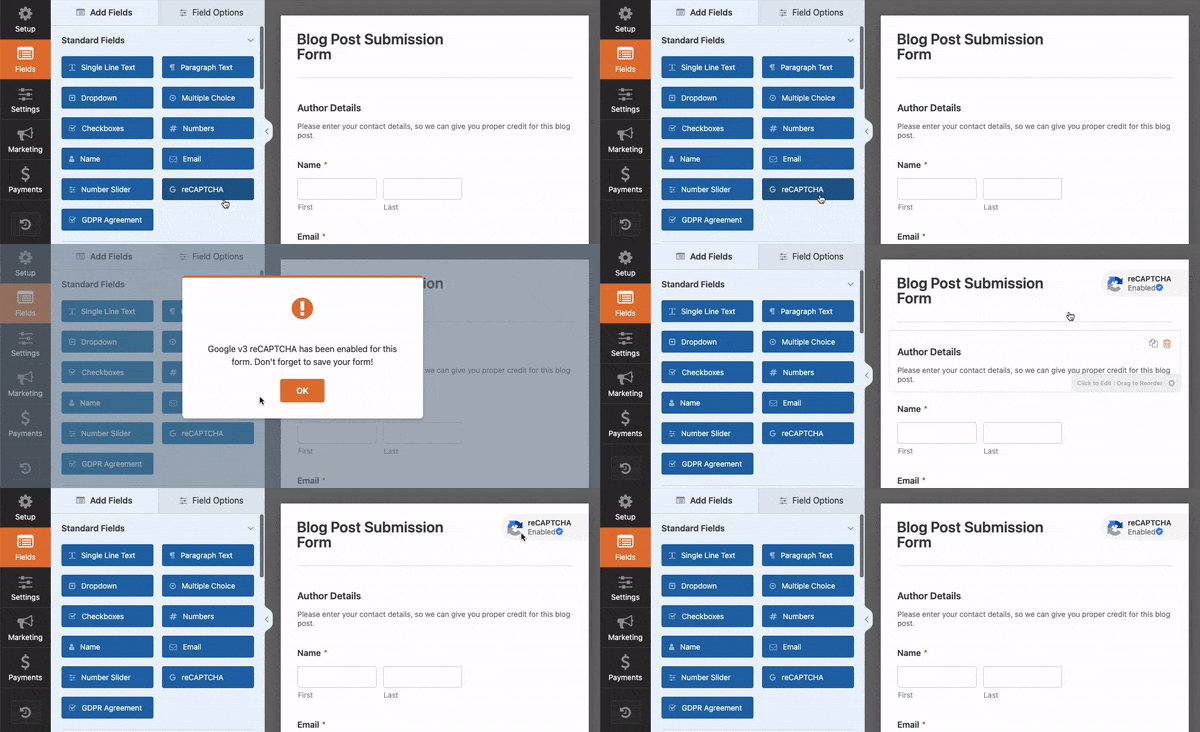
You can also add a GDPR agreement checkbox to your form the same way. Highly recommended! You’ll need to enable this feature inside WPForms settings page. Follow this GDPR tutorial from WPForms for step by step details.
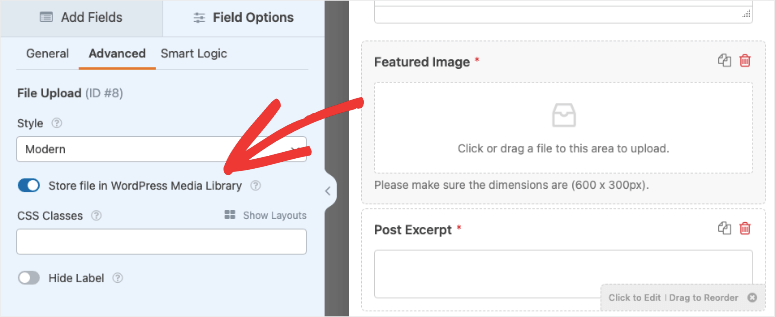
Finally, we also recommend saving featured image uploads in your Media Library for ease-of-use. To do this, click on the Featured Image field on your form. From there, scroll down to Advanced Options on the left-hand side and make sure the box that says Store file in WordPress Media Library is checked.
Once you’ve finished, don’t forget to click Save.
Step 3: Set Up Your Post Submission Settings
While still in the WPForms editor, go to Settings » Post Submissions. From there, make sure the post submissions option is turned ON.
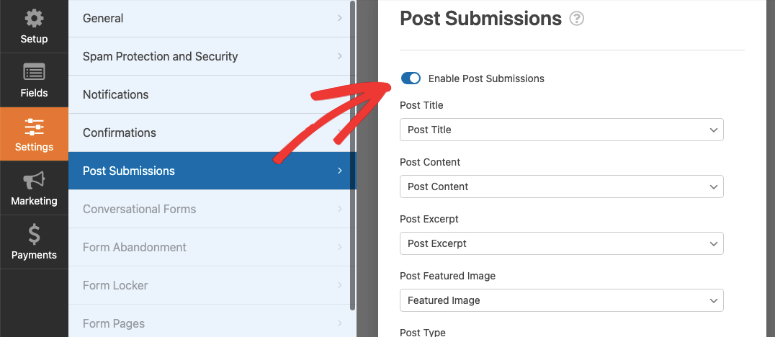
Next, make sure all of the dropdown menu items match the form field title found above each dropdown menu. For example, Post Title should say “Post Title” in the dropdown. Unless you changed or added any new fields when you were creating your form. In which case, you’ll need to match them up with the corresponding custom fields you created.
When you’ve finished, click Save.
Step 4: Add Form to Your Guest Post Submissions Page
You’re nearly done! All that’s left to do is add your newly-created form to your page calling for guest post submissions.
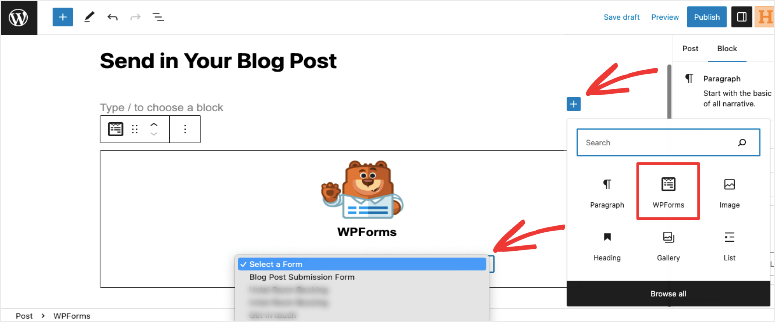
In the Block Editor, you simply need to add a new block and search for WPForms.
Add the block and you’ll get a dropdown menu from which you can select your newly created Blog Post Submission form.
In the Classic Editor, from your WordPress dashboard, choose the page you want to edit. Or, go to Pages » Add New to create a new page.
Once on the page you wish to add your form to, simply click on the Add Form button above your writing toolbar.

From there, select the form you created from the dropdown menu. Then click Add Form.
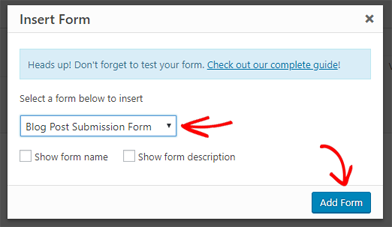
That’s it! Hit either Update or Publish on your page and you’re all set.
We hope this post helped you learn how to create a guest post submission form.
If you enjoyed this tutorial, you might also like our step-by-step guide on how to create a multi-page form in WordPress.

but these fields won’t be carried over to the final landing page which is a blog or a page! only three fields would eventually show there
Hey Maryam, can you please explain more about what you want to achieve here? So I’ll be able to help you better.
I’m confused. It said you can add more fields if you want, but there isn’t an option to ‘bring them over’ when to user clicks submit. Only 3 options carry over with a feature image? Can someone please help-?
Hey Jenny, you can add more fields just like it’s explained in step 2.