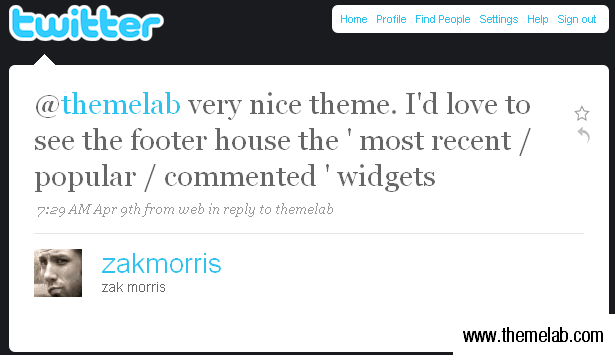
The inspiration for this tutorial comes from a tweet I received with feedback for the soon-to-be-released RS12 theme.
Although the widgetized footer did not ultimately make it in the release of the RS12 theme, I decided to write this tutorial to show people how exactly to add a widgetized footer in your theme. In this guide, you’ll learn:
- The HTML and CSS code needed to produce the widgetized footer
- How to add commonly used WordPress template tags as placeholders
- How to widgetize the footer and place widgets inside it
There’s going to be a lot of code in this post, so if you’re up for it, read on…
I’ll be using the Green Rays WordPress theme as my example in this tutorial. At the moment, the footer just has a standard “copyright” message and credits.
The HTML
The first step is to add the HTML markup. Let’s say we’re going to have three different sections in the widgetized footer with lists of Most Recent Posts, Monthly Archives, and Daily Archives. We’ll place this HTML code above the current “copyright” line.
<div class="footer-item">

<h3>Recent Posts</h3>

<ul>

<li><a href='#' title='Featured post'>Featured post</a></li>

<li><a href='#' title='Blockquotes'>Blockquotes</a></li>

<li><a href='#' title='How the ‘more’ tag works'>How the ‘more’ tag works</a></li>

<li><a href='#' title='Order or Unorder'>Order or Unorder</a></li>

</ul>

</div>

<div class="footer-item">

<h3>Monthy Archives</h3>

<ul>

<li><a href='#' title='March 2008'>March 2008</a></li>

<li><a href='#' title='February 2008'>February 2008</a></li>

<li><a href='#' title='January 2008'>January 2008</a></li>

<li><a href='#' title='December 2007'>December 2007</a></li>

</ul>

</div>

<div class="footer-item">

<h3>Daily Archives</h3>

<ul>

<li><a href='#' title='March 7, 2008'>March 7, 2008</a></li>

<li><a href='#' title='February 9, 2008'>February 9, 2008</a></li>

<li><a href='#' title='January 4, 2008'>January 4, 2008</a></li>

<li><a href='#' title='December 22, 2007'>December 22, 2007</a></li>

</ul>

</div>

<div class="clear"></div>
Basically this code puts each “widget” in a div. Inside each widget is a heading and an unordered list with links. Yes, I know the links don’t go anywhere. We’ll later replace this with WordPress template tags. Here’s what we have so far:

The CSS
As you can see, this isn’t looking so good without any CSS styling. Add the following code to your stylesheet.
.footer-item {

 float: left;

 width: 33%;

 padding-bottom: 10px;

}

.footer-item ul {

 padding-left: 15px;

}
What this code does is float each footer item to the left, which basically means they can be side by side. The width is set to 33%, which gives enough room for three footer items in a single row. There is also a little bit of padding added below each footer item. The second piece is just padding the lists 15 pixels to the left.
Now you can see the HTML and CSS are starting to come together. Here’s what you should have so far:

WordPress Code
At the moment, we have a bunch of empty HTML links, with no actual WordPress code. Let’s replace the lists under Recent Posts, Monthly Archives, and Daily Archives with the WordPress template tag equivalents. Replace what you currently have with the following:
<div class="footer-item">

<h3>Recent Posts</h3>

<ul>

<?php wp_get_archives('type=postbypost&limit=4'); ?>

</ul>

</div>

<div class="footer-item">

<h3>Monthy Archives</h3>

<ul>

<?php wp_get_archives('limit=4'); ?>

</ul>

</div>

<div class="footer-item">

<h3>Daily Archives</h3>

<ul>

<?php wp_get_archives('type=daily&limit=4'); ?>

</ul>

</div>
The parameters should be pretty self-explanatory, but if you’re not sure about any of them, try looking up wp_get_archives in the WordPress Template Tag Lookup Tool. Remember, I’m just using the wp_get_archives() template tags as a placeholder. We’ll be switching these out with other WordPress widgets later, after we widgetize the footer.
Widgetize It
For this section of the tutorial, I’ll be borrowing parts from my previous widgetizing themes tutorial.
The first step is to register the “sidebars.” To do this, simply replace the current contents of the functions.php file with the following:
<?php

if ( function_exists('register_sidebar') )

    register_sidebar(array(

        'name' => 'Sidebar',

        'before_widget' => '<div class="sidebaritem">',

        'after_widget' => '</div>',

        'before_title' => '<h3>',

        'after_title' => '</h3>',

    ));

if ( function_exists('register_sidebar') )

    register_sidebar(array(

        'name' => 'Footer',

        'before_widget' => '<div class="footer-item">',

        'after_widget' => '</div>',

        'before_title' => '<h3>',

        'after_title' => '</h3>',

    ));

?>
Now we’ll go into sidebar.php and replace the current dynamic sidebar conditional tag with this:
<?php if ( !function_exists('dynamic_sidebar') || !dynamic_sidebar() ) : ?>
With this:
<?php if ( !function_exists('dynamic_sidebar') || !dynamic_sidebar("Sidebar") ) : ?>
Now we’ll go into our footer.php file and wrap the footer items in it’s own respective sidebar conditional tag. Right before the first “sidebar-item” div, add the following.
<?php if ( !function_exists('dynamic_sidebar') || !dynamic_sidebar("Footer") ) : ?>
Right after the final closing “footer-item” div (and above the “clear” div which we added earlier) we’ll add the following:
<?php endif; ?>
Okay, now our sidebar and footer should be widgetized. Let’s test it out by adding a few widgets in the footer. I’ll add a Blogroll widget, Recent Comments widget, and a text widget. Here’s what it should look like:

Conclusion
Well, that’s the basics of adding a widgetized footer to your theme. You may want to add separate styling rules for other types of widgets such as the calendar or search box. This probably won’t work with every theme, such as the RS12 theme for example, as it had a non-expandable footer.
If anyone wants the updated Green Rays theme by any chance, you can download it here. This way you can see where exactly I added the code. You can compare it with the original theme as well.
Hope you liked the tutorial. Will you be adding a widgetized footer to your theme? Is there anything in the code I used above you would do differently? Questions, comments, suggestions, and criticisms are all welcome, so feel free to sound off in the comments.

Leland,
Here’s the pastebin link for my functions.php file. I posted it sans your alteration. Your help is appreciated.
http://pastebin.com/m40073591
“I too am trying to widgetize my footer using your step, but when I add the code to the functions.php, I keep getting the same error message:
Parse error: syntax error, unexpected ‘}’ in /home/………..redacted………/functions.php on line 230
I’m sure this means I just have a ‘}” out of place, but removing it doesn’t seem to work. Help?”
I am experiencing the same problems. Could you offer some advice?
Thanks,
Dave
did you ever figure that out? I’m also having the same problem but it happened when I changed my sidebar.php code.
how did you fix it?
I’m running 2 sidebars thus I have 2 sidebar.php files. I tried reverting the code to its original state but no dice. I guess I’ll have to upload my backup php file, but that will not solve the problem, it will only let me continue working on my site.
if there’s any advice, I’d appreciate it.
thanks
Stumbled across this by accident – great tutorial in terms of both content and writing style – well done.
This tutorial rocks my world! I have not seen such a thorough explanation of how to do this. I am in the process of creating a new look for my blog and wow…this is totally what I needed. Thank You so much!!
[…] Add a Widgetized Footer to Your WordPress Theme | Theme Lab (tags: wordpress tutorial footer CSS) […]
@Lance: It would depend on the theme, but it would be somewhere within the “footer” div (whatever it may be called).
It looks like the footer on your site has a fixed height, so you’d probably have to fix that before using this code.
Hi – Thanks for this turorial but I’m confused. Where do I put the HTML code that you have at the beginning?
I have the css and the footer files and I know I can put the code in there. But where does the actual HTML code go?
[…] box, custom archive and search templates, an options page, and four widgetized areas (including a widgetized footer). These features will be gone over […]
@Terri: No problem! Nice widgetized footer, by the way. 🙂
yyyyes! Thank you!
@Hannah: Yes, that’s what it means. Although it’s kind of hard for me to diagnose the problem if I can’t see the exact code. Could you possibly paste the code of your current functions.php file to some sort of pastebin? Something like http://pastebin.com – thanks!
Great tutorial! I’m trying to widgetize my footer using your step, but when I add the code to the functions.php, I keep getting the error message:
Parse error: syntax error, unexpected ‘}’ in /home/………..redacted………/functions.php on line 230
I’m sure this means I just have a ‘}” out of place, but removing it doesn’t seem to work. Help?
[…] found a nice tutorial on how to add widgets to the footer of a theme. Widget aren’t just for the sidebar […]
@ezg: Ah…well glad it worked out for you.
@Jeffro: Thanks, appreciate the stumble, and glad you liked the tutorial.
I’ve been waiting for a post like this for a long time now. I figured it out on my own but it’s always nice to have a reference to fall back on. I submitted this puppy to StumbleUpon 🙂
[…] Add a Widgetized Footer to Your WordPress Theme | Theme Lab (tags: wordpress) […]
[…] domain ), uploaded the new theme, and started making my tweaks to it. The biggest thing I did was add a chunky widgetized footer. You can do the same using the linked tutorial from Leland at Theme Lab. Mostly I wanted to make […]
[…] Add a Widgetized Footer to Your WordPress Theme – who says widgets are just for sidebars? I’ve seen them used in plenty of other places, including footers, which is exactly what you’ll learn to do in this tutorial. [Link] […]
[…] http://www.themelab.com/2009/04/25/add-a-widgetized-footer-to-your-wordpress-theme/ […]
You didn’t see it, cause I’m not using it now. But when I turned it on, it really looked like great. Later, when I will think about what widgets to use I’ll turn it on.
@ezg: Nice! Just wondering, which blog did you use it on? I checked the URL you used to comment here, but didn’t see the widgetized footer.
I used your tutorial in my blog. It looks really cool.
Thanks for your lesson. 🙂
@sriganesh: Sounds good, let me know how it works out for you.
thanks. iam using now elegant theme.which i won in contest. see my theme footer.. thanks alot. , i mini problem-i added my flickr photos. but its irregularly arranged.like other professional site with border, i cant align it. can u help me in this. past three months i tried my own and added codings but nothing happen.
[…] HTML or for a content management system (CMS)? Depending on your skill Add A Widgetized Footer to Your WordPress Theme – themelab.com 04/25/2009 The inspiration for this tutorial comes from a tweet I received with […]
nice tutorial, i’ll try this, cos i need something like that. visit my site. i like to have same as it mentioned here.
Don’t get me wrong, I love the tutorial and all…but to be completely honest, I feel you kind of hoed us out…like we want to know how YOU did YOUR header you know? This is no personal attack, but I just feel a little jipped getting a measly boring text footer….
If you could please, tell us how you did YOURS, that’d be great. And not just throw in “put your image behind it…” I mean how youuuuu did it for real. Thanks….
I did all of what you said and I don’t know how to “drag” the widgets…? I don’t see anywhere to drag them to….
You do that in your WordPress admin panel on the widget page. By “dragging” I just mean putting the widgets in the various widgetized areas.
Sorry you feel “hoed out” but I wanted to write a tutorial that could apply to almost any kind of theme.
FYI, I don’t even use any WordPress widgets in the footer and header of this site, they’re hardcoded.
I’m not sure how much more detailed he could have been. If you’re a web designer and have an idea of what wordpress is, they you would know how to get the rest accomplished. His tutorial was perfect.