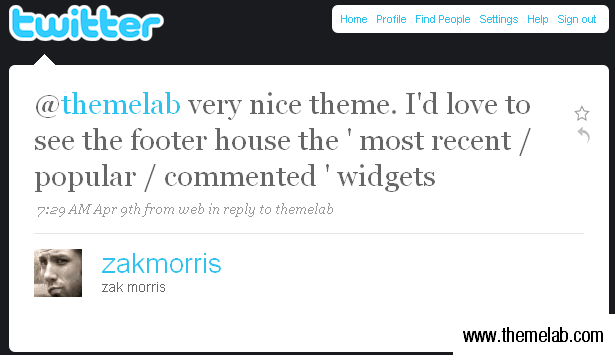
L'inspiration pour ce tutoriel vient d'un tweet que j'ai reçu avec des commentaires pour le thème RS12 bientôt disponible.
Bien que le pied de page avec widgets n'ait finalement pas été inclus dans la sortie du thème RS12, j'ai décidé d'écrire ce tutoriel pour montrer comment ajouter exactement un pied de page avec widgets dans votre thème. Dans ce guide, vous apprendrez :
- Le code HTML et CSS nécessaire pour produire le pied de page avec widgets
- Comment ajouter des balises de modèle WordPress couramment utilisées comme espaces réservés
- Comment rendre le pied de page avec widgets et y placer des widgets
Il y aura beaucoup de code dans ce post, donc si vous êtes prêt, lisez la suite...
J'utiliserai le thème WordPress Green Rays comme exemple dans ce tutoriel. Pour le moment, le pied de page contient juste un message standard de « copyright » et des crédits.
Le HTML
La première étape consiste à ajouter le balisage HTML. Supposons que nous ayons trois sections différentes dans le pied de page widgetisé avec des listes des articles les plus récents, des archives mensuelles et des archives quotidiennes. Nous placerons ce code HTML au-dessus de la ligne actuelle « copyright ».
<div class="footer-item">

<h3>Articles récents</h3>

<ul>

<li><a href='#' title='Article en vedette'>Article en vedette</a></li>

<li><a href='#' title='Citations'>Citations</a></li>

<li><a href='#' title='Comment fonctionne la balise « more »'>Comment fonctionne la balise « more »</a></li>

<li><a href='#' title='Ordonner ou désordonner'>Ordonner ou désordonner</a></li>

</ul>

</div>

<div class="footer-item">

<h3>Archives mensuelles</h3>

<ul>

<li><a href='#' title='Mars 2008'>Mars 2008</a></li>

<li><a href='#' title='Février 2008'>Février 2008</a></li>

<li><a href='#' title='Janvier 2008'>Janvier 2008</a></li>

<li><a href='#' title='Décembre 2007'>Décembre 2007</a></li>

</ul>

</div>

<div class="footer-item">

<h3>Archives quotidiennes</h3>

<ul>

<li><a href='#' title='7 mars 2008'>7 mars 2008</a></li>

<li><a href='#' title='9 février 2008'>9 février 2008</a></li>

<li><a href='#' title='4 janvier 2008'>4 janvier 2008</a></li>

<li><a href='#' title='22 décembre 2007'>22 décembre 2007</a></li>

</ul>

</div>

<div class="clear"></div>
Essentiellement, ce code place chaque « widget » dans une div. À l'intérieur de chaque widget se trouve un titre et une liste non ordonnée avec des liens. Oui, je sais que les liens ne mènent nulle part. Nous remplacerons cela plus tard par des balises de modèle WordPress. Voici ce que nous avons jusqu'à présent :

Le CSS
Comme vous pouvez le voir, cela ne ressemble pas à grand-chose sans aucun style CSS. Ajoutez le code suivant à votre feuille de style.
.footer-item {
 float: left;
 width: 33%;
 padding-bottom: 10px;
}
.footer-item ul {
 padding-left: 15px;
}
Ce code permet de faire flotter chaque élément du pied de page vers la gauche, ce qui signifie essentiellement qu'ils peuvent être côte à côte. La largeur est définie à 33 %, ce qui laisse suffisamment de place pour trois éléments de pied de page dans une seule rangée. Il y a également un peu de rembourrage ajouté sous chaque élément de pied de page. Le deuxième élément n'est qu'un rembourrage des listes de 15 pixels vers la gauche.
Maintenant, vous pouvez voir que le HTML et le CSS commencent à se rapprocher. Voici ce que vous devriez avoir jusqu'à présent :

Code WordPress
Pour le moment, nous avons un tas de liens HTML vides, sans aucun code WordPress réel. Remplaçons les listes sous Articles récents, Archives mensuelles et Archives quotidiennes par les équivalents des balises de modèle WordPress. Remplacez ce que vous avez actuellement par ce qui suit :
Les paramètres devraient être assez explicites, mais si vous n'êtes sûr de l'un d'eux, essayez de rechercher wp_get_archives dans l'outil de recherche de balises de modèle WordPress. N'oubliez pas que j'utilise simplement les balises de modèle wp_get_archives() comme espace réservé. Nous les remplacerons par d'autres widgets WordPress plus tard, après avoir ajouté des widgets au pied de page.
Ajouter des widgets
Pour cette section du tutoriel, j'emprunterai des parties de mon précédent tutoriel sur l'ajout de widgets aux thèmes.
La première étape consiste à enregistrer les « barres latérales ». Pour ce faire, remplacez simplement le contenu actuel du fichier functions.php par le suivant :
'Barre latérale',
'before_widget' => '',
'before_title' => '',
'after_title' => '
',
));
if ( function_exists('register_sidebar') )
register_sidebar(array(
'name' => 'Pied de page',
'before_widget' => '',
'before_title' => '',
'after_title' => '
',
));
?>
Maintenant, nous allons aller dans sidebar.php et remplacer la balise conditionnelle de barre latérale dynamique actuelle par ceci :
Par ceci :
Maintenant, nous allons aller dans notre fichier footer.php et envelopper les éléments du pied de page dans leur propre balise conditionnelle de barre latérale respective. Juste avant le premier div « sidebar-item », ajoutez ce qui suit.
<?php if ( !function_exists('dynamic_sidebar') || !dynamic_sidebar("Pied de page") ) : ?>
Juste après la dernière balise fermante « footer-item » div (et avant la balise « clear » que nous avons ajoutée précédemment), nous allons ajouter ce qui suit :
D'accord, maintenant notre barre latérale *et* notre pied de page devraient être widgetisés. Testons cela en ajoutant quelques widgets dans le pied de page. J'ajouterai un widget Blogroll, un widget Commentaires récents et un widget texte. Voici à quoi cela devrait ressembler :

Conclusion
Eh bien, ce sont les bases de l'ajout d'un pied de page widgetisé à votre thème. Vous voudrez peut-être ajouter des règles de style distinctes pour d'autres types de widgets tels que le calendrier ou la boîte de recherche. Cela ne fonctionnera probablement pas avec tous les thèmes, comme le thème RS12 par exemple, car il avait un pied de page non extensible.
Si quelqu'un souhaite le thème Green Rays mis à jour par hasard, vous pouvez le télécharger ici. De cette façon, vous pourrez voir où j'ai ajouté le code exactement. Vous pouvez également le comparer avec le thème original.
J'espère que le tutoriel vous a plu. Allez-vous ajouter un pied de page avec des widgets à votre thème ? Y a-t-il quelque chose dans le code que j'ai utilisé ci-dessus que vous feriez différemment ? Les questions, commentaires, suggestions et critiques sont les bienvenus, alors n'hésitez pas à vous exprimer dans les commentaires.

J'ai une erreur en ajoutant un widget personnalisé dans mon thème. Voici le code que j'ai ajouté dans functions.php.
function widget()
{
register_sidebar(array(
‘name’ => __(‘Barre latérale principale’, ‘wpb’),
‘id’ => ‘primary_sidebar’
‘description’ => ”,
‘class’ => ”,
‘before_widget’ => ”,
‘after_widget’ => ”,
‘before_title’ => ”,
‘after_title’ => ”,
));
}
add_action(‘widgets_init’, ‘widget’);
Quel message d'erreur recevez-vous ?
Excellent travail sur votre tutoriel !
Une question :
Pourquoi avez-vous eu besoin d'ajouter du code dans le fichier sidebar.php alors que le but du tutoriel est d'ajouter trois zones avec des widgets dans le pied de page ?
Salut Mark, bonne question.
Ce tutoriel suppose que vous avez déjà une zone avec des widgets dans votre barre latérale. Lorsque je mentionne le fichier
sidebar.php, je suis en train de recoder cette zone avec des widgets pour lui donner un nom unique (dans ce cas, « Sidebar ») afin de la différencier de la nouvelle zone de pied de page avec des widgets que nous sommes sur le point de créer.Vous trouverez plus d’informations sur la création de plusieurs zones de widgets dans mon tutoriel WordPress sur les widgets.
Wow, j'ai réussi à faire fonctionner ça ! (Ce n'est pas un commentaire sur votre code, juste un commentaire sur mes compétences en codage). Merci !
Ma première tentative de mise en place de widgets, et cela a fonctionné à la perfection. Merci ! 🙂
Vous avez dit :
« La première étape consiste à ajouter le balisage HTML. » et « Nous placerons ce code HTML au-dessus de la ligne actuelle « copyright ». »
OK…. à QUOI l'ajouter ? Où dois-je mettre le balisage HTML ? À quoi dois-je l'ajouter ? Comment trouver le fichier qui contient la ligne « copyright » ?
Essayez de regarder dans votre fichier
footer.php.Pourriez-vous me donner un bref aperçu du nouveau pied de page du thème par défaut de 2012 ? Je veux utiliser ce tutoriel mais le pied de page de 2012 est ridiculement long ou « haut » Je veux ajouter 5 widgets de texte, et il a un modèle fluide, j'utilise le modèle pleine page donc je voudrais qu'il soit centré. Vous pouvez y jeter un sac de chips si vous voulez 😛
Le tutoriel est merveilleux, mais j'aimerais savoir comment coloriser l'arrière-plan où se trouvent les widgets ou comment y ajouter une image. Si vous pouviez répondre à ce commentaire ou m'envoyer un e-mail, ce serait formidable.
Encore une fois, excellent tutoriel, il a parfaitement fonctionné pour le blog de mon thème et maintenant je veux juste le peindre un peu, si vous voyez ce que je veux dire.
Cordialement et j'attends votre réponse ! 🙂
Je pense que vous cherchez la propriété CSS background – http://www.w3schools.com/css/css_background.asp
Wow, je ne savais vraiment pas que vous auriez pu rendre cela plus simple et direct. Excellent tutoriel sur un processus qui aurait pu être beaucoup plus difficile… 10 minutes et je suis opérationnel avec un tout nouveau pied de page de widgets. Merci !
Merci beaucoup d'avoir pris le temps de faire cela ! excellent article. Le thème sur lequel je travaille a été beaucoup personnalisé, donc cela devrait m'aider à ajouter le pied de page que je recherche depuis un moment !
Merci pour ce super tutoriel. J'ai une question. Ajouter les widgets n'est pas un problème mais d'une manière ou d'une autre, il ne veut pas ajouter d'arrière-plan à tout le pied de page. La partie où se trouvent les widgets reste blanche chez moi. Y a-t-il un moyen de résoudre ce problème ?
http://blog.whenlovefalls.com/
Hmm… il semble que j'ai oublié de mentionner de mettre
.clear { clear: both; }dans votre feuille de style.Cela devrait résoudre le problème.
N'est-ce pas un problème de simplement remplacer le contenu du fichier functions.php ? N'est-ce pas l'un des fichiers que je ne suis pas censé toucher ?
Aussi — quel appel de fonction aurais-je besoin pour obtenir une liste de pages dans chaque section du site Web ? Je veux une sorte de pied de page « plan du site », si vous voyez ce que je veux dire (une liste horizontale de liens de premier niveau, chacun avec ses sous-pages listées ci-dessous)
Vous pouvez y toucher si vous voulez, mais je ferais une sauvegarde avant de le modifier car si vous faites une erreur, cela peut causer des problèmes pour le reste de votre site.
Vous cherchez probablement la fonction wp_list_pages ou le widget « Pages ».
Ce post m'a sauvé. J'ai essayé tellement d'autres posts, j'ai failli abandonner et puis j'ai trouvé le vôtre. Ça marche à merveille. En tant qu'entraîneur personnel à San Diego, je dois avoir des informations à portée de main pour les gens. Merci encore pour votre aide. 2001 Iron
Désolé, j'ai appuyé sur le bouton de soumission par accident. Ok, merci pour ce post génial. Ça vous dérange si j'y mets un lien. Merci
Champion de Bodybuilding Ironman 2001, Hank Butler
Ravi que le post vous ait plu, Hank. N'hésitez pas à y mettre un lien.
Puis-je remplacer ce pied de page par le pied de page de n'importe quel thème WordPress
À peu près. Il existe certains designs de pied de page qui ne sont pas très flexibles, et cela pourrait ne pas fonctionner sur ceux-là.
Salut Leland,
Comment puis-je faire pour que l'arrière-plan de tout le pied de page soit d'une couleur différente du reste de la page ? J'ai essayé d'utiliser background-color dans la section footer-item de la feuille de style, mais cela ne change que l'arrière-plan des zones occupées par les widgets, par exemple, si le widget n'occupe que la moitié de la zone du widget, l'arrière-plan n'occupe également que la moitié de la zone.
Vous auriez probablement besoin de mettre une autre div autour de toutes les divs footer-item et de définir la couleur de fond pour celle-ci. Assurez-vous que les divs footer-item sont également effacées.
Merci Leland
J'ai expérimenté un peu plus et j'ai réussi à le faire. J'ai dû placer ma balise au début du fichier et y placer le style background-color.
Merci pour le post. J'ai essayé tellement d'autres idées pour faire ça et j'ai passé la plupart de mon temps à réparer ce qu'ils avaient gâché. Ça marche à merveille et maintenant je l'ai sur tous mes sites. Merci
Hank, content d'apprendre que ça a marché pour vous !
Merci beaucoup pour ce joli tutoriel, Leland ! 🙂
Pensez-vous que vous pourriez me guider sur la façon d'ajouter des séparateurs entre chaque bloc (div) de liens ou de widgets, comme dans le pied de page de cette page ?
@Saeed : Il vous suffirait de modifier votre CSS.
Vous pourriez faire quelque chose comme :
.footer-item { border-right:1px solid #000; }
Ou vous pourriez toujours appliquer un arrière-plan à chaque élément du pied de page.
@Leland : Je suis tombé sur ce post, j'essaie de faire quelque chose d'un peu plus étendu et je cherchais des conseils. Disons que l'utilisateur veut ajouter plus de 3 widgets (par exemple) et que la largeur du conteneur de pied de page ne peut en gérer que 3. Je veux que les 3 widgets suivants tombent directement en dessous. Là où je bloque, c'est que lorsque les 4ème (et suivants) widgets sont ajoutés, ils ne sont pas alignés verticalement correctement... à cause des 3 premiers widgets qui n'ont pas de hauteur fixe. Mais je ne veux pas que les widgets aient une hauteur spécifique, je veux qu'elle soit dynamique.
La seule chose à laquelle je peux penser est d'avoir une fonction qui récupère les widgets pour le pied de page par groupes divisibles par 3, et les enveloppe dans un conteneur div. Pouvez-vous m'aider avec ça ? Sinon, avez-vous d'autres suggestions sur la façon dont je peux aborder cela ?
Merci,
Jeff
Jeff, ce que je ferais, c'est créer trois zones de widgets distinctes, une pour chaque colonne. De cette façon, vous pourriez mettre autant de widgets que vous le souhaitez dans chaque colonne et ils seraient correctement alignés.
Excellente idée ! Merci
Salut
Je n'arrive pas à passer la partie widgetisation du tutoriel. Et maintenant, mon site est infesté d'erreurs. J'ai suivi les étapes exactement comme vous les avez expliquées.
Pouvez-vous me répondre pour que nous puissions examiner ce qui n'a pas fonctionné ?
Merci d'avoir créé ce tutoriel. J'ai hâte de le faire fonctionner pour mon site. C'est une bonne idée.
Bon tutoriel. Je suis également bloqué sur la partie widgetisation. J'ai plusieurs barres latérales sur mon site, j'ai donc deux fichiers sidebar.php. J'ai essayé d'ajouter le HTML de la barre latérale à mon fichier « sibebar1.php », mais j'obtiens maintenant une erreur similaire à ce que d'autres ont signalé.
qu'est-ce que je fais de mal ?
Très bon article, enfin ça a marché pour moi, maintenant c'est implémenté sur mon site, ça m'a aidé à concevoir le thème existant comme je le voulais au lieu de chercher un thème adapté. Encore merci pour cela.
Bonjour, puis-je utiliser ceci avec le thème Thesis ? Je l'ai acheté et j'essaie d'apprendre à utiliser toutes ses fonctionnalités comme Thesis OpenHook. Faites-moi savoir.
Merci, Tam
[…] Dans : Plugins Wordpress 29 juil. 2009 Aller à la source […]
[…] Ajoutez un pied de page avec widgets à votre thème WordPress Un tutoriel qui vous apprend à coder votre propre pied de page avec widgets, y compris le code HTML, CSS et WordPress nécessaire. […]
[…] Ajoutez un pied de page avec widgets à votre thème WordPress Un tutoriel qui vous apprend à coder votre propre pied de page avec widgets, y compris le code HTML, CSS et WordPress nécessaire. […]
[…] Ajoutez un pied de page avec widgets à votre thème WordPress Un tutoriel qui vous apprend à coder votre propre pied de page avec widgets, y compris le code HTML, CSS et WordPress nécessaire. […]
Leland :
Merci pour votre commentaire sur mon article. Mon seul problème avec ce tutoriel est que je ne sais pas où va le balisage « HTML » initial. Est-ce dans le functions.php ?
[…] un pied de page widgetisé sur un thème Wordpress minimaliste ? J'ai déjà essayé le tutoriel ici et quelques dépannages ici. J'essaierai peut-être celui-ci [...]