Do you want an easy way to move from Shopify to WooCommerce? Want to make sure your online store and its contents stay intact while you move?
One of the biggest issues in migrating your website is that you can break your site. You’ll end up spending hours trying to fix issues.
But don’t worry, this guide will take you through the process step by step. Simply follow the steps below to properly move your site from Shopify to WooCommerce.
Before we start the tutorial, let’s be 100% sure you want to make the shift.
Should You Migrate from Shopify to WooCommerce?
Shopify is an all-in-one solution to build your eCommerce store. It takes care of hosting, security, caching, etc., so you’ll never have to worry about these technical aspects. It’s super easy for beginners and those who don’t know much about website building.
You just have to pay a monthly or annual fee. Their basic plan starts at $29 per month, and you can upgrade to the Shopify plan for $79 or the Advanced Shopify plan for $299 per month.
Aside from this cost, with Shopify, there’s a bigger price to pay. Since they handle all the technical aspects for you, this means you lose a lot of control over your site’s customizations.
Now WooCommerce gives you full control over how you modify your site but you need to have your own web hosting plan. Other than that, the WooCommerce plugin is free to use. All you have to do is install WordPress and the WooCommerce plugin to get started with your online store.
So making the switch will be beneficial in the long run as you’ll save on costs and you’ll get more flexibility with how you customize and manage your store.
For more on this, read: Shopify vs. WooCommerce – Which Is the Best eCommerce Platform.
What you need to know before we get started is that Shopify does not have an easy way to export data that’s in a file format supported by WordPress. So you may be able to export your website but you won’t be able to use the file with WooCommerce.
To solve this problem, our sister concern WPBeginner has built a plugin that helps you migrate from Shopify to WooCommerce with ease. It works like a charm with importing Shopify to WooCommerce.
With that said, let’s get right to the tutorial.
How to Move from Shopify to WordPress
Step 1: Set Up Your WooCommerce Site
You might be wondering why setting up WooCommerce is first on the list. Well, think of moving to a new house, you first need to have a new home to move into, right? That’s what we’ll be doing in this first step – setting up a new home for your website.
Unlike Shopify, WooCommerce is a self-hosted platform which means you need to take care of web hosting on your own. So what is web hosting?
Web hosting gives you access to a website server where your website files and database will be stored. Without a server, you won’t be able to get your site live on the internet. And web servers are expensive so instead of buying your own, almost everyone rents server space from a web host.
We recommend using Bluehost. They are the most reliable web hosting providers that have plans specifically designed for WooCommerce.

We’ve worked out a deal with Bluehost where our users get an exclusive offer on their web hosting plans. You can get started for as low as $2.75 per month and Bluehost will give you a domain name and SSL certificate for free.
Claim This Exclusive Bluehost Discount »
You can also sign up with Hostinger. They have a dedicated WordPress plan that’s ideal for WooCommerce sites and it starts at just $2.69 per month. You’ll get a free domain name, SSL, and email too.
Today, we’ll sign up with Bluehost. Once you’ve signed up, Bluehost will automatically install WordPress for you. You can access the WordPress admin panel from your hosting account dashboard.
Simply click the ‘Log in to WordPress’ button.
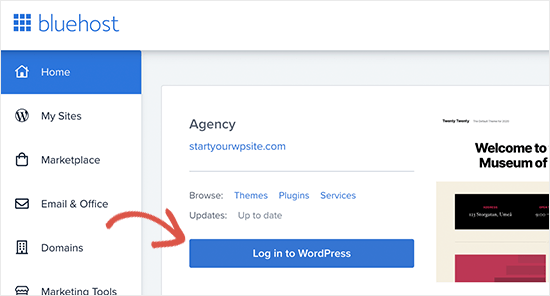
Now you should see your WordPress admin where you’ll manage your website. From the menu on the left, head over to Plugins » Add New page.
You’ll see a search bar at the top where you can search for “WooCommerce”.
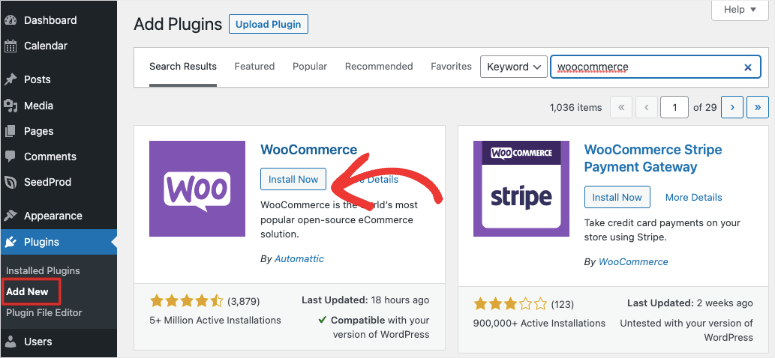
Once you see it appear in the search results, click on the Install Now button and then the Activate button.
Next, WooCommerce will launch a setup wizard. This allows you to enter your store information and set up a payment gateway.
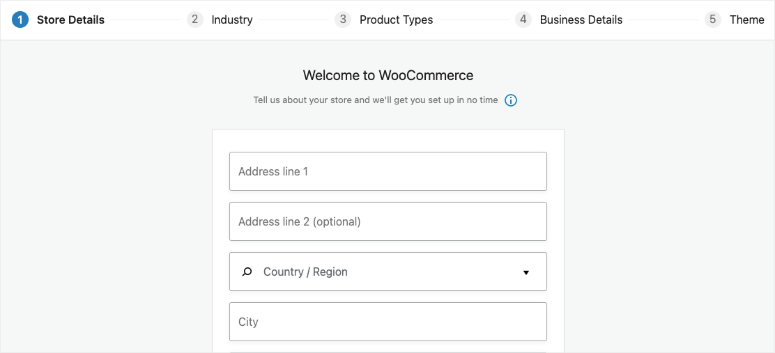
We recommend following the setup wizard to make sure you cover the basics.
Step 2: Export Shopify Data
When you try to migrate your Shopify site to WooCommerce, the risk of losing historical data and breaking your site is high. Many times, users have had to recreate their products from scratch. You could pay for a migration service that will handle it for you. But these services are expensive.
The best way to export your Shopify data is by using the free Shopify to WooCommerce importer tool.
It will export your data in a standardized format so that when you import it into WooCommerce, your data stays intact. And the best part is that it’s free!
To get started, visit the Shopify to WooCommerce website and enter your Shopify website URL and email address.
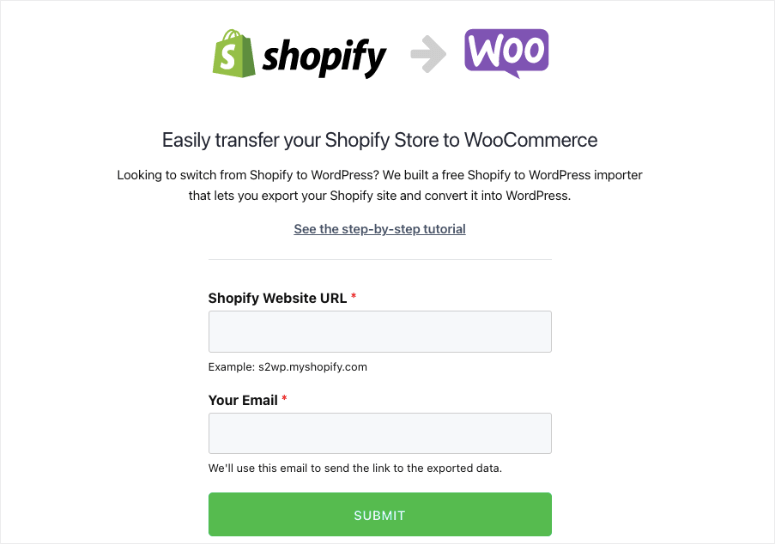
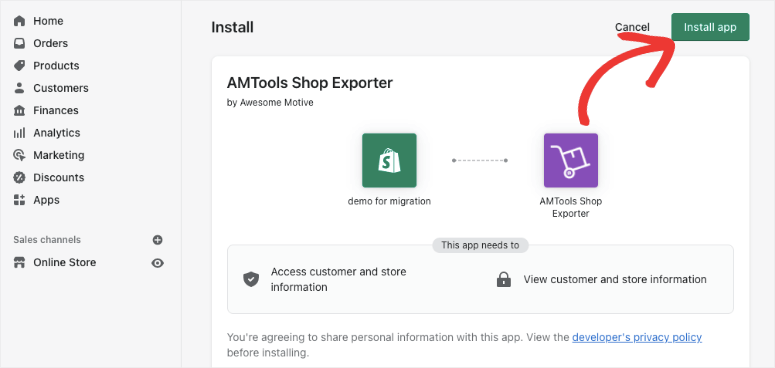
When you click on the Submit button, you’ll be redirected to your store’s Shopify admin section. You’ll be prompted to install the app which will automatically generate a Shopify API key for data migration. Simply click on the Install App button at the bottom to continue.
On the next screen, the app will show you the data it will export using the Shopify API. Currently, it exports all your product data, product categories, customer data, and orders.
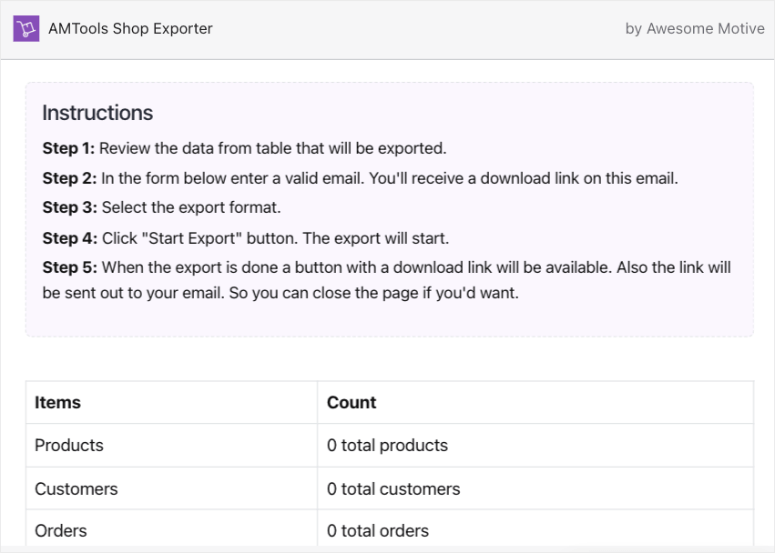
Unfortunately, the app does not export your Shopify pages or blog posts (at the time of writing this). But don’t worry, that’s easy to manually import into WordPress.
You’ll need to provide an email address where you’ll receive a link to download the export file.
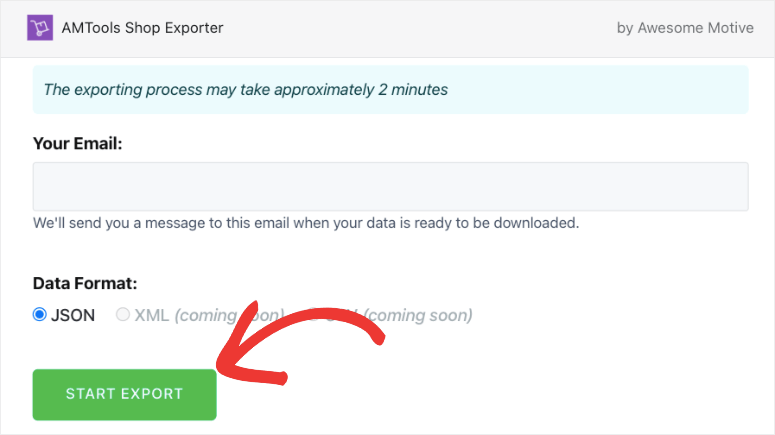
Click on the Start Export button to continue.
The app will show you the progress of the migration process. Once it’s done, a download button will appear. You’ll also get an email with a link to the download file.
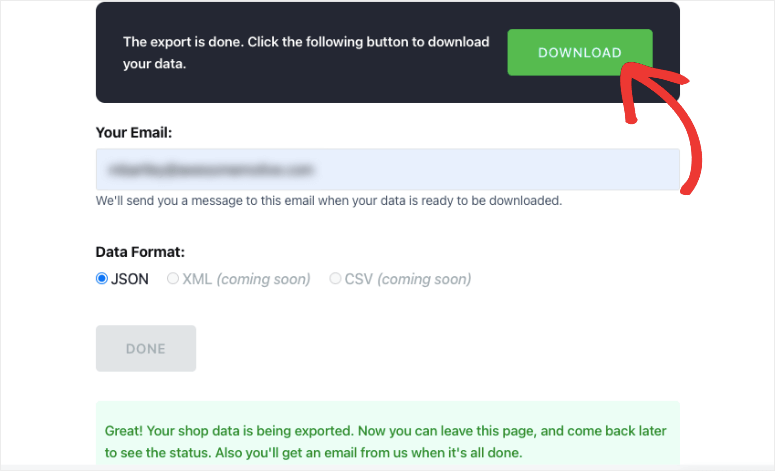
You can now go ahead and download the export file to your computer.
Step 3: Import Shopify Data in WooCommerce
The next thing you need to do is import the data into your WordPress site. We’ll use the same plugin to do that.
In your WordPress admin panel, go to Plugins » Add New page. Search for and install the Import Shopify to WP plugin.
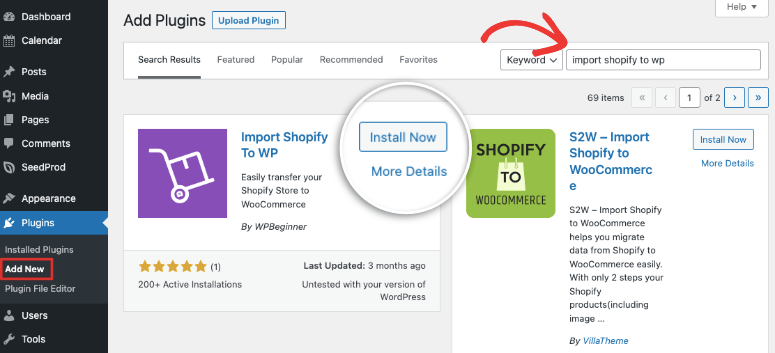
Once you install and activate it, navigate to Tools » Shopify Importer in the WordPress menu.
On this page, you’ll get an option to choose a zip file. Select the export file from your computer that you downloaded earlier.
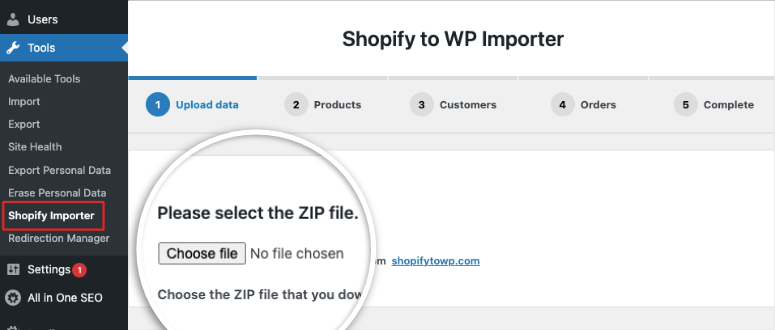
Next, click on the Upload button to continue.
Now, the plugin will display a list of exported products that are present in your upload file. Click on the Start Import button to begin the process.
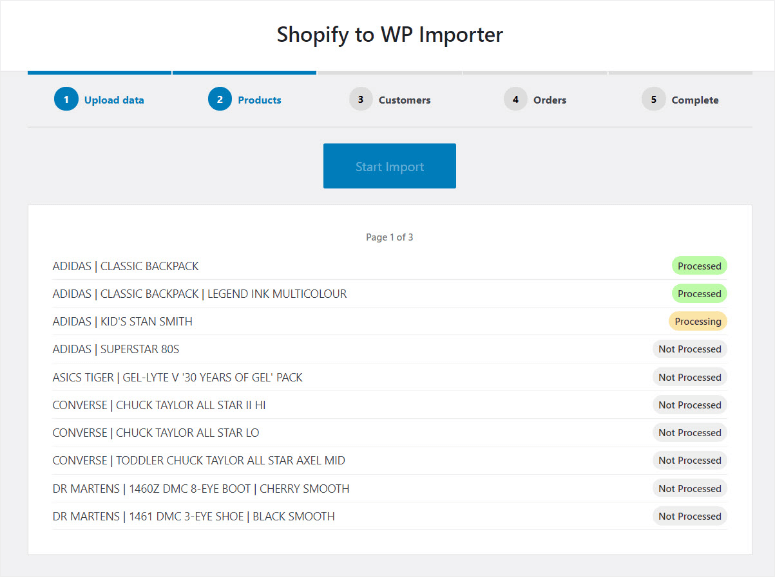
You can sit back for a few minutes while the plugin does the heavy lifting. It usually takes just a minute or two and you can leave the page if you want to. The plugin will continue to run the importing process.
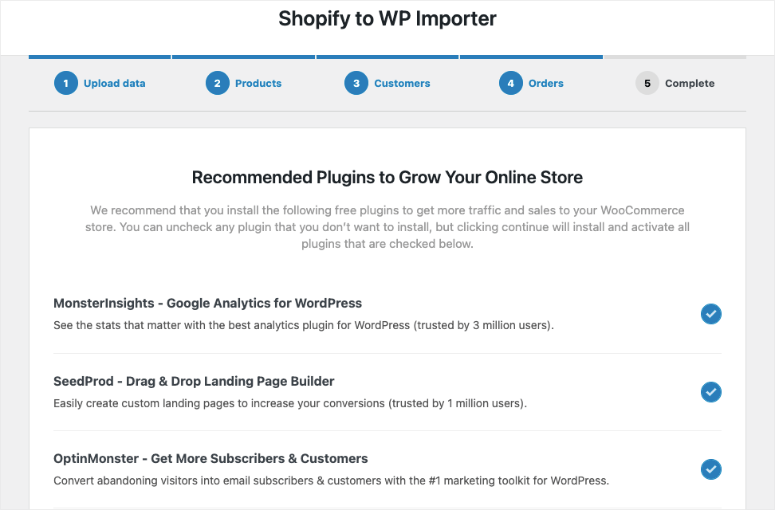
Once it’s done, the plugin shows you a list of recommended plugins that you’ll need to grow your Woocommerce store. These are free plugins that will be auto installed for you. If you don’t want these tools, then you can uncheck the box because clicking on the Continue button.
You can now review your imported products, orders, order status, and WooCommerce product categories to make sure that everything is imported. On the final page, you’ll see blog and video guides to set up WooCommerce.
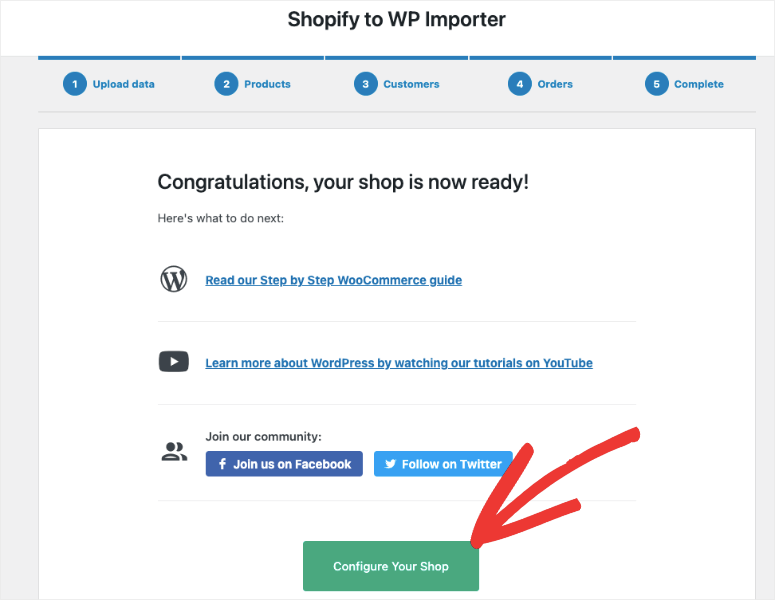
When you click on the Configure Your Shop button, the plugin will automatically redirect you to the WooCommerce configuration page.
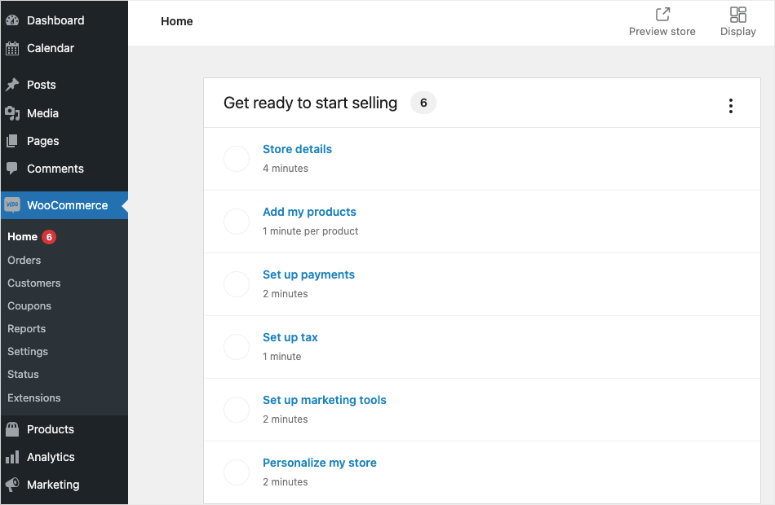
You can follow the setup wizard to configure your store here.
Step 4: Redirect Your Old Website
Now that you’ve finished importing your site, the next step is to set up the proper redirects from Shopify to WooCommerce.
If anyone tries to visit your old Shopify site, the redirect will automatically send them to your new WooCommerce store. That way, you won’t lose any customers if they end up on the wrong website.
Note: If your store had a Shopify branded domain name (Example: yourstore.myshopify.com), you won’t be able to use individual redirects. You’ll need to edit your Shopify website and add a link to your new store.
Moving Your Domain from Shopify to WooCommerce
If your Shopify store was using a custom domain name like “isitwp.com”, then you can easily add a redirect to your WooCommerce store.
To do this, you need to change your domain’s DNS settings. This is a bit technical but it isn’t hard to do either. Your new hosting provider will provide you with DNS server addresses that you need to enter in your domain settings. They typically look like this:
ns1.bluehost.com
ns2.bluehost.com
If you bought your domain with Shopify, this means it will be registered with Shopify. You can log in to your Shopify account and go to Online Store » Domains to manage your DNS settings.
For other domain registrars, see this article from WPBeginner on How to easily change DNS nameservers.
Update URLs in WooCommerce
In any site migration, you may find URLs inside descriptions still pointing to your old website. In this case, it could be in product descriptions that link to your Shopify branded domain. You can bulk update all those URLs easily, instead of trying to find them one by one.
We recommend using the Velvet Blues Update URLs plugin.
When you install and activate it on your site, you need to visit Tools » Update URLs page. Here, you can enter your Shopify store URL as the old URL and your WooCommerce domain name as the new URL.
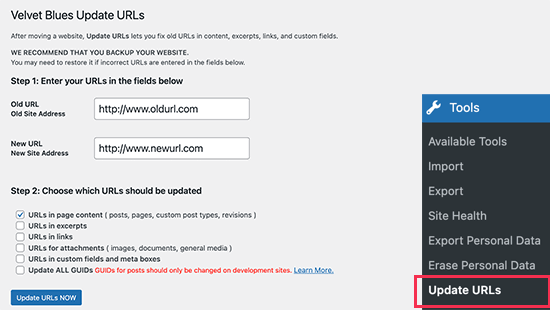
Then, at the bottom of the page, simply click the Update URLs NOW button and it will fix all your links across your site.
After your URLs are updated, you can uninstall the plugin from your site.
To set up redirects for blog posts and pages, we recommend using the Redirection plugin.
Upon activation, you need to visit the Tools » Redirection page. Simply follow the instructions in the setup wizard to set up the plugin.
The plugin is really simple to use. To add your first redirect, click on the Add New button. Enter the URL of the post or page in the Source URL field, and then enter the new URL in the Target URL field.
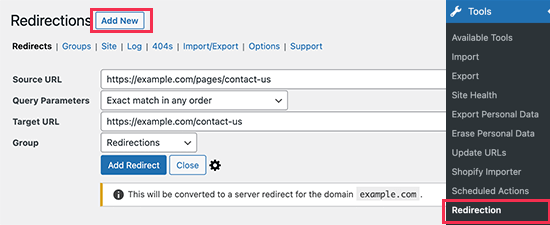
Don’t forget to click on the ‘Add Redirect’ button to save your changes.
For detailed tips on setting up redirects, take a look at this guide on how to set up redirects in WordPress.
Post Migration Steps
After you’ve imported your site, you’ll probably see that your site looks different. This is because the WordPress default theme is enabled.
You can customize your store by using a new WooCommerce theme. See our list: 60+ Best WooCommerce Themes for Your Online Store.
You can also recreate the style of your Shopify store on your own. However, this can be a difficult task. Instead, there are plenty of drag and drop website builders you can use to customize your site. Check out SeedProd which comes with built-in coming soon and maintenance mode, premade website themes, and a builder that’s incredibly easy to use.
Next, you’ll also want to reconfigure your Wooommerce setting. Inside your WooCommerce dashboard, you can set up these options:
- Payment and shipping options
- Security settings
- Email notification options
- Product settings
- Tax options
You can reset it to your old Shopify settings or start afresh. You’ll see that WooCommerce has a lot more options and gives you so much flexibility over your settings. Learn more about this in our guide: How to Create a Profitable Online Store – Step by Step.
That’s it. You’ve successfully moved your Shopify store to WooCommerce. You can now customize your store the way you want. Being realistic, you may face a few issues at the beginning to get your site looking right and earning the new platform. But you’ll benefit in the long run.
Up next, we’ve picked these must-read resources for you:
- How to Protect Your WooCommerce Site (Steps + Security Tools)
- 10 Best WooCommerce Reporting Plugins (Free & Paid)
- 6 Best WooCommerce Payment Gateways for Secure Transactions
The first post is really important because you need to take care of your site security on your own now. The guide will give you the right steps you need to take to protect your site from hackers. The last 2 lists will help you grow your site and build trust with your customers.

Comments Leave a Reply